A guide that hopefully should teach you how to port Teardown Models to Source Engine, or just Garry’s Mod if you wanted. This is a bit of an advanced process so don’t come into this guide thinking you’ll be done relatively quickly (unless you’ve done it before!)
Please leave any comments or questions in the comments down below, OR ping me in the Official Teardown Discord, my Discord handle is “Prop Dude” so just ping for that.
How to Import Models to Garry’s Mod
1. Required Programs
My goal is to make this beginner friendly to an extent, with that in mind. Here’s whats required.
- Blender
- Blender Source Tools Plugin (Can be found on the VDC)
- VTFEdit
- Magicavoxel
- Garry’s Mod or any Source Engine game
- Crowbar
Now, let me explain each one if you’re a bit confused or concerned about security issues.
Blender is an obvious one, it’s just the modelling tool, i don’t think i need to explain that one.
Blender Source Tools is a plugin for blender that allows the importing of Studiomdl Data and DMX Model Files. It’s required when working with Source models. You can search up “Blender Source Tools” and get it off the VDC through a link (Valve Developer Community)
VTFEdit is how you make textures for a Source Engine game, it’s also required when working with this. You can also find it on the VDC through a bottom link, Usually “Nem’s Tools” archive link due to the actual site being down.
Magicavoxel should be familiar if you already do Teardown Modding, you use it to make voxel models and is required in exporting your model as an OBJ.
Garry’s Mod is the game of choice, i don’t think i need to explain what a Source Engine game is, but its any game (Portal 2, Left 4 Dead 2,) That runs on Source Engine.
Crowbar is the program required to compile Source models (Or decompile them) and is absolutely necessary. You can search “Crowbar VDC” to find the page for it where you cab download it, the download page is on their steam group page.
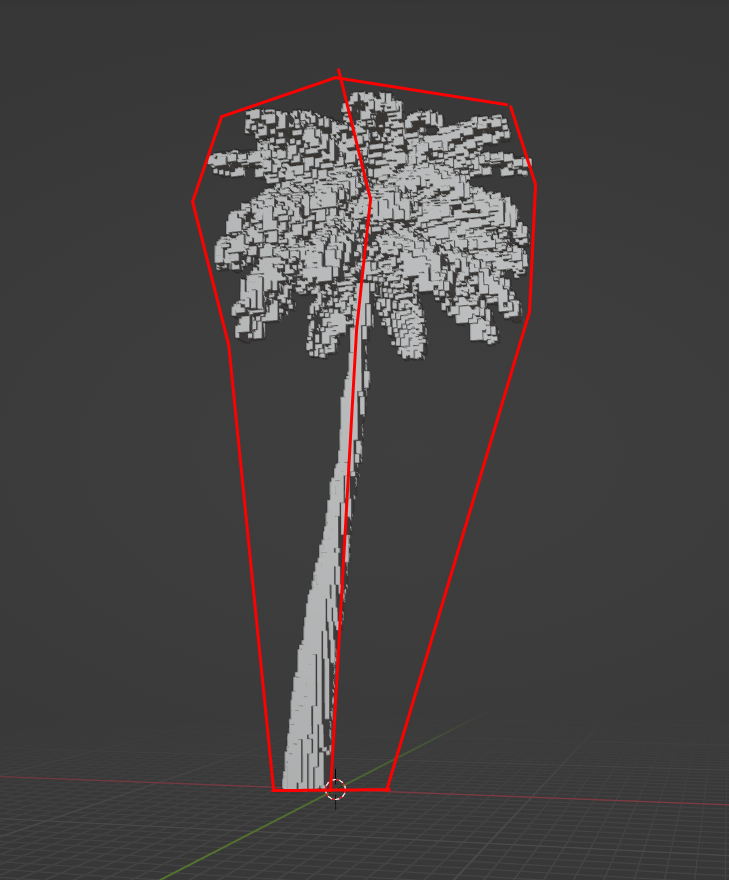
2. Preparing Voxel Models
On the left side you’ll find your palette
(If you’re wondering where to get all these in-game models, you can find them in the Mega Model Pack on the steam workshop which i try to keep updated)

First step, is to make the palette work with Garry's Mod, due to source limitation it'll distort the colors a bad amount if you leave it like this. So you'll want to make it so there's only one color per lane, If you have more than one color per lane in the end, it's fine but try to make it so its as little as possible.
You can move the colors by holding CTRL and dragging the color to a new spot on the palette.
Next step is easy enough, If you've got glass on your model, you want to separate it into a new object. I won't be doing this considering mine has no glass. You can do this by using the magic wand tool and selecting all the glass, then hitting CTRL X, going to object mode and hitting CTRL V, that'll split your model.
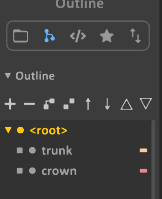
On the right side now, enter the Outliner where all your model parts are named. Make sure each one has a short but discernible name.")
First step, is to make the palette work with Garry’s Mod, due to source limitation it’ll distort the colors a bad amount if you leave it like this. So you’ll want to make it so there’s only one color per lane, If you have more than one color per lane in the end, it’s fine but try to make it so its as little as possible.
You can move the colors by holding CTRL and dragging the color to a new spot on the palette.
Next step is easy enough, If you’ve got glass on your model, you want to separate it into a new object. I won’t be doing this considering mine has no glass. You can do this by using the magic wand tool and selecting all the glass, then hitting CTRL X, going to object mode and hitting CTRL V, that’ll split your model.
On the right side now, enter the Outliner where all your model parts are named. Make sure each one has a short but discernible name.
Now that you’ve got your model prepped and ready, we can begin exporting. Make a new folder on your desktop that is for specifically for that model, we want to keep it localized and contained for ease of access.
Now at the bottom right, hit Export to open up the export menu. And select the OBJ option, You may change the model name if you please, i’m not going to but it’s up to you.
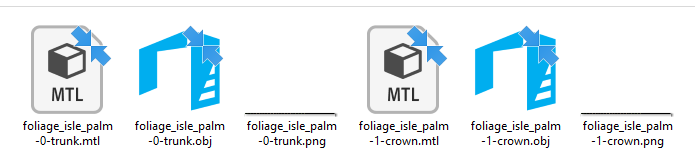
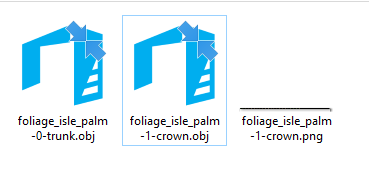
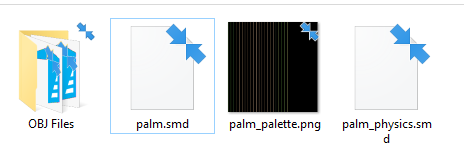
Now you’ve got MTL files, Palette PNG’s and the OBJ themselves for each object. We now need to clean up unnecessary files. Delete all the MTL Files and All but ONE of the palette PNG files.
This is what it should look like after you’re done cleaning up:
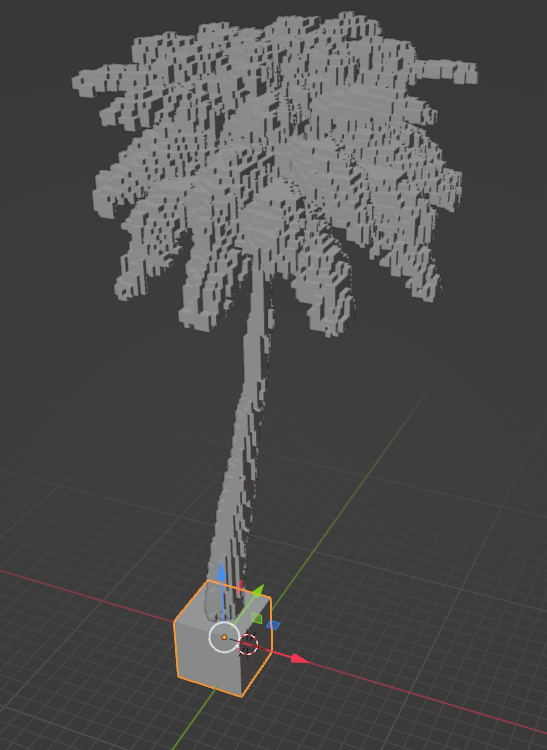
3. Blender Work
At the top select Install and find the zip file on your PC. and just add it, you can now check it in blender and it’ll be mounted.
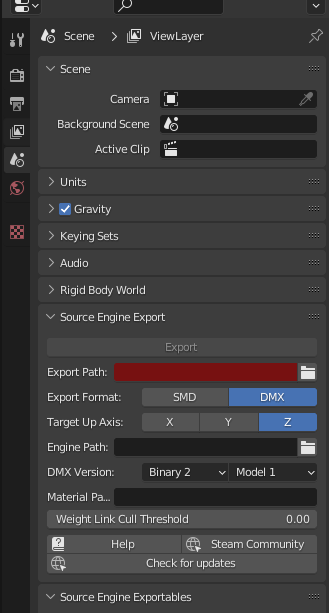
You can now find this under the shown tab in the image. You want to set the export path to your work folder where you have the OBJ Files. and the mode to SMD and not DMX. With that set up you can now begin the process of importing your models.
Go to the top left, under File go to Import and then Wavefront (.OBJ) You can now import every piece of your model as one.
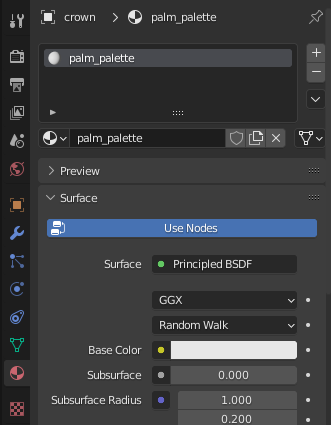
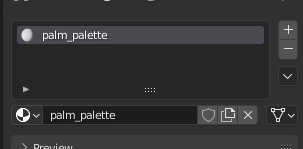
Now let’s set up the Palette Material. On the right side (With your model selected) Choose the materials tab, the red circle. The default material will most likely be “palette” or something along those lines. I recommend changing this to the name of your object, and then palette. like “palm_palette”
If your material is glass, name it something else like car_glass_palette, since you will ultimately only need one glass file.
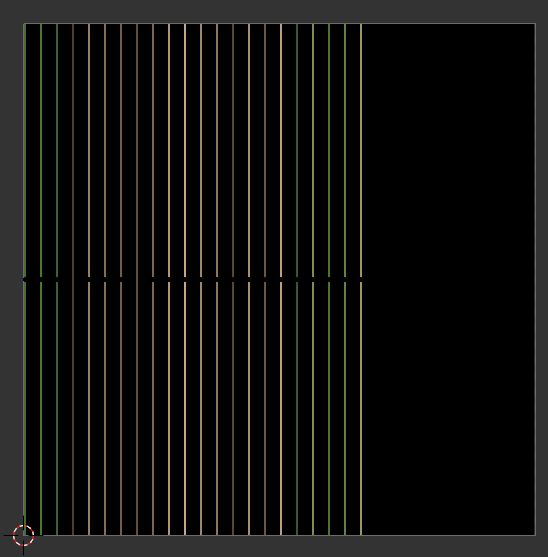
Now, we need to make the image a proper resolution for Source. So at the top go to the “UV-Editing” Tab, and you’ll be greeted with a grid shaped area. This is your models UV map, we aren’t going to be editing this. At the top where you see the empty bar, you want to click the folder icon and load in your palette PNG.
![]()
The UV map will now be much smaller and like a long strip, we want this to be a square. So at the top find the “Image” tab, and click it. Then click Resize and made it 256×256.
Now, you can click “Image” again, and then Save As. Then you want to just overwrite the old palette PNG file with this one. The name will most likely be red, so just hit Save and it’ll overwrite.
Now, you should have this done:
- The Model in Blender
- Material Set Up
- Image at correct Resolution/
If you answered yes to all of these, click the Modelling tab at the top to swap back to the default view.
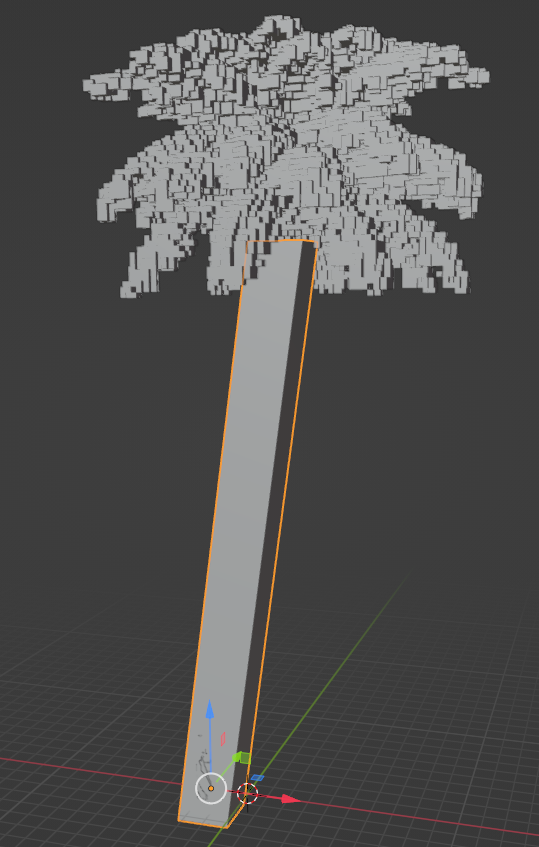
The model itself, is very un-optimized. Due to being voxels it doesn’t do backface culling or any optimizations of it’s own. I personally won’t be optimizing my model but if you’d like to, you can. Just remember the voxel designs are directly related to how the voxels are on the model, so optimizing the model may ruin the design.
If your model has unnecessary bit’s you’d like to remove, here’s a process on how to do that.
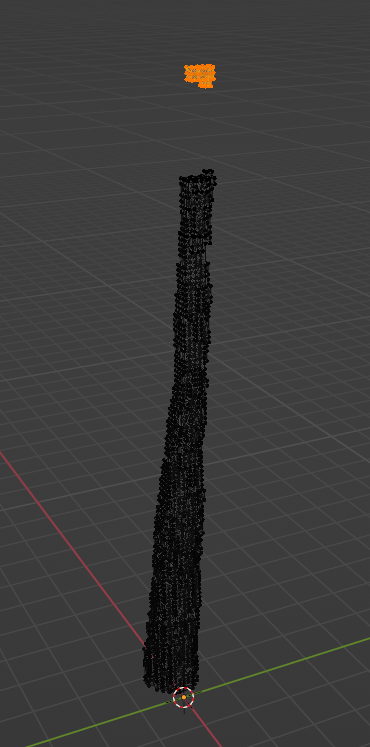
My model has a bit of the trunk going further than it needs to, so i’ll be removing it. I have hidden my crown by pressing the eye icon in the hierarchy on the right, and am left with the trunk.
So i select the trunk, pres Tab to enter edit mode. and hold Z to enter wireframe mode. While on Vertex edit mode, (Selected top left) I drag a selection box around the part i don’t want, and hit X to delete it.
With that out of the way. We now need to match the scale of Garry’s Mod, since this is way too small. With every part of your model selected, hit S and drag to scale the model up. Or alternatively, you can hit N and bring up a menu on the right. You can manually set the scale here, the scale that worked for me is 23.355 but it may be different for you, you can use this value if you’d like or get a model from Garry’s Mod and decompile it using Crowbar and import the SMD as reference.
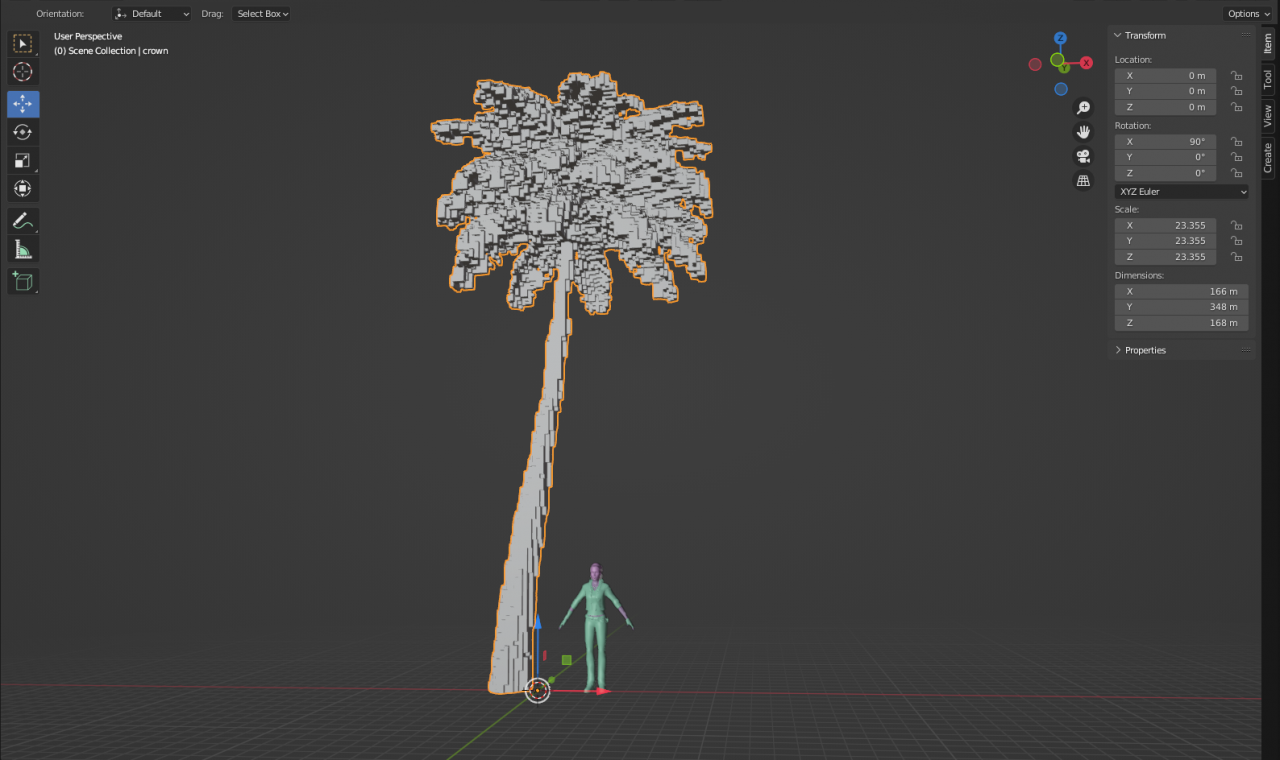
Now, with the model properly scaled up. You should begin to join common pieces of models together, one’s that use the same material and such. For example, my tree came as two models and i’ll be combining it into one, since they both use the same palette and because they’re a common model.
On a vehicle for example, you’d combine the glass and car model you has, they have different materials (car_palette and car_glass) but they are a common model.
You can combine models together by selecting them and hitting CTRL J. this combines them and their materials, i recommend going back to the materials tab and making sure it’s only the one’s you want. My tree had two materials when i combined it but i made it back to just one named palm_palette. you can remove materials using the little minus symbol on the right, if your material becomes named something like “palm_palette_001” you can enter edit mode on your model, click “Select” in the materials tab (With the 001 material selected) and it should select all vertices using that material, now you’d simply click the main correct material and click the assign button instead. Now delete the old useless material after exiting Edit mode.
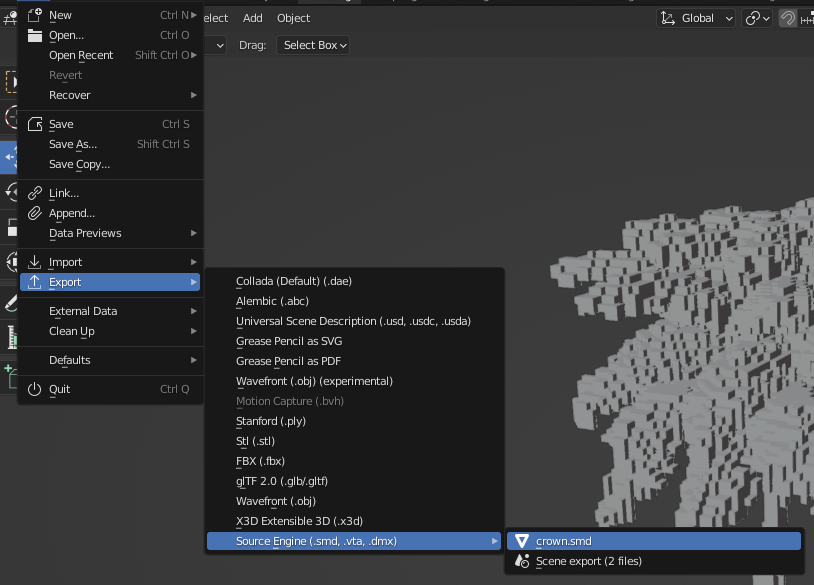
Now for the fun part, we can begin exporting the model. Select your model, and with it selected go to File, Then export, and hover over the “Source Engine” option, You want to export the first option that is the name of the model with a .SMD extension.
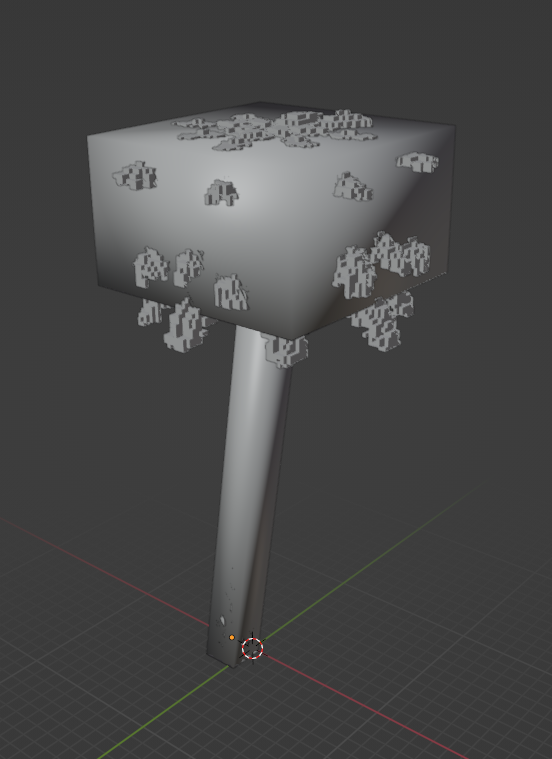
BE CAREFUL, this part is confusing. If you don’t know the difference between “Convex” and “Concave” i recommend googling a picture.
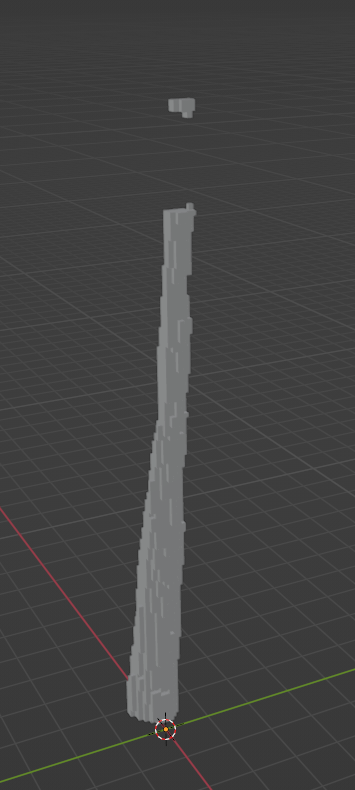
Since my model is a palm tree, we’d expect to be able to fluidly walk under it and such. So we need to make a custom concave collision model. Since source automatically makes a convex collision model otherwise. This is what it would look like without us making any collisions.
Nasty stuff eh? This isn’t required on any model like a crate or whatever since a shrink-wrapped collision model will work just fine.
To begin making your model, in object mode (Not edit mode) hit Shift A to bring up the creation menu, and create a cube from under the mesh category.
It’ll be quite small by default so you want to scale it up, This how i made mine so far.
Now you need to enter Edit mode on the cube, and make sure you have face edit mode selected at the top left, found located under the “Help” section (Physically under it, not figuratively where you’d click on Help)

With that selected, you want to click on the face of the cube that needs to be made longer and hit E to extrude, make it encompass your model. I extruded my cube upwards and then moved it to the right to make the bent trunk shape.
Now, while STILL IN EDIT MODE on the first cube, hit Shift A again, and repeat with another cube for all the other parts of your model, each part of the collision model has to be a new convex piece, your “collision cubes” CANNOT be convex on their own.
Once you’ve finished, you want to hit A to select all faces, and then right click. Find the “Shade Smooth” option and hit it. your collision model should now look like this.
Go ahead an exit Edit mode, and rename the model in the hierarchy to something like “palm_physics” (Change palm to whatever your model is). Then you can just export it like you did the other model. It doesn’t need a material because it’s collisions.
4. QC and VTF Files.
Now, lets make the proper file paths in Garry’s Mod’s files. Go ahead and go to Garry’s Mod’s local files, you can find these easily through the steam library by right clicking Garry’s Mods, and going to properties and then Local files.
go to Garry’s Mod/garrysmod and find the materials folder, if you don’t have one make one.
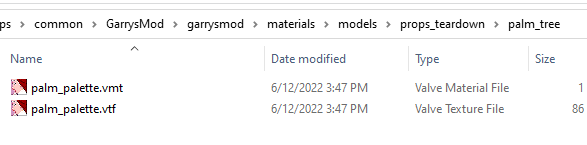
Enter your materials folder, and find the “models” folder within this materials folder. Create one if you don’t have one. now you want to make a folder called something like “props_teardown” and inside that one make another called “palm_tree” or whatever your model is.
Now back out back to the “garrysmod” folder and find the “models” folder, make it if you don’t have it. you want to do the same thing, make a “props_teardown” folder and then another named after your model.
![]()
Now that we’ve got these file path’s set up. We can begin making the materials (VTF Files) for our model.
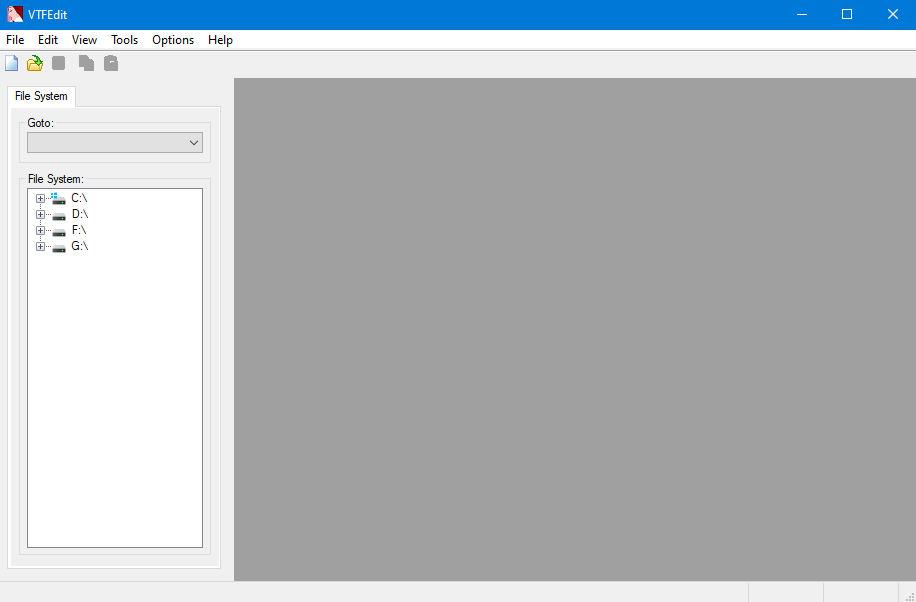
You should have VTFEdit like explained at the start of the guide. Go ahead and open it up. It’ll look something like this:
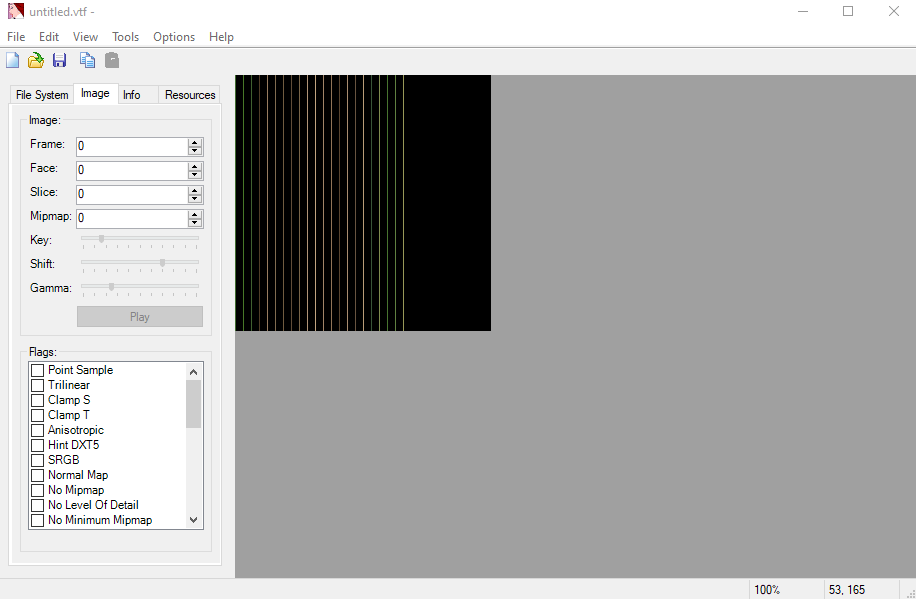
Press the white page icon top left to import a PNG, go ahead and import your palette PNG file. A second window will pop up shortly afterwards, you can just skip this page and hit enter a second time. With your image imported, go ahead and go to “Options” at the top and tick the “Auto Create VMT File” option.
Now go to “File” and click “Save As” make sure you direct it to your folder you made in the “materials/models” folder. and make sure it’s named EXACTLY the same as the material you chose in blender, since my material in blender was “palm_palette” that’s what i’m naming the VTF.
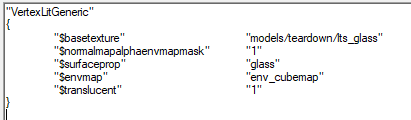
Go ahead and open up the VMT with VTFEdit by double clicking it. You’ll get something that looks like a text file, you want to change at the top where it says “LightMappedGeneric” into “VertexLitGeneric”
This tells Source this material is for a model.
If you’re making the material file for the glass, you want to also add these lines into the VMT.
- “$normalmapalphaenvmapmask” “1”
- “$surfaceprop” “glass”
- “$envmap” “env_cubemap”
- “$translucent” “1”
This tells source to make it look like glass.
Here’s the VMT for the glass i use:
Now, we’ve got the material files set up for the model. Let’s do the QC file to compile our model using Crowbar
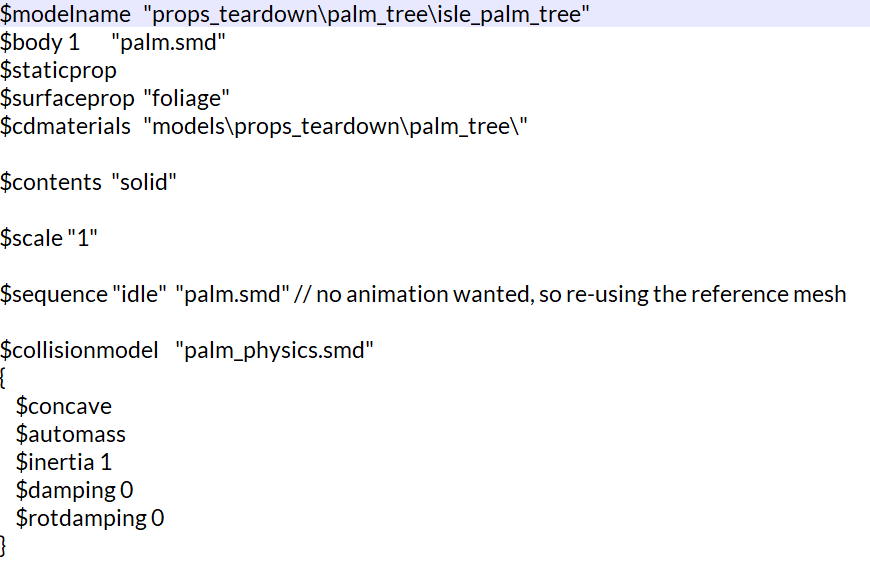
The QC file is required to compile our model, so we need to make it. Start with a text file. And enter these lines in.
- $modelname
- $body 1
- $staticprop
- $surfaceprop
- $cdmaterials
- $contents “solid”
- $scale “1”
- $sequence “idle”
- $collisionmodel
Now we need to edit each one a little more, First and foremost the modelname. Here you want to add the filepath like in the models folder. So in my case its “props_teardown\palm_tree\isle_palm_tree”
Next up is body, you want to specify your SMD file here. so i’d add “palm.smd”
Surfaceprop is next, this is where you specify what sound it makes, you can find a list by googling $surfaceprop, in my case i’ll be using “foliage”
CDMaterials if where you specify your materials filepath, you want to start after the materials folder like the models folder one was. So in my case its “models\props_teardown\palm_tree\”
Sequence is the animation our model shall do, I know what you’re saying. “But i didn’t animate my model” Which is exactly why we’re only defining an IDLE animation. to do this you’d write your SMD file a second time after the “idle” line. so in my case i’d write “palm.smd”
Collision Model is where we specify our collision model from earlier. So you’d write the SMD of the collisions. (If you have one, if not just re-specify the SMD) In my case i’d write “palm_physics.smd” since i made a collision model.
Now, you want some extra lines for our collisions. You’d add an opened curly bracket under the collisionmodel line, and then write
- $concave
- $automass
- $intertia 1
- $damping 0
- $rotdamping 0
then close it with a closed curly bracket.
Here’s my QC for reference:
Now you’d save and exit the QC file, here’s what we’ve got so far.
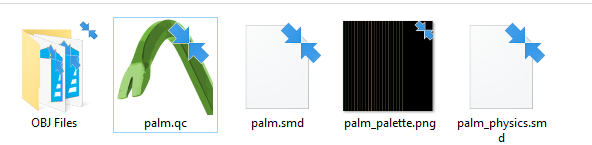
Our VTF and VMT aren’t here since they’re in the correct materials folder already
Now simply double click your QC file to open Crowbar, it’ll look alot like this:

Mine is missing the File since i started it through Taskbar. normally it’d show the path at the top, which is correct.
Now you want to choose the game your compiling for, i already have Garry’s Mod chosen and set up. If you’ve got Garry’s Mod on a drive other than C: You need to go to the “Set Up Games” tab and set up the Garry’s Mod Config.
Now with that, you want to select “Output To: Subfolder” and specifiy a Subfolder name, like i have.
Now hit Compile!
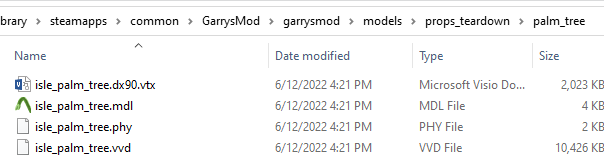
Once its done It should spit out a folder in your work folder with all the files it’s compiled, the MDL and related file. You can simply copy the “models” folder that all these files are in, and paste it in your “garrysmod” folder directory, so it sends all files exactly where they should go
5. Problems
You can also try compiling with the game set to Counter Strike Global Offensive. This will allow you possibly due to its increased vertex limit. But this a cheap way of doing it and it’s also a bad practice.
If your material is missing, you can check a few things. Check if your VMT and VTF are placed correctly first of all, second make sure your Blender material is correct. You can check this by opening the SMD with notepad and seeing what material it says. You can change this with a “Replace All” if you’d like.
The model’s collisions being in the wrong place can be fixed by making sure the Origin of the model and collision is in the same spot, or close enough. like 0, 0, 0.
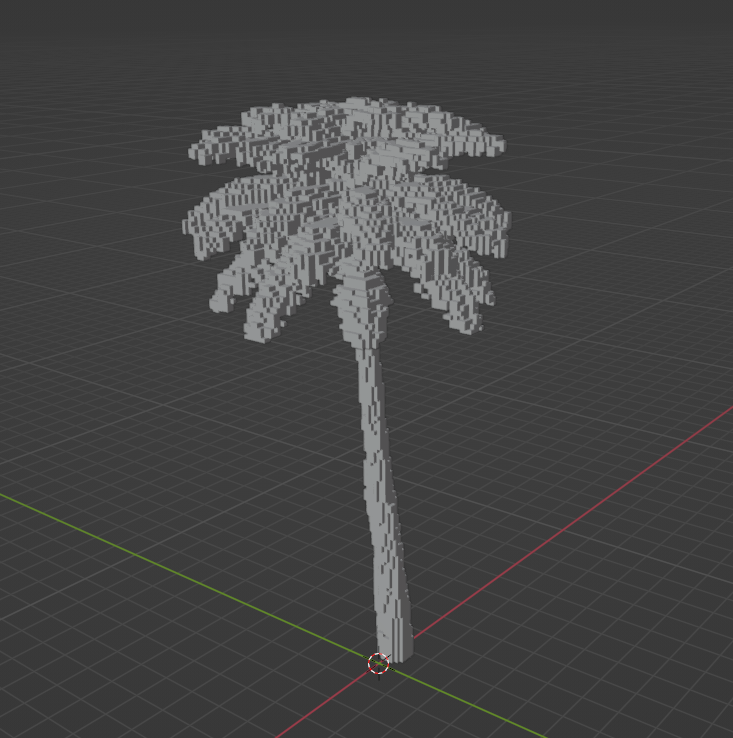
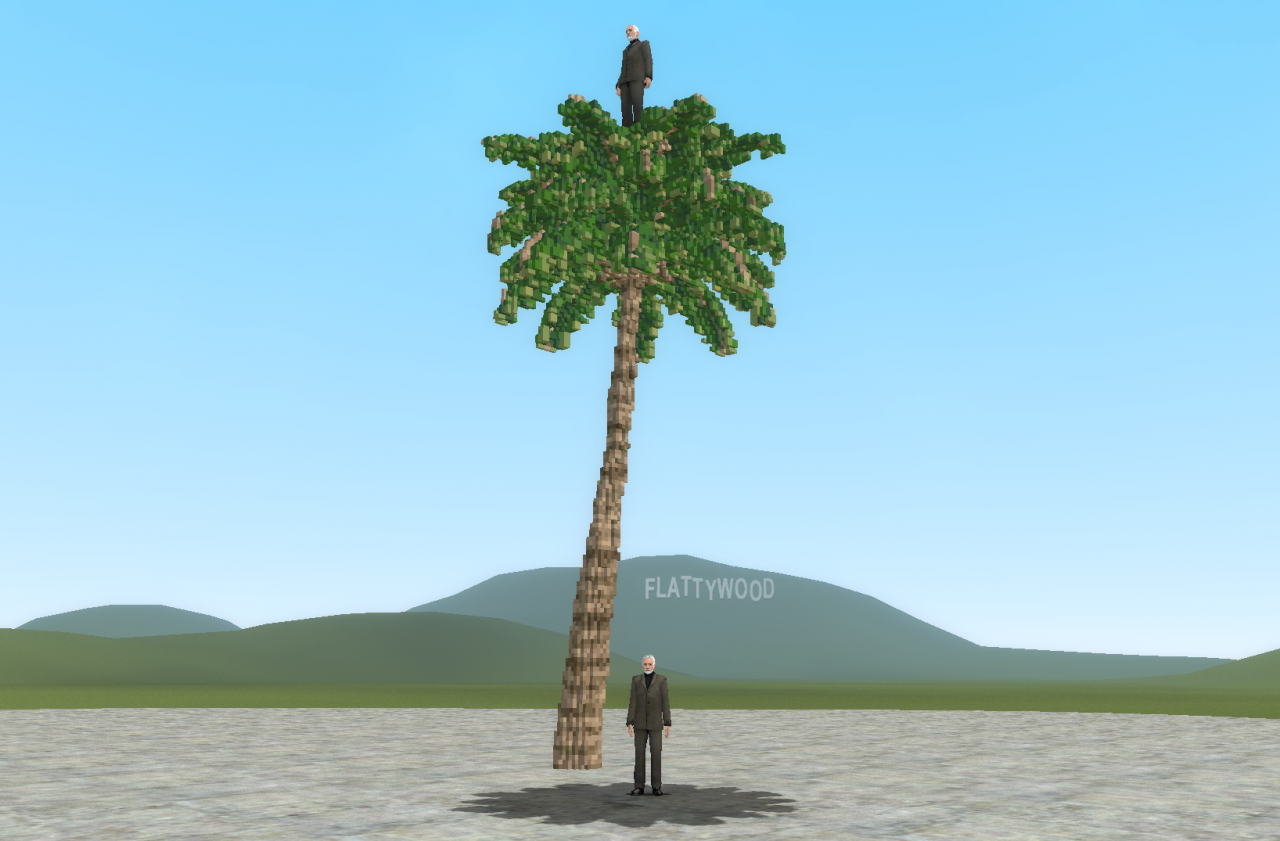
6. End Product
And there you go!
By The Mafia