This Guide will show you how to complete all of the Warrior Priest challenges solo and without Deeds. /
Shield of Faith

map: Fortunes of War or The Horn of Magnus difficulty: Recruit
“Fortunes of War” contains many specials at predictable times and you will find potions of concentration at every run at the same location.
You can also steal the Gutter Runner`s secret stash in “The Horn of Magnus” to attact a whole bunch of assassins at the same time.

map: any map difficulty: Champion or Legend
Wait until the last Bot is downed, use the shield and revive him.
But the Bots have to get knocked down first, that is why you should pick Champion or Legend difficulty.

map: Into the Nest or The Pit difficulty: Champion or Legend
You will only encounter Skaven special units in “Into the Nest” and before you enter the Storehouse in “The Pit”, that makes it a lot easier to find two of them.
The higher the difficulty, the more specials will spawn but it also makes them harder to kill.
Make sure that your Bots don´t steal your kill no matter how.
Kill your Bots first or take their weapons.
Take the Slayer, the Grail Knight and Sienna with a Flamestorm Staff with you so they can´t shoot your enemies from afar.
And use the shield with the “Unyielding Blessing” talent.
It will not only give you more time, but also it will prevent you from getting pushed back.
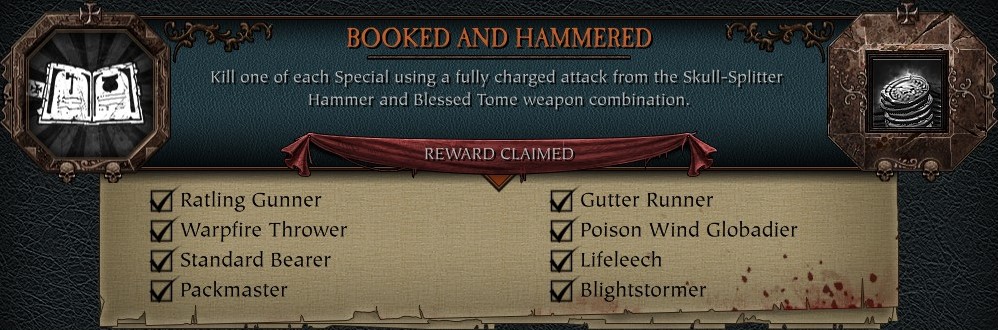
As the description says, it does not matter if you kill one of each Ratling or Warpfire Thrower.

map: any map difficulty: any difficulty
Can be done alongside other challenges.
Just walk into the next horde while using the “Unyielding Blessing” shield.
Enemies are more likely to strike if you´re just approaching them, than standing next to them.
Holy Warrior

map: Into the Nest difficulty: Legend
This is the hardest challenge to complete when you only have Bots.
You can complete the challenge even if you are using the Shield of Faith multiple times, as long as you don´t let the effect expire.
That is why you should use a potion of concentration.
In order for your Bot to get 50 kills, you need to gather as many enemies as possible around him.
You can use the same strategy as for the “Old-Fashion Learning” challenge.
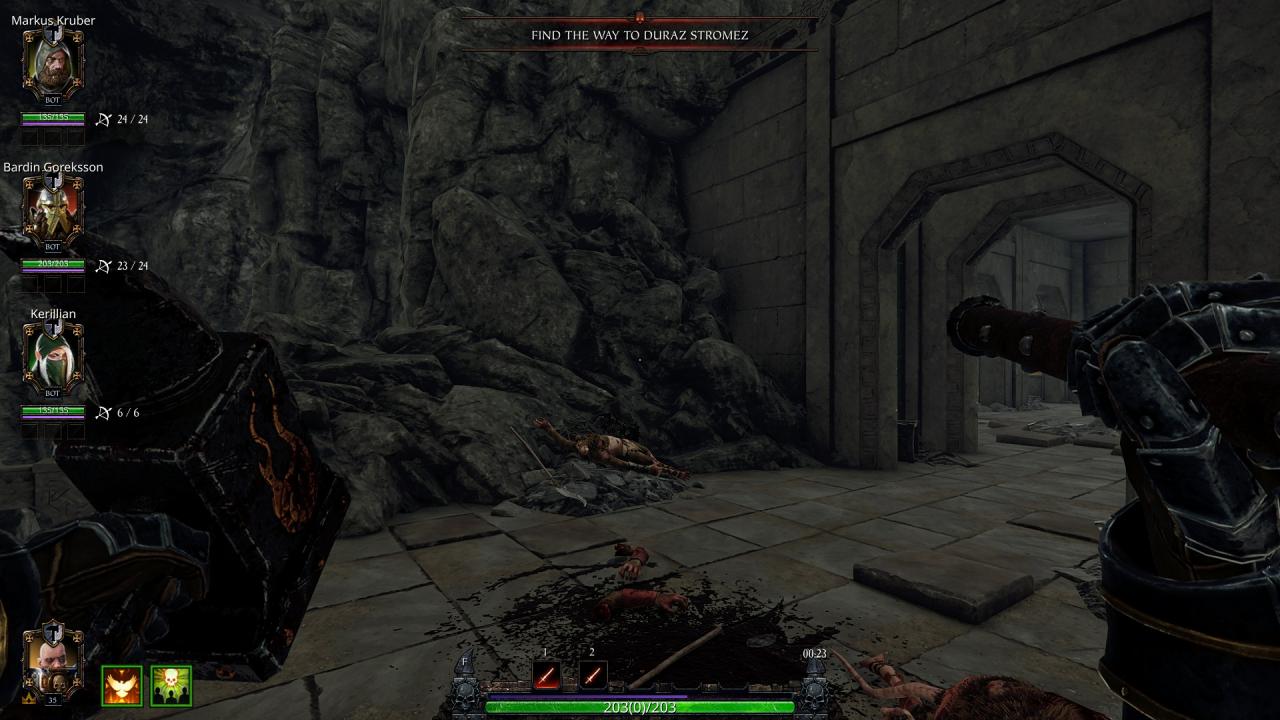
The mission “Into the Nest” is best suited for this.
After you go down the stairs before the first drop down, turn around and you can see a cliff.
Climb up there and wait for two of your Bots to die.
Take two Bots with low health and one with good defense with you.
You might want to take a Ironbreaker with you, do to his extra stamina shield and high defense.
If both Bots died, make sure there are enough enemies left in that horde otherwise wait for the next one.
Stay at the right side of the cliff and wait for the first enemies attacking the remaining Bot so he stays at the point shown in the picture, than go to the left side of the cliff to make sure the enemies lurking behind the stonewall coming in.
Than go back to the right side so your Bot stays at the tight space on the far right and wait for the enemies to surround him, then drink the potion, use the shield on the Bot, jump down and push some enemies back so the Bot stops blocking and he can attack.
Then use the Shield again, so that it doesn´t expire and push again.
Repeat that until you have the achievement.
Equipt for the Bot the Dual Hammers or a weapon with wide sweeps with power vs Skaven.
For the necklace you should take health or block cost reduction and damage reduction vs Skaven.
Use a weapon with high stamina and stamina recovery on your trinket for yourself.
Otherwhise you can play together with someone who wants the most kills in a mission (you probably know that sort of player).
Wait for a horde to approach, drink the potion of concentration and use the shield a few times on him while you stay back.
I know it´s not a way to do it alone, but you don´t have to ask for help either.
That guy will make the kills anyway.
Hammer & Tome
map: Chaos Wastes difficulty: any difficulty
For this challenge, you can go for a few pilgrimages in the Chaos Wastes.
Heaps of specials will spawn at the chest of trials and you can take routes where special units appear more frequently.
If you have problems to kill a Blightstormer with melee attacks, you can go for the Tower of Treachery.
In the Dining room always spawn two Blightstormer and they have not enough space to keep their distance to you.

map: Into the Nest difficulty: Legend
This challenge is easier as everyone thought.
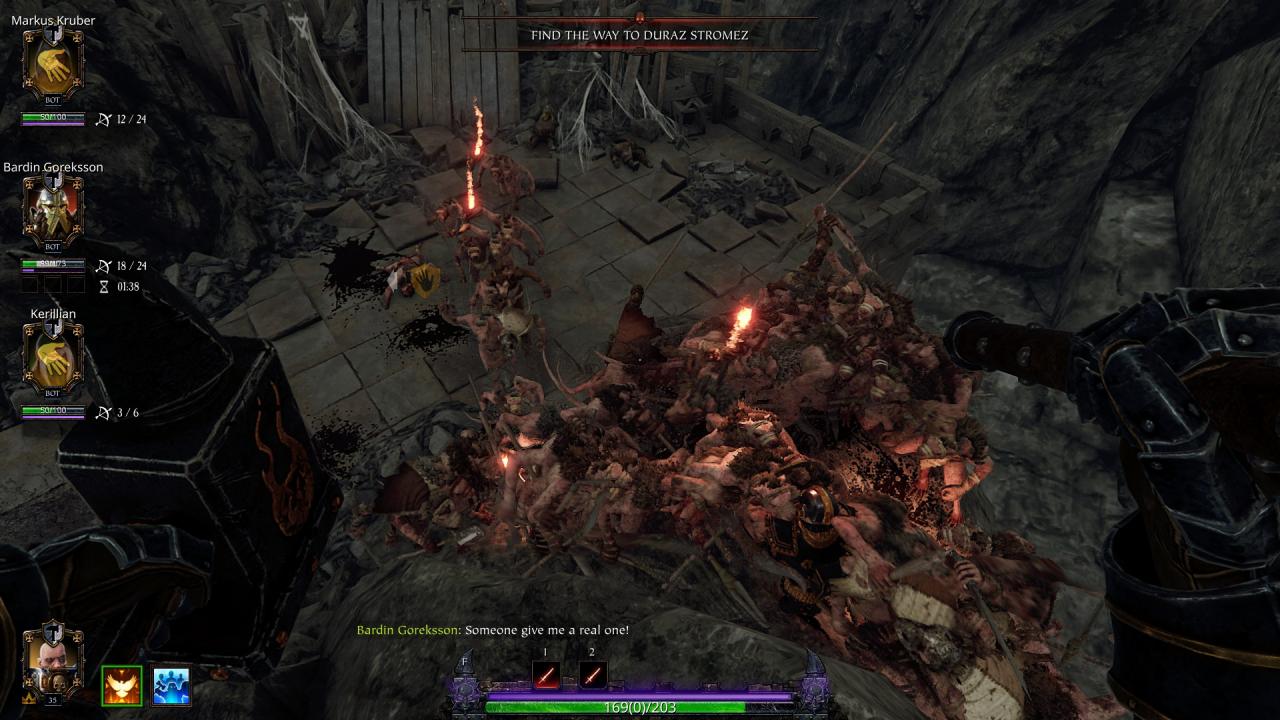
Use the same strategy I showed above, to gather as many enemies as possible at a tight space.
But this time you must hit 60 enemies with a charged attack from your Hammer.
It has to be the strike from above and not the strike forwards, so use the special attack from the Blessed Tome (“V” at default settings), do an light attack than hold for a charged attack from above.
You can hold the charged attack as long as you want, so hold the attack before you jump.
With the “Unyielding Blessing” shield you don´t get pushed back, so use the shield, jump down into that pile of Ratmen and at the same moment you land release your attack.
With this strategy you get the achievement probably by the first try.
And you don´t have to let all Bots die.
The last one will act as a decoy first and then help you clear out the detaining specials like Assassins and Hookrats that are lurking around (They are a big problem, trust me).
You can always open the Game for others afterwards, so they can replace the Bots with missing gear and talents and help you to complete the mission.
The same goes for all challenges that aquire you to let your Bots die.
Great Hammer

map: Empire in Flames difficulty: Champion or Legend
Before the gate will always spawn two Chaos Warriors.
Just get close enough that he punches you and then use the special attack of the Great Hammer to punch him back.
It takes a long time for the message below to appear.
You might want to let your Bots die, so they can´t kill the Chaos Warrior first.

map: any map difficulty: any difficulty
There is not much more to say about it, except that you might want to use the third charged attack in that combo so you can get a headshot more easily.

map: guess which one difficulty: Champion
You might want to let your Bots pick up the Tomes so they can´t heal themselves.
Help them up until you reach the gate and after you break trough you can let them die.
Because no specials will show up after you break trough the gate.
You can also let one Bot alive, so he can help you lower the health of the Boss.
But then let him die too, so he can´t steal your kill.
A lot of Breserker and Chaos Warriors will attack near the end of the battle, so come prepared.
And make sure you don´t kill the Boss accidentdally with other attacks or with your Shield of Faith.
Take the Reckoner Great Hammer with power vs Chaos, a Charm with power vs Armoured and Chaos and a necklace with damage reduction vs Chaos and extra health.
If Bördvarr is low on health keep hitting him with the special attack of your Great Hammer.
Take a Grail Knight with you, because his quests give you a buff, even if he´s dead.
Righteous Fury

map: any map difficulty: any difficulty
With the “From Fury, Fortitude” talent you can heal the allies standing next to you while smiting your enemies with Righteous Fury.

map: any map difficulty: Legend
Your kills and the kills of your nearby allies will increase the Righteous Fury bar.
The only thing you have to do is to fight a horde large enough to keep Righteous Fury active for 50 seconds.

map: The Screaming Bell difficulty: Legend
You may ask why you should take the “Screaming Bell” mission instead of “The War Camp”.
The answer is, that in “The War Camp” Beastmen will mingle with the Chaos patrol and the Bestigor and Standart Bearer will ruin everything.
In “The Screaming Bell” only Skaven or chaos patrols will appear.
But you still need a little bit of strategy and some luck to complete the challenge.
Take a Grail Knight with you for the quests and a Ranger Veteran for the bombs and potions.
You could also let one or two Bots die so they can´t steal your kill (especially the Grail Knight).
Pick up a potion of concentration and a bomb.
Let one Bot pick up a potion of strength.
The first thing you have to do is to find a Chaos patrol.
If you found one, follow them at a safe distance and wait for a horde.
The horde kills will activate Righteous Fury.
Drink the potion of concentration, so you can activate your Shield a few times and you can focus on making damage.
Let you give the potion of strength and head for the patrol.
Throw the bomb, drink the potion and focus only on the Chaos Warriors and using the Shield of Faith.
As your equipment you should take a charm with power vs Armored and Chaos and as weapon a Reckoner Great Hammer with power vs Chaos and citical strike chance.
Use the light, light, heavy attack combo for maximum damage.
The talents “Prayer of Vengeance” and “Empowered Smite” help too.

map: any map difficulty: any difficulty
Can be done alongside other challenges.
“Empowered Smite” will help here too.

map: any map difficulty: any difficulty
And? How are the challenges going?
Since there´s nothing to say about this challenge, I thought I´d ask.
Implacable

map: any map difficulty: Champion or Legend
You only take 20% from the actual damage from Implacable.
Remember how much damage a certain enemy deals and lower your health until one hit almost kills you.
In the Options you can change to a more detailed UI.
After you get hit, block the next attacks so you don´t die from that.

map: any map difficulty: any difficulty
Can be done alongside other challenges.
Just use the shield after getting hit.
Missions

map: any map difficulty: any difficulty
You should complete the others first, because this challenge doesn´t have any special requirements.

map: all remaining maps difficulty: Recruit
You will need “Into the Nest”, “Empire in Flames”, “The War Champ” and perhaps “The Screaming Bell” for other challenges, so better do the other missions if you want to do this challenge first.

map: any map difficulty: any difficulty
Can be done alongside “Vanquisher of the Pact”.
Don´t forget that you have to be the one who has to carry it.
Congratulations
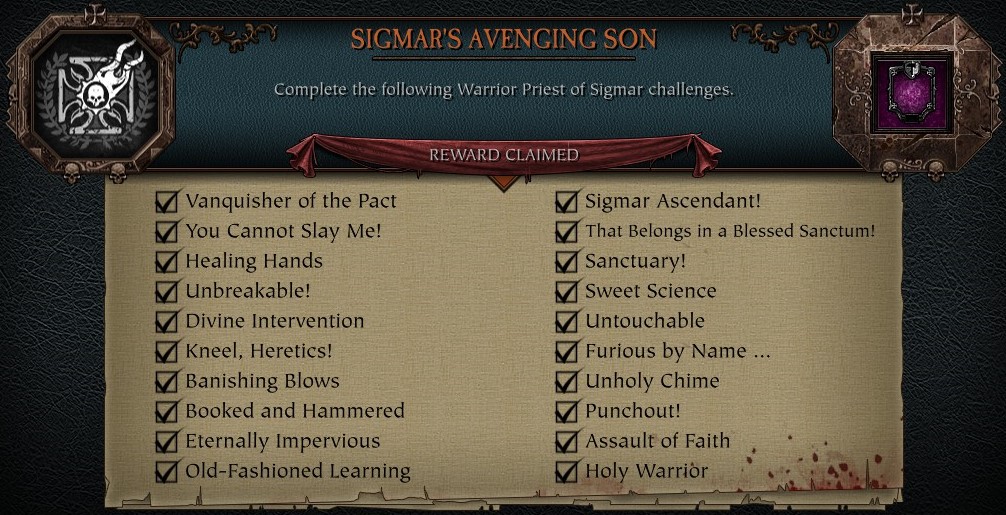
You managed overcome all Warrior Priest challenges and you get a cool frame as a reward, even if you didn´t buy the cosmetic upgrade.
I hope this guide made the challenges a bit easier for you.
And don´t forget to vote if you liked it!
More Guides:
- Warhammer Vermintide 2: Tricks for the “Tower of Treachery” Map
- Warhammer Vermintide 2: Weapon Combos Guide
- Warhammer Vermintide 2: Support Mercenary Build
- Warhammer Vermintide 2: Career Tier List 2021
- Warhammer Vermintide 2: Tomes and Grimoires in The Curse of Drachenfels