
... content here ...
... more content ...
A zombie standing at a station is doing three jobs at once. It works in your place, its talent decides how fast it works, and it keeps the tech points that would otherwise drop on the floor for you. Nearly every argument about zombies comes from missing that third part. Everything below is read from the game data of version 1.004.x, not from guesswork.
What a Station Zombie Actually Does
The station decides the talent. Not the body, not the level, not the collar — the workplace itself carries a talent colour in the data, and the zombie is judged against that colour the moment you place it there. A furnace names red. A carpenter’s bench names orange. The kitchen table names green. The writing desk and the printing press name yellow. The formulation bench names blue.
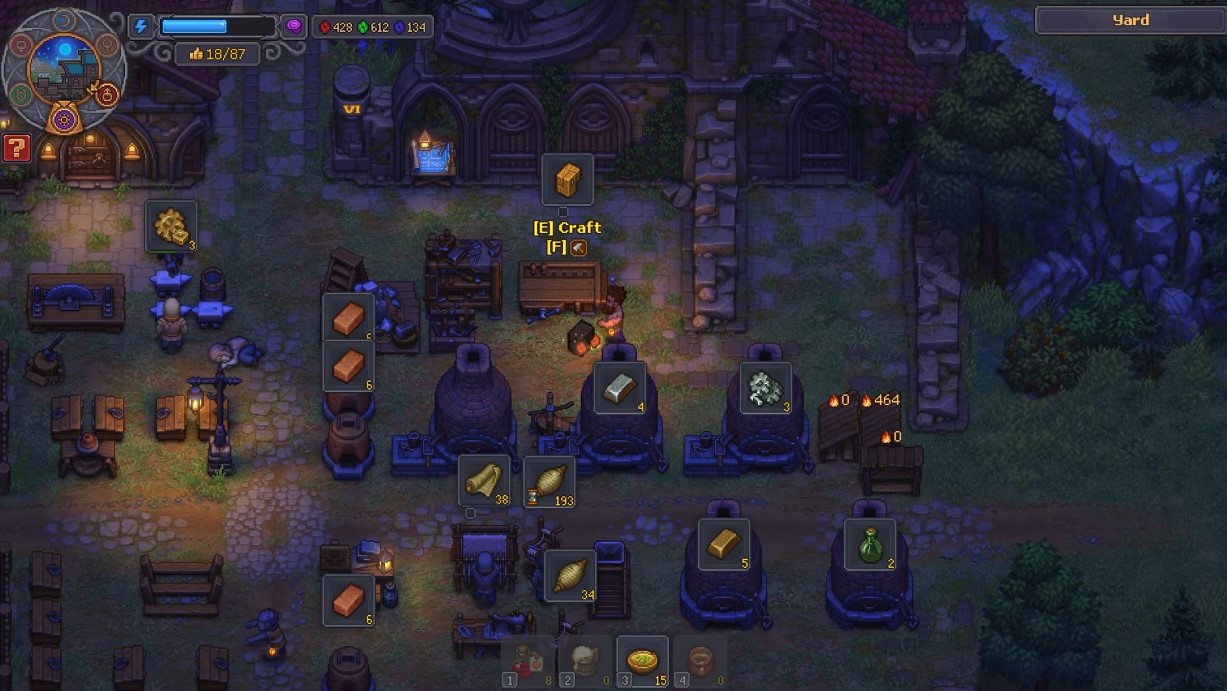
So the question “which zombie do I need here” is always the same question: which talent does this station use? A zombie can be placed into 71 objects, and 52 of those actually produce something. The remaining ones are storage, transport, and cosmetic placements that do not compare talent at all.
The Five Talents and Where They Work
Zombies share your talent spread: orange for building and woodwork, red for smithing and furnaces, green for garden and kitchen, yellow for writing, sermons and printing, blue for anatomy and alchemy. The mapping below is what the data actually ties each talent to.
| Talent | Colour | Stations That Use It | Quality Thresholds? |
|---|---|---|---|
| Building and woodwork | Orange | Carpenter’s bench, sawmill | Yes — carpenter’s bench only |
| Smithing and furnaces | Red | Furnace, anvil | No |
| Garden and kitchen | Green | Kitchen table, garden beds | Yes — kitchen table only |
| Writing and printing | Yellow | Writing desk, printing press | Yes — both |
| Anatomy and alchemy | Blue | Formulation bench | Yes — formulation bench only |
Speed vs Quality — Two Different Jobs
Talent does two separate things, and mixing them up is behind most bad upgrade decisions.
Speed. At every station without exception, a higher matching talent means faster actions. This never stops being true. If all you want is throughput, talent is raw speed.
Quality. Only recipes carrying bronze, silver and gold thresholds care about the talent number itself. There are not many of them, and they cluster in five places.
| Station | Talent | Bronze / Silver / Gold |
|---|---|---|
| Kitchen table — salads, sauerkraut | Green | 1 / 4 / 7 |
| Writing desk — prayers, stories | Yellow | 1 / 6 / 10 on simple recipes, up to 4 / 10 / 14 on late ones |
| Printing press | Yellow | 1 / 6 / 10 |
| Formulation bench — solutions | Blue | 1 / 4 / 8 |
| Formulation bench — injections | Blue | 1 / 6 / 12 |
| Carpenter’s bench | Orange | 2 / 4 / 6 |
Everywhere else — the furnace, the anvil, the sawmill — output has no quality tier at all. Pushing a zombie to talent 14 to stand at a furnace buys nothing but speed. Doing it for a writing desk changes what you get out of the desk. Same points, completely different return.
Editor Warning: The furnace is the trap I see most often. New players dump every red tech point into the zombie tending it, see the craft timer drop, and assume they are getting better bars. They are not — there is no quality tier on furnace output. The points would have been worth far more on a yellow or blue worker.
Tech Points — Where They Come From and Who Keeps Them
Tech points come in three colours: red, green and blue. They are paid out when a craft finishes. 575 recipes in the game carry a tech reward, usually 1–6 points, occasionally as many as 15.
Here is the part the game never explains. If you complete the craft, the points drop on the ground as items and you pick them up. If a zombie was working the station, the points go straight into that zombie’s own pool. They never touch the floor. They never reach you.
That pool is personal. A zombie earns its own upgrade currency simply by working, and points cannot be transferred between zombies. The longer a worker has been producing, the more it has saved toward its own tree. This is also why station quality matters for levelling speed — frequent, cheap recipes fill the pool faster than slow expensive ones.
Spending Points — the Zombie Perk Tree
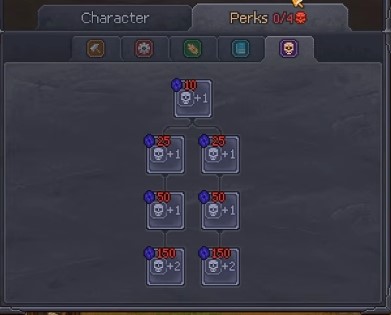
Saved points are spent inside the zombie’s own window, on its own tree. The game holds 85 zombie nodes, split by talent: 17 orange, 17 red, 17 green, 19 yellow, 15 blue.
... content here ...
... more content ...
Nodes fall into two groups:
- Talent levels — a flat +1 to the talent. These are the numbers compared against the bronze, silver and gold thresholds.
- Named perks — 50 of them. No talent level on their own, but a concrete effect. Excavator digs clay and sand faster. Lumberjack chops faster. Carpenter’s Apprentice gives +2 orange when working with wood. Novice Stonecutter gives +2 when working with stone.
Prices are fixed and always single-colour: 10, 25, 50, 100, 200, 400 or 500 points per node. Every node has parents, and a child stays locked until its parent is bought. The first node of a branch costs 50 red (building and smithing), 50 green (gardening) or 25 blue (writing and anatomy).
That pricing structure leads to one clear conclusion: a generalist zombie is a bad investment. Branches do not overlap, points arrive slowly, and the return is always best on the single talent of the station the zombie actually stands in.
Equipment — Tool and Collar
A zombie has three slots: hand, armour and collar. A tool in the hand adds to one specific talent — not to “work” in general. A bronze axe is +2 orange. A bronze shovel is +2 green. A bronze hammer is +2 red. A rusty pickaxe is +1 orange.
That tool bonus stacks with everything bought through perks, and it counts when the game compares against the quality thresholds. The catch is simple: an axe handed to the zombie at your writing desk gives it nothing, because the writing desk does not read orange.
The collar works on a different axis. It does not touch talent at all — it sets how many red skulls you can raise and keep.
| Collar | Red Skull Limit |
|---|---|
| Bronze collar | 5 |
| Gold collar | 10 |
| Steel collar | 99 — effectively unlimited |
Skulls — Where the Body Gets Them
White and red skulls are locked onto the body long before it ever becomes a zombie.
- Embalming adds skulls based on the mixture used. Some mixtures add only white, some only red, and some are a trade — +2 white at the cost of −2 red, for example.
- Autopsy mistakes cost one white and one red at the same time. Every ruined part is −1 / −1.
Red skulls are what collide with the collar limit. White skulls are the reason the body was worth preparing in the first place.
Zombie Roles
Separate from talent, a zombie has a role set by where you place it:
- Crafter — stands at a station and runs its recipes.
- Caretaker — carries items between chests and stations.
- Gardener — works the garden beds.
- Porter and conveyor carrier — move output along the chain.
- Fighter — comes along to fight.
- Idle — stands around doing nothing.
Talent follows the zombie through all of this. Move a well-levelled orange worker from carpentry to a furnace and every orange point it owns is worth zero in that new spot.
Editor Warning: If the game is held back by a Stuttering Issue during large crafting chains, do not read it as a zombie problem. The worker counts and point pools are handled correctly in the data — the frame drops are a separate performance matter and should not send you hunting through perk trees for a fix.
Quick Reference
- Read the station’s talent, not the zombie’s. You pick a zombie for a station, never the reverse.
- Quality exists only at the kitchen table, writing desk, printing press, formulation bench and carpenter’s bench. Everywhere else, talent is pure speed.
- A zombie banks its own tech points as it works. To level one fast, put it on a station with cheap, frequent crafts.
- Level one talent per zombie. Spreading points across five branches is a reliable way to never hit a single gold threshold.
- Match the tool to the station’s talent. A correct +2 tool is two perk levels you did not have to pay for.
Every number here comes straight from the game data of version 1.004.x. If a patch changes something, leave a comment and I will update the guide.
More Guides:
- Graveyard Keeper 2: Some Useful Strategies for The Game’s Mechanics
- Graveyard Keeper 2: How to Fix Game Stuttering Issue
- Graveyard Keeper 2: How to Enable 32:9 Ultrawide Resolution
... content here ...
... more content ...


