
Tired of getting animation-locked by janky enemy attacks while elites chain combos you can’t read? This build turns the game’s worst mechanic into your ultimate weapon—complete stun-lock by freeze. Every enemy becomes a training dummy that stands still while you stack status effects and delete health bars. No i-frame gambling, no perfect dodging, just three sprinting attacks and the fight is already over.
Quick Answer
The Frost Knight Cheese Build requires two permanent unlocks and three ideal run boons to reach full power:
- Frostbound Charge (from Frost Diamond ring): Each sprinting attack applies 1 frost stack. Three stacks fully freeze any enemy.
- Amulet of Cleansing Pestilence: Heavy attacks have 30% chance to apply poison. Poison attacks deal +84 poison damage.
- Scorching Charge (pants boon): Sprint attacks immediately apply burning.
- Sanguin Slam: Heavy attacks apply 500 bleed. Two heavy attacks inflict bleeding.
- Relentless Momentum: Sprinting attacks deal 20% more damage.
The loop is simple: sprint attack three times to freeze, then burst with heavies to stack poison and bleed. Back out, repeat. Most enemies never get a turn.
Why Freeze Beats Everything Else in Crimson Moon
Crimson Moon’s combat is built around punishing animations and enemy attacks that ignore your i-frames at the worst moments. The Frost Knight Cheese Build doesn’t fight that system—it bypasses it entirely.
The core comes from the Frostbound Charge boon, which lives on the Frost Diamond ring. You won’t have it at the start. You need to find the ring during a run, survive to the end, and purify it at the hub. Once purified, Frostbound Charge is permanently added to your boon pool for future runs.
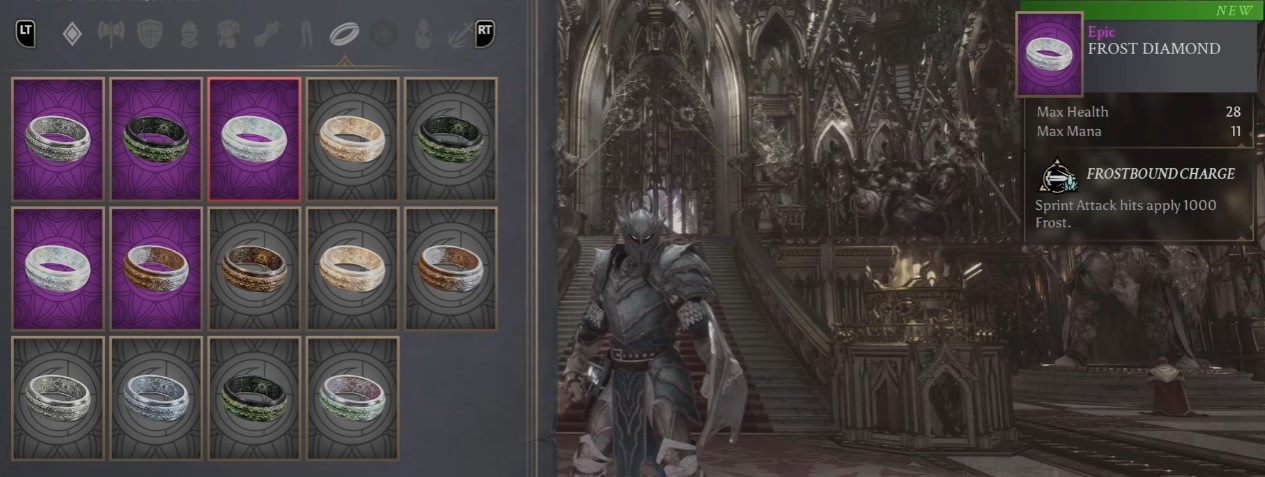
Each sprinting attack with Frostbound Charge applies one stack of frost. The first stack slows the enemy noticeably. The second stack makes them crawl. The third stack fully freezes them in place, giving you a massive window to dump damage without any fear of retaliation.
What makes this so powerful is the safety it creates. You never commit to a long combo and pray. You sprint in, land one hit, sprint out. The slow from frost stacks means enemies can’t close the gap before you reset. It’s the most forgiving offensive loop in the game, and it turns elite encounters into trivial exercises.
If you’re struggling with the purification system itself, my full breakdown of the process covers exactly how to unlock items permanently.
The Amulet That Carries the Damage
Frost alone doesn’t kill. It locks enemies down, but you need a damage source that punishes them while they’re frozen. That’s where the Amulet of Cleansing Pestilence comes in.
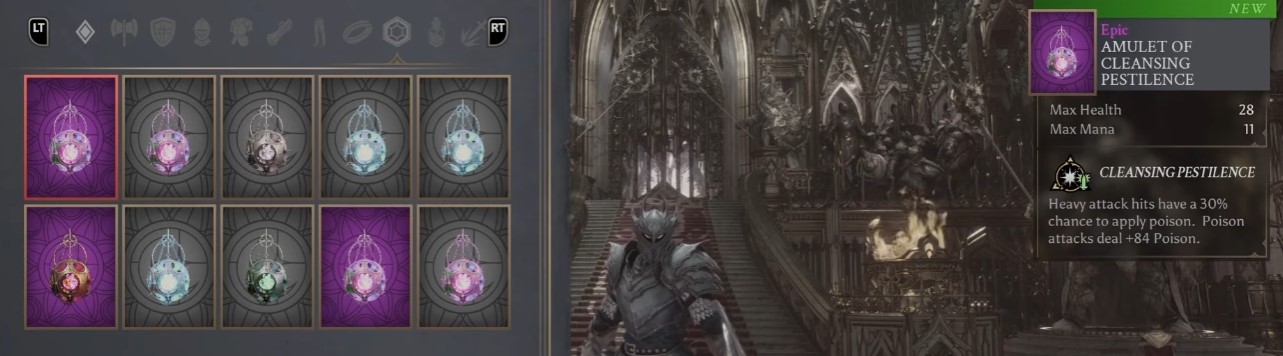
This amulet does two things:
- Heavy attacks have a 30% chance to apply poison
- Poison attacks deal 84 additional poison damage per tick
The amulet is your base damage layer. Once an enemy is frozen, you switch to heavy attacks. Each heavy has a nearly one-in-three chance to stick poison, and each poison tick hits for 84 damage on top of your normal attack numbers. Against a frozen target, you can land three or four heavies before they thaw, which gives you excellent odds of stacking poison multiple times.
What I like about this setup is that it doesn’t force you into a single playstyle. The build’s foundation is sprint attacks for frost, but the damage type you commit to—light, heavy, or sprint—should follow whatever boons you find during the run. The amulet pushes you toward heavies, but if you find a better light-attack boon, the core loop still works. You just adjust your damage window accordingly.
Stacking Every Status Effect in One Combo
The base build is strong on its own, but the real devastation comes when you layer run boons on top. In my best run with this build, three specific boons turned the loop into a status-effect machine gun.
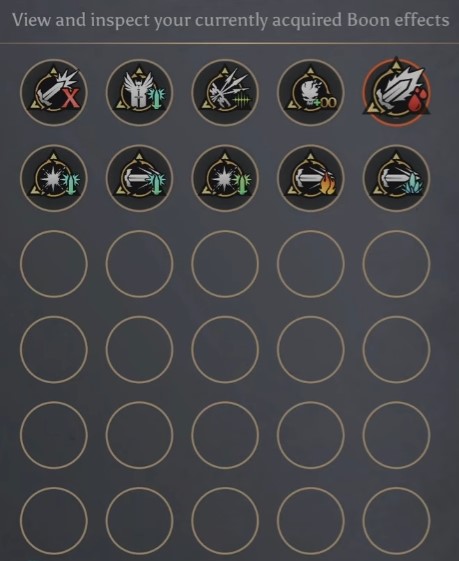
| Boon | Slot | Effect |
|---|---|---|
| Scorching Charge | Pants | Sprint attacks immediately apply burning |
| Sanguin Slam | Any | Heavy attacks apply 500 bleed |
| Relentless Momentum | Any | Sprinting attacks deal 20% more damage |
Here’s how the combo plays out with these boons active:
- Sprint attack to apply frost and burning simultaneously
- Follow with a heavy attack for a 30% poison chance
- Second heavy applies 500 bleed
- Enemy is now frozen, burning, bleeding, and possibly poisoned
- Back out and repeat the cycle
The status stacking is absurd. Frost locks them down, burning and bleed tick for massive passive damage, and poison adds another layer on top. Against most elites, one full cycle—three sprint attacks and two heavies—is enough to either kill them outright or leave them with a sliver of health while four damage-over-time effects finish the job.
Relentless Momentum is the quiet MVP here. A flat 20% damage increase on sprinting attacks might not sound flashy, but when every single engage starts with a sprint attack, that bonus applies to every frost application and every opening hit of the fight.
How I Handle Exploration and Bosses with This Build
Exploration is where this build shines brightest. Crimson Moon’s normal levels are often harder than its boss fights because elite enemies swarm you with overlapping attacks and the camera can’t always keep up. The stun-lock completely sidesteps that problem.
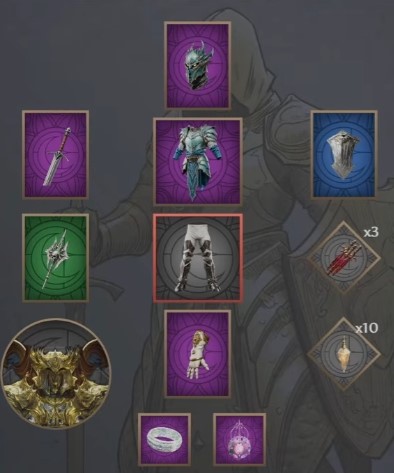
I never waste my Angelic Form on elites anymore. The freeze loop handles them safely, so I save the full gauge for the boss at the end of the run. In my showcase run, I reached the boss with a completely full Angelic Form meter, which made the fight dramatically easier than it should have been.
That said, not every boss respects the freeze. Some bosses have resistance to freezing, bleeding, or burning. When a boss shrugs off frost, the build loses its primary stun-lock, and you have to fall back on the damage-over-time layers instead. The good news is that poison, bleed, and burning still chunk through resistant bosses—you just have to play more carefully without the freeze windows.
For specific boss matchups, I’ve broken down how this exact poison-and-freeze strategy handles Cardinal Matias in a separate guide.
What to Prioritize During a Run
If you’re building toward this setup from a fresh run, here’s my priority order:
- Find the Frost Diamond ring if you haven’t purified it yet. Nothing else matters until Frostbound Charge is permanently unlocked.
- Grab the Amulet of Cleansing Pestilence as your base item once it’s available.
- Hunt for Scorching Charge on pants. Burning on every sprint attack is the single best damage add for this loop.
- Take Sanguin Slam if it appears. 500 bleed on heavies is too much value to pass up.
- Relentless Momentum is a nice-to-have that makes the whole loop hit harder.
The build works with just Frostbound Charge and the amulet. The run boons are multipliers that turn a safe build into a fast one. If you only find one or two of the ideal boons, you’re still in great shape—the core freeze mechanic does the heavy lifting regardless.


