
Defeat Ephere the Dry Rot King in the Defiled Cemetery without dying by stacking poison and burn DoT effects, maintaining 150+ stamina through executions, and saving Angelic Ascension for burst windows. Bring a sword with Gouging Throw for ranged pulls, keep health potions stocked (upgrade max carry to 3+), and use shield bash to stagger the boss for execution openings. The boss is susceptible to poison and frost — apply both relentlessly. Lock-on breaks when the boss goes underground, so attack its hand during those phases instead.
What I Actually Pack Before Walking Into the Defiled Cemetery
The loadout crystal floating in the air during an active run is not a bug — it stays raised until you clear every sequential district mission and defeat the district boss. Understanding this loop matters because it dictates how you prepare.
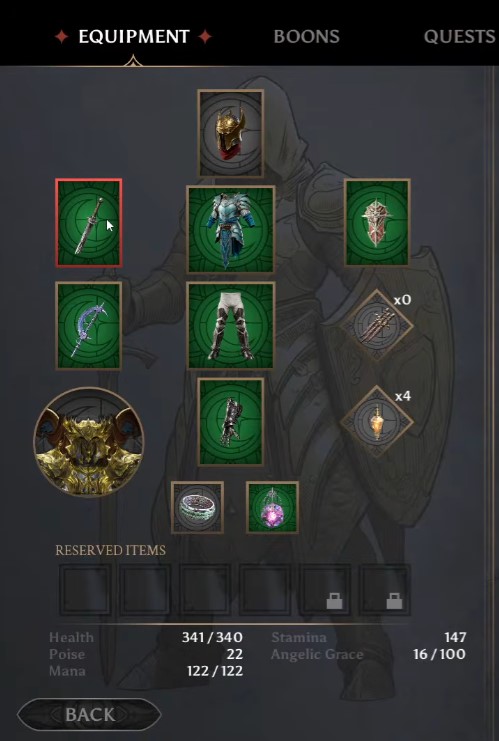
Here’s my pre-run checklist:
- Primary weapon: Sword with Gouging Throw for ranged pulls and reliable damage
- Backup: Two-handed hammer in your bag if you prefer its throw animation
- Reserved slots: Carry extra health consumables back from dungeons
- Forge upgrades: Upgrade weapons before starting — purified items and gear upgrades persist between runs, even though boons and souls reset
You cannot replay completed districts (like Forsaken Street) until the run concludes, so grab every relic you find — three spawn per district, some drop from elites.
The Build That Carries the Fight: DoT Stacking and Stamina Economy
Poison and burn are not optional against E’frae — they are the backbone of a zero-death strategy. Stacking damage over time lets you focus on survival instead of greed.
| Boon | Effect | Why It Matters |
|---|---|---|
| Poison on heavy attacks | Strong DoT | Sustained damage while you reposition |
| Burn on weapon art | 75% chance | Pairs with poison for dual DoT pressure |
| Frost on light attacks | 200 frost | Slows the boss, creates retreat windows |
| +25 physical damage | Weapon attacks | Raw damage for execution phases |
| Chalice of Conquest | Restore flask after 8 hits when empty | Emergency sustain |
| Trial by Flame | 25% burn on weapon attack | Extra burn uptime |
Executions grant +5 max stamina each. Prioritize executing staggered enemies throughout the run — I aim for 150+ base stamina before reaching E’frae. That pool lets you dodge extended combos and keep attacking through the boss’s pressure phases.
Angelic Ascension buffs like +30% attack while active are your panic button. Save it for when you need burst damage or need to survive a dangerous sequence, not for opening the fight.
District Boss Warm-Ups: Where the Fight Actually Starts
The second district boss has a cinematic intro and one-hit-kill potential. I pop Angelic Ascension immediately for burst damage, then keep distance and dodge until openings appear. Heavy attacks stagger, and parries work well against faster enemies.
The third district boss requires a different trick: destroy its eggs to stagger it. Learn that mechanic before you reach E’frae — it trains the stagger-and-execute rhythm you will need at the world boss.
E’frae, the Dry Rot King: The Fight Itself
Ephere the Dry Rot King sits in the Defiled Cemetery — a dead god, once worshipped as lord of the wild, felled by Lunarin in the war of the gods. The fight is long, but the mechanics are learnable.
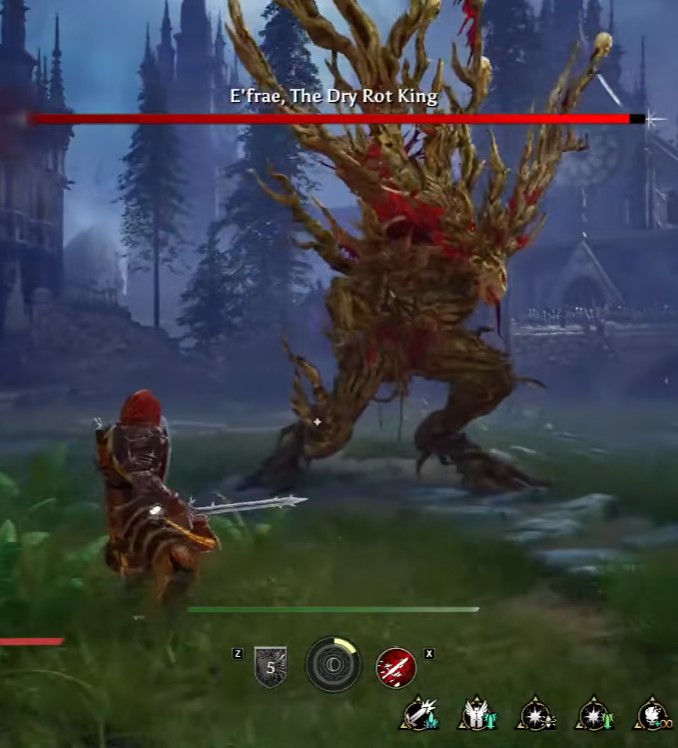
Key observations from my successful zero-death run:
- Lock-on breaks when the boss goes underground. Do not fight the camera — attack the boss’s hand during those phases instead. It is a vulnerable point.
- Shield bash staggers the boss. Use it to create openings, then execute for bonus stamina.
- Poison and frost both land. Apply them consistently for extra damage while you manage positioning.
- Thorns are a hazard. Watch the ground and avoid them during repositioning.
- Mana potions are blue. Health potions are not — do not mix them up mid-fight.
I entered the fight with five to six lives, which gave me a safety margin, but the goal is to not spend any. Use health potions before you hit critical — Chalice of Conquest can restore a flask after eight hits if you empty your stock. If you need the full route from prologue to this fight, the Crimson Moon Walkthrough & Guide Hubwalks through each district in order.


