A general idea of the weapons, their strengths and weaknesses, and a rough idea of how to use each gun. This is not meant to be a comprehensive guide, simply an overview and introduction.
Introduction

New to Halo? Been gone since the H3/Reach days and confused by all the new gadgetry? Or even just an avid Halo player that doesn’t quite get how to use a certain gun?
This guide is for you.
Please note that this guide is not intended to be a detailed analysis of every weapon or of all strategies and tricks. The purpose of this guide is to help you understand the basics of what each weapon is good for, why you would use it, and how to use it effectively.
Also note that the information in this guide is current as of time of writing and may be changed with future updates, and that any measurements or rough damage estimations are entirely theoretical numbers based solely on multiplayer gameplay. Nothing I cover here is relevant to the campaign and I could full well be wrong on some of the damage figures.
Damage Types, Explained
Halo Infinite expands heavily on a concept never fully explored in previous Halo games in its distinct classification of damage into 4 (well, four and a half) damage types, each with their own unique role and strengths. While past games had Covenant weapons deal more damage to shields and human weapons deal more to unshielded opponents, Infinite splits these into very specific niches and creates a sort of rock-papers-scissors approach to prevent crowding the sandbox.
Kinetic damage, while not terribly effective against shields, deals a great deal more damage to unshielded opponents, often able to kill them in a mere shot or two. This makes it an all-around solid damage type for combat, particularly to finish off a wounded foe. The exception to this is explosives; most explosive weapons and grenades seem to be listed as Kinetic damage for some reason, but either deal roughly equal damage or deal enough damage as to kill opponents instantly.
Plasma damage, on the other hand, absolutely devastates shields in no time, but does very little to enemies after those shields are down. Pair plasma weapons with a Kinetic weapon to finish your target quickly, or use a grenade to finish the fight.
Shock damage is one of two newcomers and excels at shutting down vehicles and dealing area of effect damage. Vehicles damaged with Shock (particularly the excellent Dynamo grenades) are EMPed, finding themselves unable to move or fire driver-controlled weapons (Warthog turrets are exempt); EMP an aircraft like the Wasp or Banshee and they’ll even drop out of the sky, either dropping off the map or possibly allowing you to board them with fast reflexes or a precise Grappleshot. Shock damage also chains from affected targets, shocking all passengers of a vehicle and anyone standing near a Shocked vehicle or enemy.
Thermal damage, meanwhile, deals absurd damage to personnel and vehicles with the caveat of Thermal weapons often being tricky to use and having slow reload times or fire rates. A few rounds of Thermal damage to a vehicle is often all it takes to send it and its passengers sky-high, and Thermal weapons can overheat a Spartan faster than any desert sun.
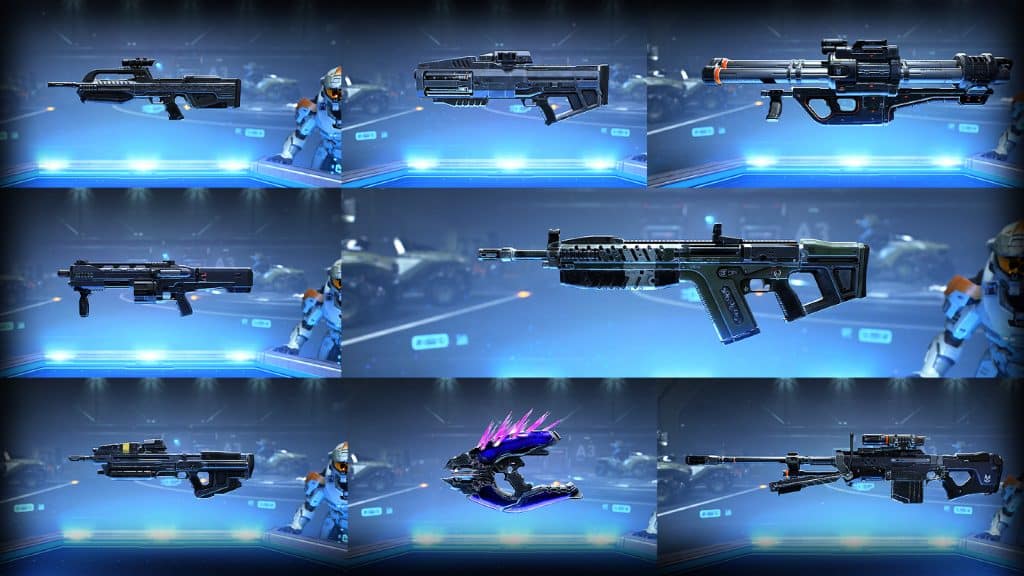
UNSC Weapons (Kinetic)
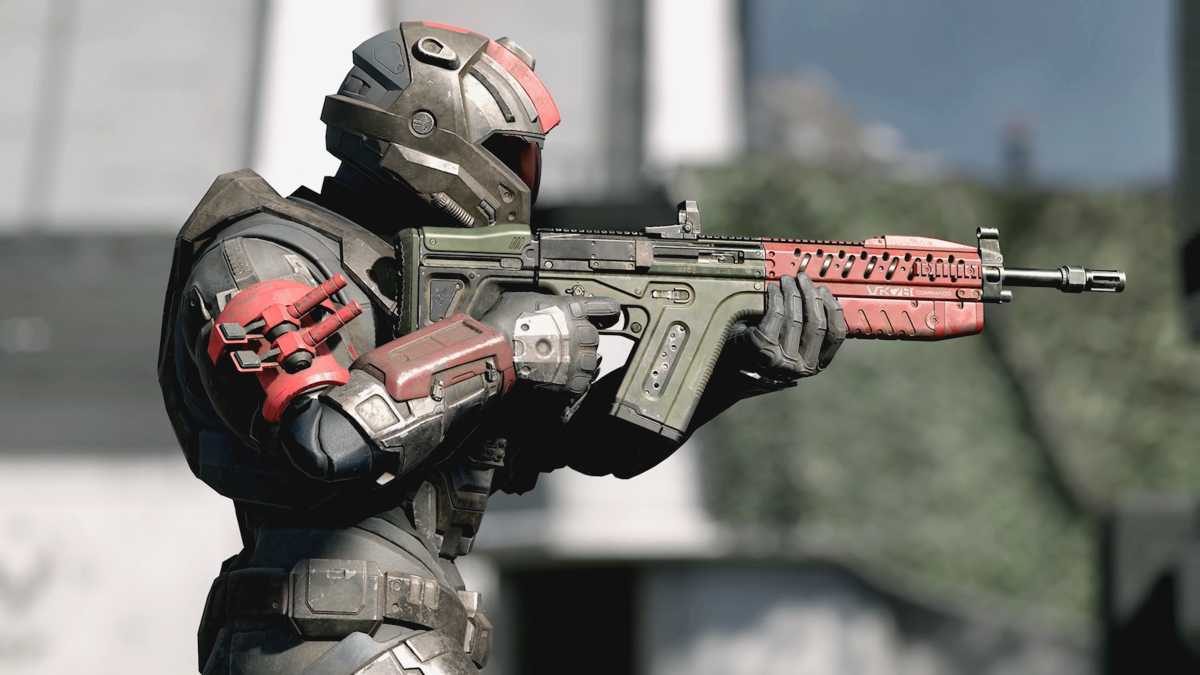
 MA40 Assault Rifle: Likely the first weapon you will see upon loading into your very first game, this dependable series classic is a jack of all trades, master of none; able to perform at most combat ranges, but with no major selling points or areas it excels in. A reliable workhorse through and through.
The Assault Rifle is about equally as good at all ranges out to medium-long, and can pack a solid punch against shields and health alike but takes quite a few shots to do so. You have a decent magazine size and fire rate but fairly low damage, with no major benefits against shields or vehicles and too low damage per shot to benefit from Kinetic’s boost to health damage. Try to focus on dumping rounds into a target, then finish them off with another weapon or a melee.
AR Quirks: Your accuracy degrades while firing; while your aim will be quite tight for the first few rounds, sustained fire will widen your accuracy cone to the point of being all but useless if you fire a full mag. Fire in tight, controlled bursts of no more than 5-10 rounds if at range.
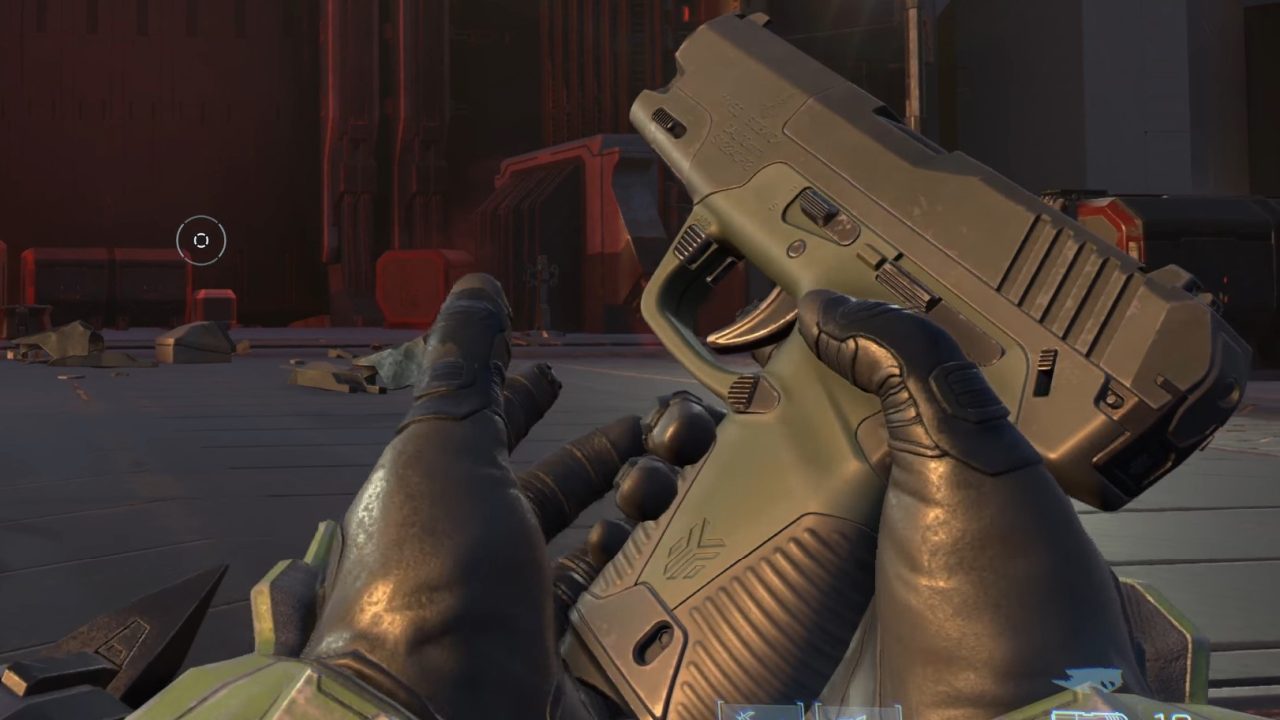 Mk50 Sidekick: As the name implies, you’ll often find this weapon at your side, and while it might not be as strong as other guns, you can count on this sidearm to finish the fight. A surprisingly good damage output and the ability to mercilessly destroy unshielded opponents makes this handgun a great way to mop up a weakened foe, and its great accuracy can even lend it to improvised use as a marksman’s weapon for those with steady hands and fast fingers.
Switching to your pistol is always faster than reloading. – Captain Price
The Sidekick is best used at close to medium range for most players, and is ideal for finishing off an enemy you’ve already weakened with your primary weapon. Starting a fight with the Sidekick is not ideal, but can pay off for those with excellent aim. Kinetic’s bonus against health allows this pistol to kill in a few shots after shields are broken, and can even drop a Spartan in a single round with a headshot within range.
Sidekick Quirks: Those of you with particularly fast fingers (especially on PC) might end up oversampling this gun as its firerate, though quick, is limited. Try to get a feel for the rhythm of the weapon to maximize your output of lead.
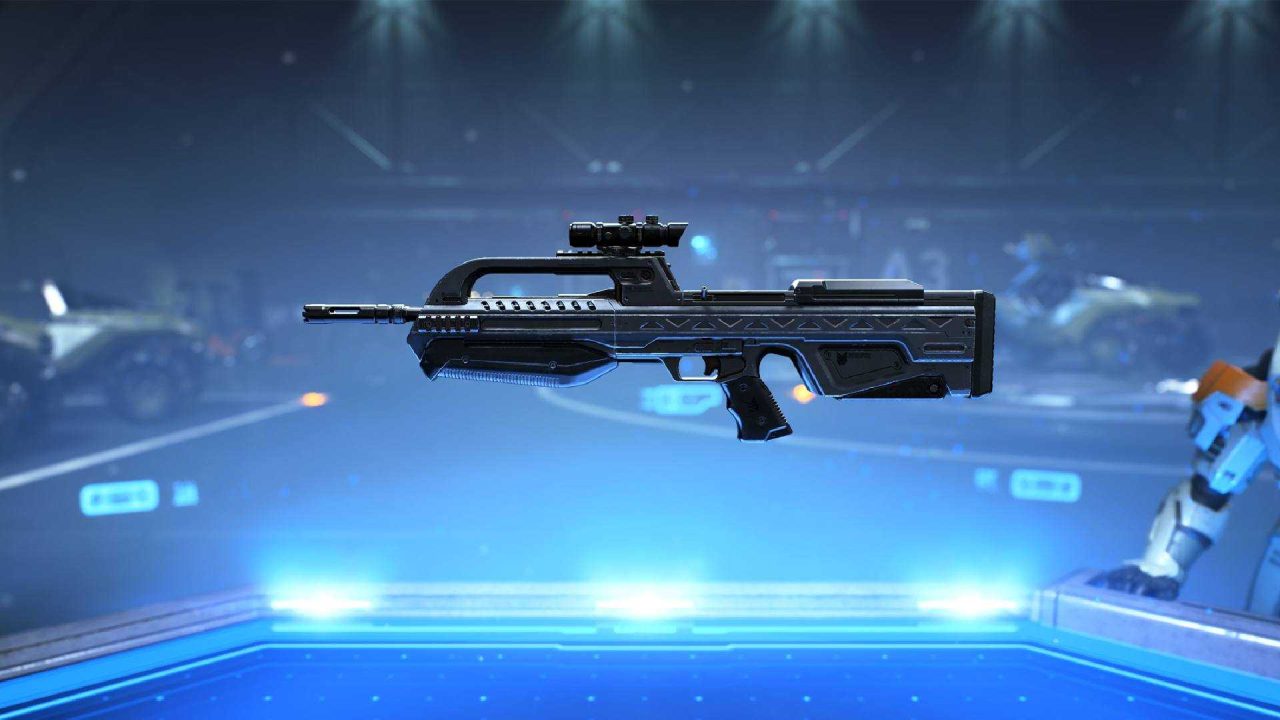 BR75 Battle Rifle: Another old favorite, particularly with fans of classic Halo playlist SWAT, the Battle Rifle is the definitive burst rifle of legendary acclaim. With tack-driving accuracy, an integral scope and excellent damage, this weapon has put down more Halo players over the years than any Covenant could ever dream of. Infinite’s BR is also aided by some of the most powerful-feeling sound design in the series, making each burst feel heavy and impactful.
The BR is best used at medium to long range, as its design lends itself quite well to precision shooting but not to reactivity. While you will descope when damaged, the accuracy of the BR is extremely tight even in hipfire, and the weapon shreds through targets without mercy, able to drop an unshielded Spartan in a single burst. Just keep an eye on your ammo count; 36 rounds may seem like a lot, but that’s only 12 bursts.
BR Quirks: While the recoil has been greatly toned down from past games, cunning Spartans can still use the burst-fire nature of the weapon to ensure easy headshots. Simply aim at upper chest level before firing; if the enemy is crouched, your shots should hit right in the top of their helmet, while standing enemies enable you to “walk” the burst up your target culminating in a headshot.
 VK78 Commando: A series newcomer, this workhorse of a weapon rewards those with good aim and better reflexes, and serves as the Kinetic marksman’s rifle. With a slow fire rate and tiny magazine, but extreme damage and precision, this weapon is best used to help your opponent take their helmets off and clear their minds.
The Commando is best used at medium-long range where faster firing options won’t outgun you, and your first and only priority should be landing round after round on your opponent’s face. This gun might not do much for shields, but can drop an unshielded Spartan in a single round to the dome, and allows quick follow up shots at longer ranges than the Sidekick. Make sure not to get outnumbered, though, as the small magazine doesn’t lend well to crowds.
Commando Quirks: I cannot overstate how tiny this weapon’s magazine and ammo reserves are. It takes ten rounds minimum to kill a fully shielded Spartan, and you typically only get 60-80 on weapon pickup. Make your shots count and don’t be afraid to save the Commando to be a backup weapon.
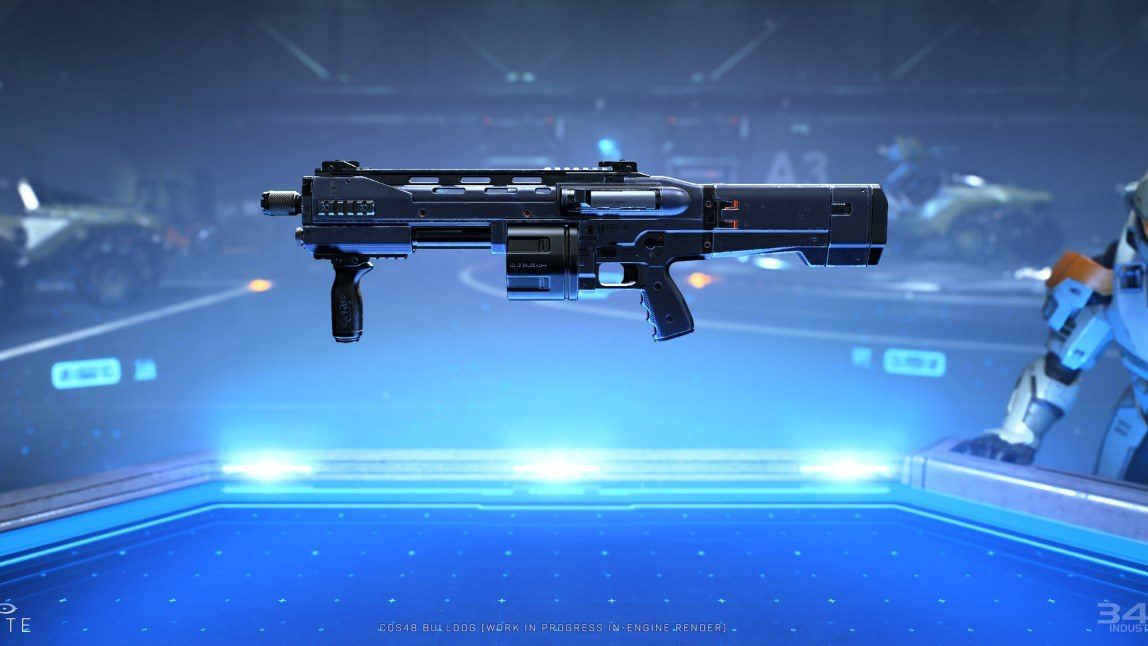 CQS48 Bulldog: The successor to the Halo series’ classic shotgun, this weapon packs less of a punch but can throw much more lead at your opponents much faster, and it may surprise you with its reach. You can, in fact, kill an opponent in a single shot with this scattergun, but good luck doing so without getting extremely lucky or finding a preposterously unaware opponent.
The Bulldog is best used at point-blank range as its spread and damage falloff make it effectively useless beyond 5 meters. Its sizable magazine offers plenty of tolerance for missed pellets, and the per-shot damage makes it extremely useful in those tight, melee-range fights where a difference of a single pellet might be life or death. Fire, melee, repeat until enemy is gone.
Bulldog Quirks: While still ultimately a shotgun, this weapon’s range is often slept on. If your enemy has the upper hand on damage, or is wielding a melee weapon, don’t be afraid to back up or throw them back with a Repulsor and shoot them from a few steps away.
Covenant Weapons (Plasma)
The Pulse Carbine excels at close to medium ranges, allowing the rounds to track onto and connect with your target. Make sure to manage your heat buildup; venting your weapon before it overheats is far faster than the overheat animation.
Pulse Quirks: The plasma bolts fired by the Carbine have a significant amount of travel time, but light tracking. Lead your shots against mobile targets to ensure your rounds connect.
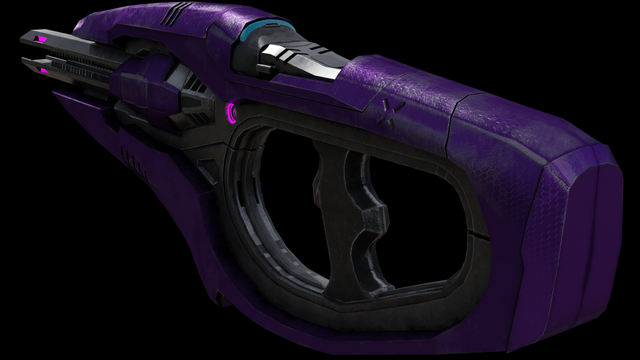
 Plasma Pistol: Don’t be fooled by its size, this weapon packs a serious punch. Uncharged shots fire incredibly quickly, and a fully-charged burst can drop a Spartan’s shields in a single hit anywhere on the body, opening them up to any bullet or fist nearby. Give this weapon the respect it deserves, even if it does look like a Nerf gun, and even if it’s usually wielded by two foot tall dimwits wearing alien propane tanks.
The Plasma pistol shreds at close range, especially if you can get a charged shot off. With an excellent rate of fire, very forgiving heat buildup and superb shield damage, this weapon puts pistols back on the menu, and can be used to great effect by those brave enough to try.
Plasma Pistol Quirks: The charged shot is the crown jewel of this weapon, with tracking and the ability to drop a target’s shields in one go. Do note, however, that holding the charge will drain your battery; try to use your radar and only charge it when you know enemies are near.
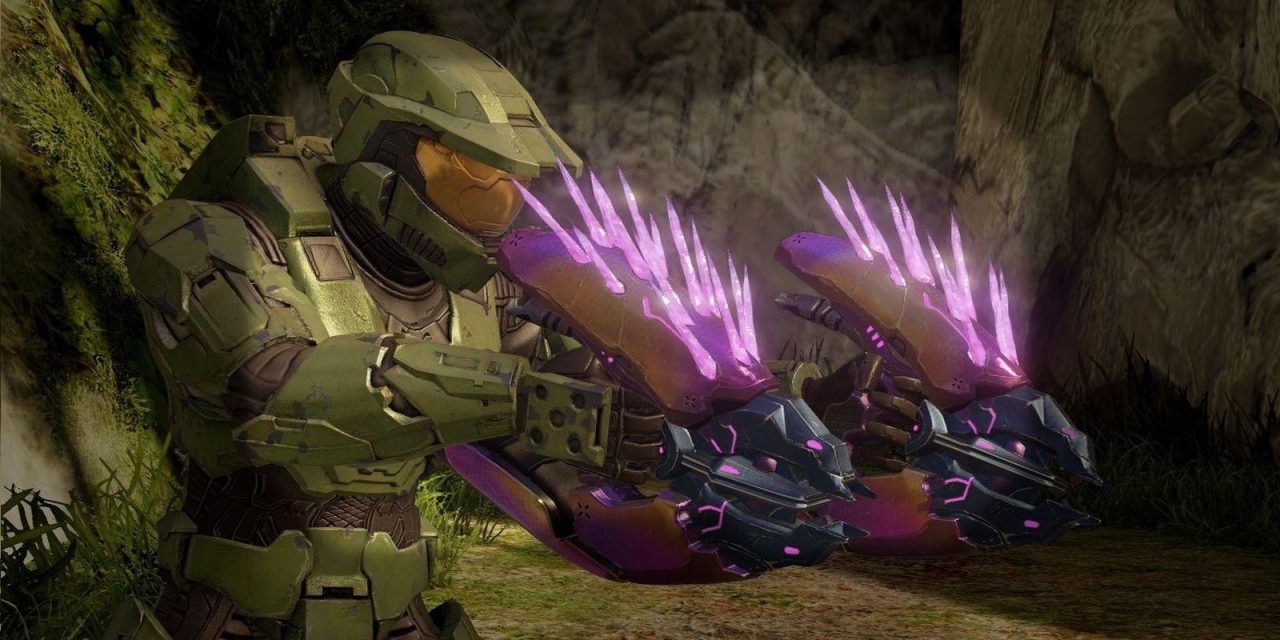 Needler: Another returning favorite, the Needler is a high-risk, high-reward weapon with low per-shot damage, yet the ability to instakill a foe if you land enough darts on target. Its pink needles detonate shortly after impact, dealing additional damage and setting off a chain reaction that can culminate in a Supercombine explosion that instantly kills any enemy unlucky enough to be tagged.
The Needler excels at close range, as the projectiles’ travel time and relative inaccuracy make landing shots at a distance fairly difficult. Shots do have moderate tracking within range, and it only takes a few rounds to land a Supercombine, so focus on getting in close and unloading needles until you see the pink boom.
Needler Quirks: A returning feature from earlier in the series, the Needler rounds will do damage on shattering even without landing enough shots to explode. This delayed source of damage can be very useful for suppressing shield regen and can even grant you trades after death if your assailant was particularly low.
 Stalker Rifle: Arguably one of the weaker weapons in the sandbox, the Stalker Rifle is the spiritual successor to the Covenant Carbine of old. Firing precise, slow shots at long range and aided by a scope, this weapon demands careful aim to be of any use, but can drop a foe in only 3 rounds if you land headshots.
The Stalker Rifle is best for long to extreme ranges where targets aren’t likely to return fire, since you will need your scoped accuracy to make your shots count. Shots are nearly hitscan, so you don’t have to worry much about leading your target, but body shot damage against unshielded targets is pitiful, so aim for the head.
Stalker Quirks: The Stalker Rifle is one of the only weapons that will not automatically cool down over time, requiring you to manually vent it regularly to manage heat consumption. Luckily, vent time is fairly short if the weapon isn’t overheated, so venting after a kill should become second nature.
Banished Weapons (Plasma, Kinetic)
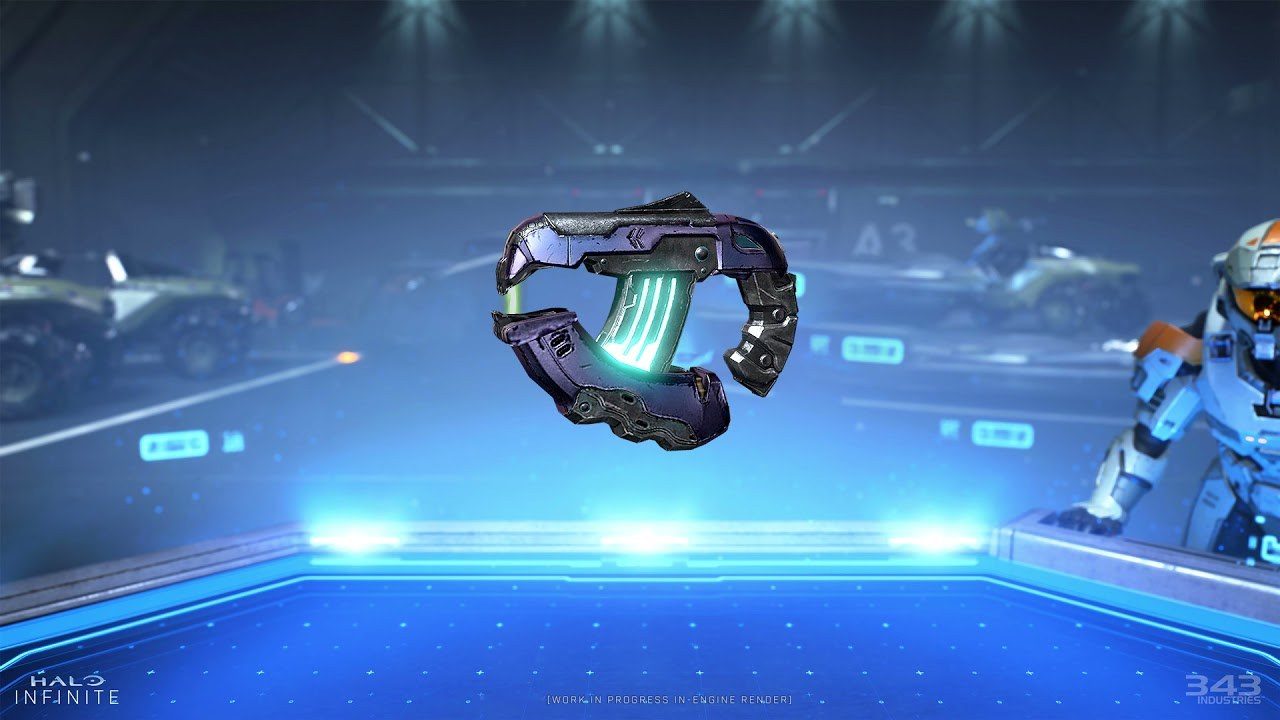
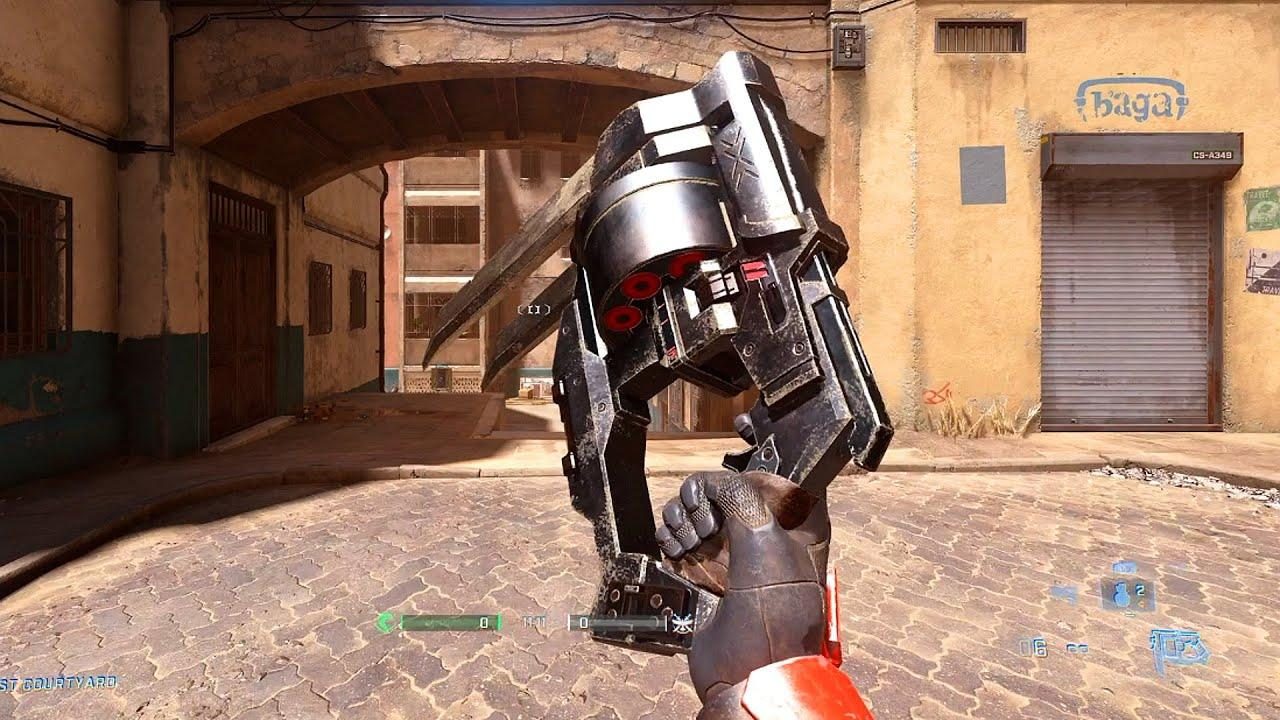
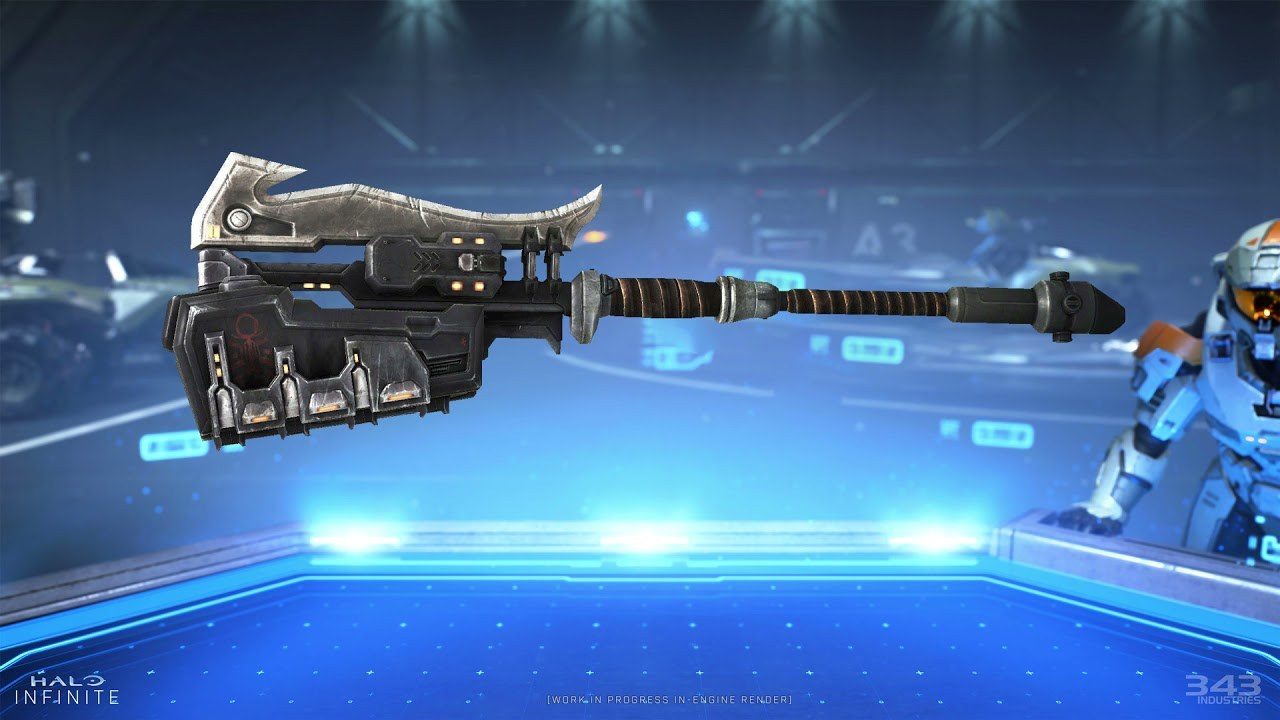
 Ravager: This Brute-designed grenade launcher fires heavy, arcing shots of explosive Plasma, and can even create a damaging pool of energy with a charged shot. Like all Banished weapons, this gun also boasts a fearsome blade on the front, boosting your melee damage by roughly half.
The Ravager is best used at close to medium range, where the drop of your shots is minimal and lead time is short. The three round burst primary fire deals quite good damage against shields and has a small area of effect, and your melee can drop a target who still has half of their shields, so don’t be afraid to get up close and personal with this launcher.
Ravager Quirks: By charging your shot fully, the Ravager will instead fire one big glob of Plasma that rebounds off of walls and detonates on impact with the ground or an enemy, creating a fairly large pool of damage that lasts for a few seconds. Use this against grouped-up enemies or enemies behind cover, but be sure to be wary of the shot bouncing off of walls in indoors environments.
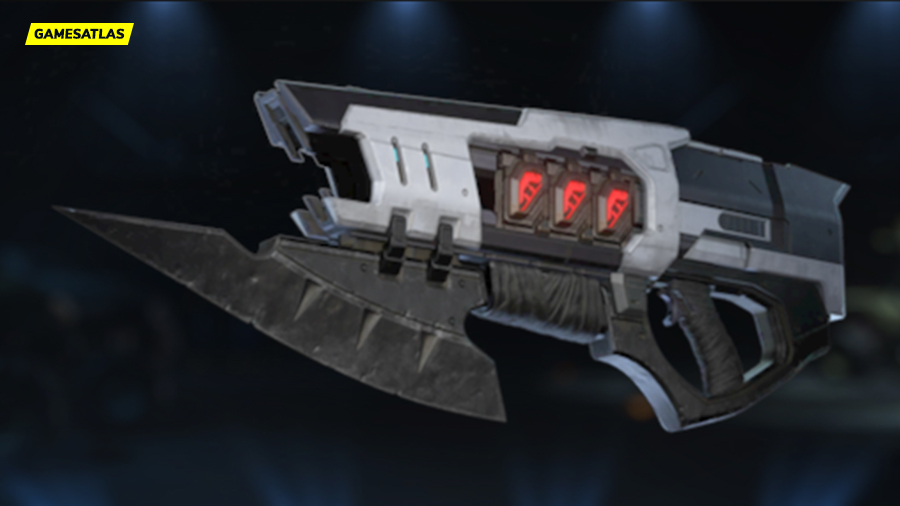
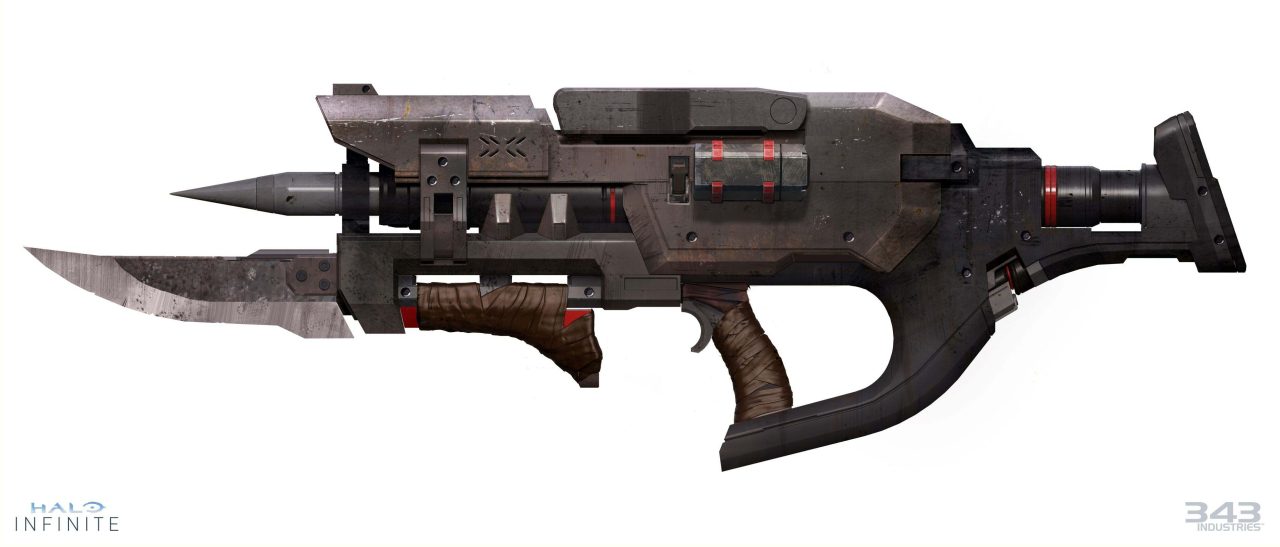
 Mangler: This glorified nailgun can guarantee your opponents meet a quick and grisly end if they get too close, and contrary to popular belief, actually isn’t a shotgun and can be used at range. Firing two spikes that begin to drop after a few meters and with not one but two knives on the front, this weapon is best used in a one-two punch to drop an enemy before they can react.
The Mangler is typically best used at point-blank to close ranges where it can be quickly followed up with a melee. Due to the increased melee damage of all Banished weapons and the Mangler’s staggering per-shot damage, you can kill an enemy Spartan by shooting them once anywhere on the body and then meleeing them, scoring an extremely fast and brutal elimination.
Mangler Quirks: While primarily designed for and best used at close ranges, and seemingly appearing to be loaded with shotgun shells, the Mangler isn’t actually a shotgun. Rather than a spread of pellets, it fires two fast-moving projectiles in a surprisingly precise pattern, meaning it can actually be used as a finishing blow at a surprisingly long range if you account for drop.
Forerunner Weapons (Thermal)
 Heatwave: The successor to the Scattershot, this hardlight shotgun fires a spread of bouncing bolts in one of two patterns. Dead Space fans will see parallels in the horizontal-vertical fire modes to their own Plasma Cutter, and this weapon can be just as deadly in the right hands. Do note that, like all Forerunner weapons, this weapon is tempered by a small magazine and a long recharge time, so make your shots count.
The Heatwave is best used at close to medium range, especially indoors or in tight quarters. Horizontal shots fire in a wide spread and are great at hitting a moving target or groups, while vertical shots have a much tighter spread and can kill in one or two shots if every bolt lands. Each bolt will also bounce off of hard surfaces for a period of time, so firing a blast from this weapon into a hallway or tight room can hit a target multiple times with one shot.
Heatwave Quirks: Do be careful indoors, as the rebounding shots of the Heatwave can also come back to bite you in the ass, often literally. It is fully possible to kill yourself with your own Heatwave, particularly at low health, so be aware of not only your target but what’s behind them.
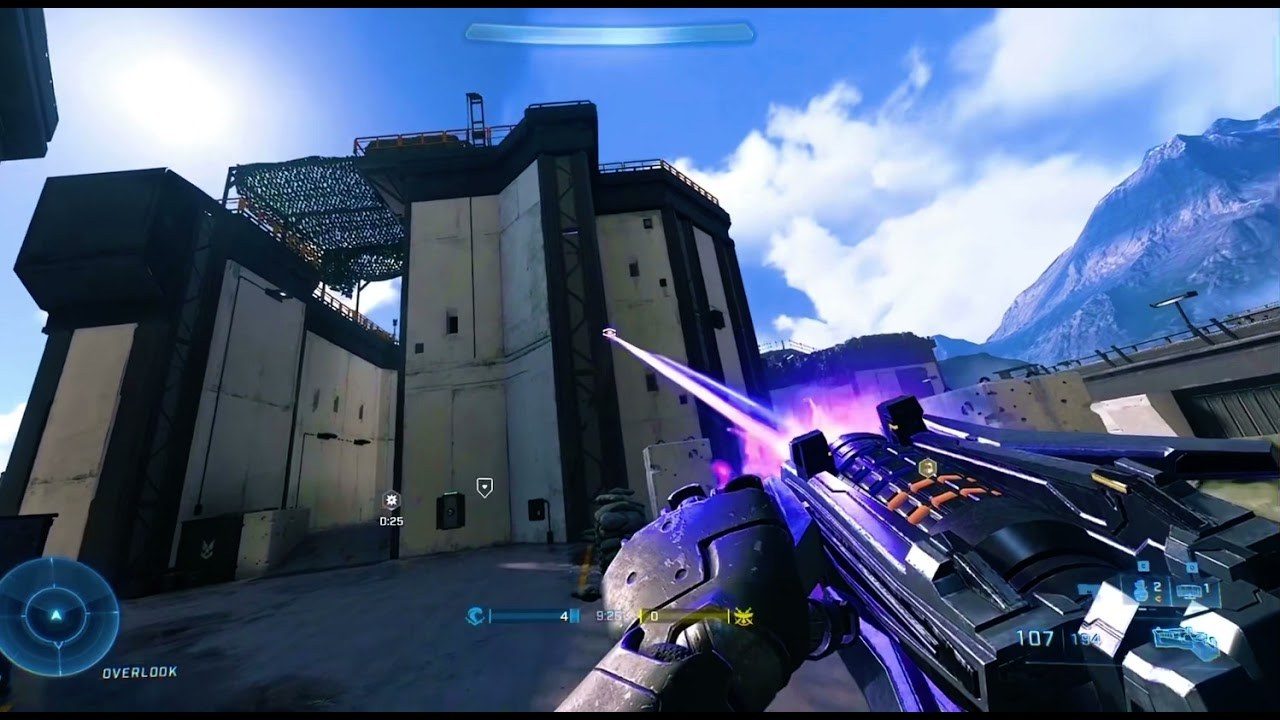 Sentinel Beam: A returning favorite from Halo 2, this handheld laser shreds through vehicles and Spartans alike, dealing exceptional damage and punching right through to hit targets behind them. Used well, this weapon can erase enemies from existence and melt their rides, and can even take out entire groups if they stand too close together.
The Sentinel Beam is best used at medium range, where you can easily track your target’s movement with the beam. The beam will also penetrate enemies and vehicles alike, dealing increased damage to the latter and able to damage enemies behind your target. Keep the beam focused at chest or head height and your foes will fall before you with ease.
Sentinel Quirks: While every Forerunner weapon tends to be ammo-hungry, the Sentinel Beam takes things to a new extreme. Chewing through charge extremely quickly, you’ll often find yourself waiting for the extremely slow recharge to fill your magazine, so use your ammunition wisely and make sure to top up before engaging.
Odds and Ends (Shock and Hydra)
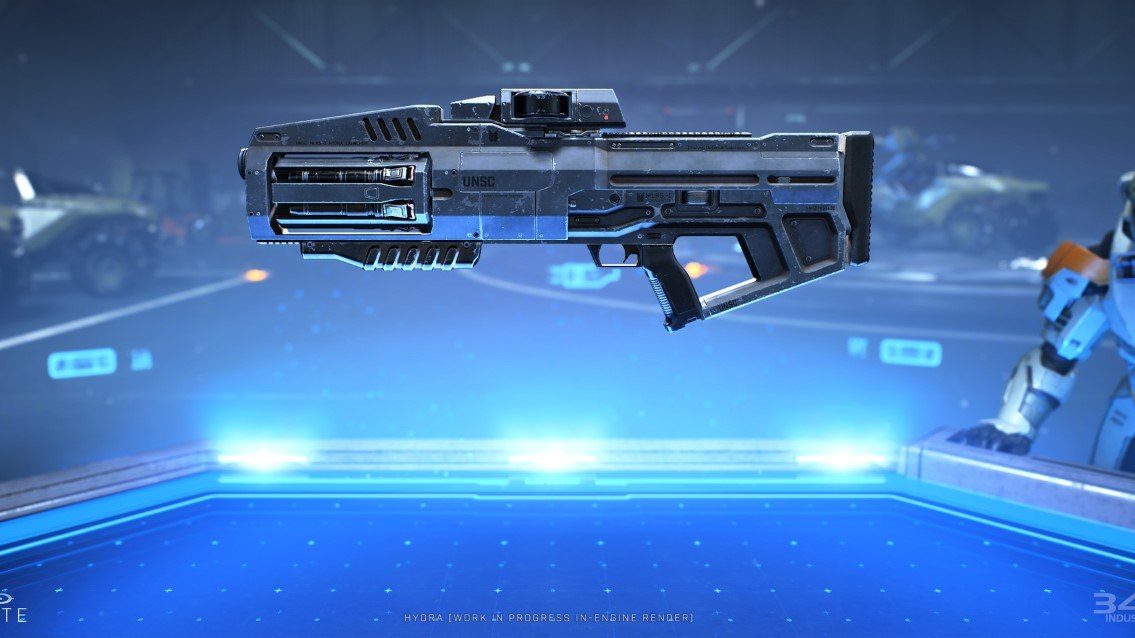 Hydra: Tricky to use, this micromissile launcher rewards skilled players with solid damage against vehicles, and its alternate firing mode makes shots against moving targets a walk in the park. Offering a choice between rapid, fast-moving rockets and homing missiles, this weapon shines against anything with an engine, and can drop a Spartan fairly quickly as well.
The Hydra is useful at most ranges, though its alternate homing mode will only lock on to Spartans from so far and vehicles from only slightly farther. Unlike most weapons, you generally don’t want to shoot straight at your target; vehicles move quickly, so lead your target and be sure to take terrain into account if using the lock-on mode. The Hydra can also defeat a fully armored Spartan in three to four rockets if you land direct hits, but be careful with your ammo as you load a single round at a time.
Hydra Quirks: Once locked on, the homing missiles are actually extremely forgiving, staying locked on for a few seconds even after a target breaks line of sight. Don’t be afraid to get creative and fire your missiles at odd angles to allow them to arc towards your target; you can even lock on and then fire straight up like a Javelin launcher if you’re fast enough.
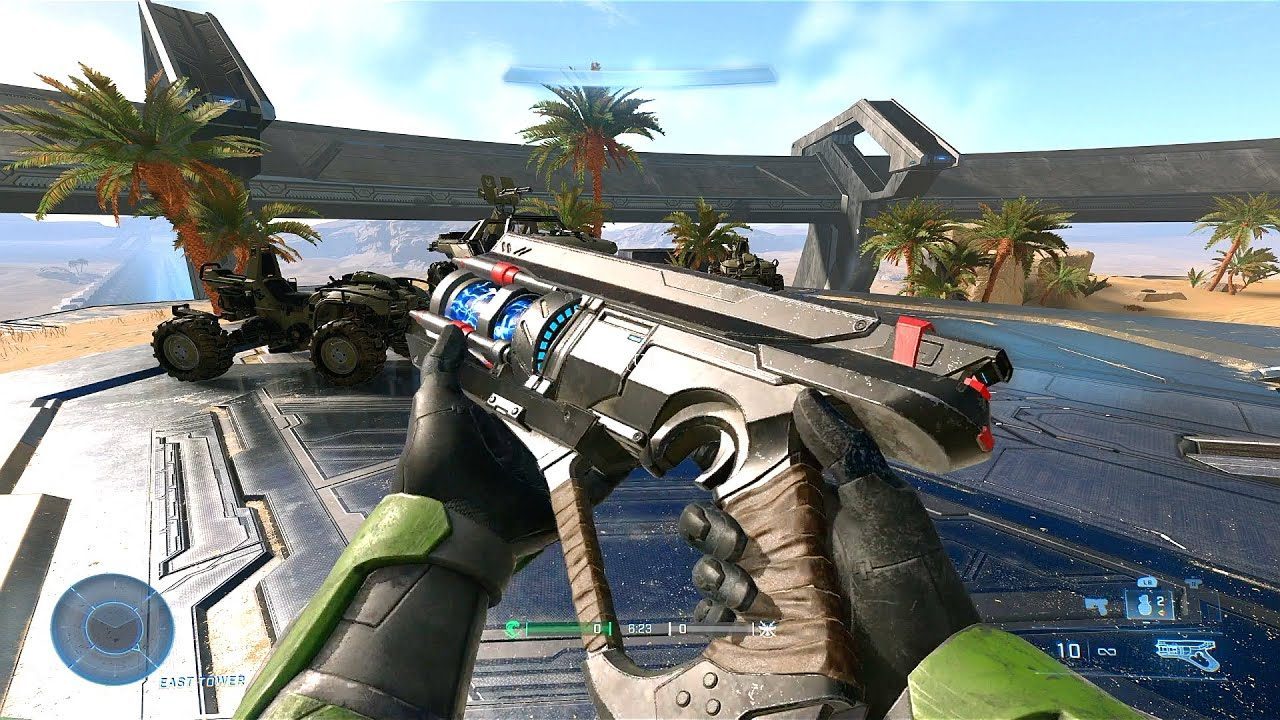 Disruptor: Don’t judge a book by its cover. While this dinky little zapper might look more at home playing Duck Hunt than in a warzone, the Disruptor is surprisingly lethal in the right hands, and can even shut down massive vehicles with its Shock damage. Dealing damage over time, shredding shields and even chaining electricity to other targets, this compact weapon is sure to leave your opponents shocked (ba dum tiss).
The Disruptor is best used at close range, as it is built around landing multiple quick shots on target. Focus on chaining shots center-mass, as this weapon doesn’t appear to have much of a headshot multiplier. You can also EMP vehicles with the Disruptor, though it will take you quite a few shots.
Disruptor Quirks: If you land enough shots with the Disruptor, you will create a burst of electrical damage that can chain to other nearby enemies. The Disruptor also deals mild damage over time, delaying shield regeneration for a short while.
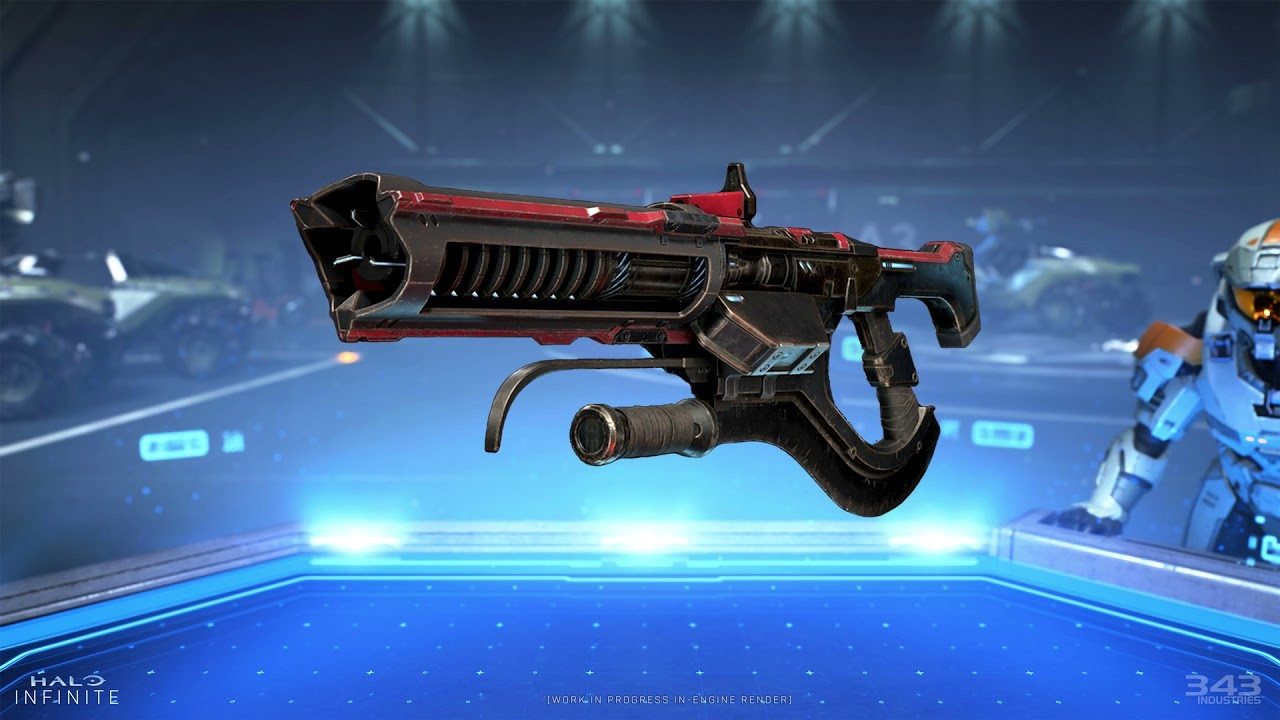 Shock Rifle: Whoever said lightning never strikes twice has never been hit with this sniper rifle. Firing powerful, precise bolts of electricity at extreme range and able to EMP most vehicles in only 2-3 shots, this powerful weapon is limited only by its ammo consumption and the user’s accuracy.
The Shock Rifle is best used at long to extreme range, primarily against vehicles and turrets. However, it will still do exceptional anti-personnel damage, killing a fully shielded Spartan in a single headshot from any range. Paired with the way Shock damage jumps to targets and damages all passengers of a disabled vehicle, this weapon can make short work of that Wasp or Warthog terrorizing your team, and Shade turrets become a Sisyphean task to use.
Shock Rifle Quirks: The main limiting factor of this weapon is ammo consumption. This weapon has a “12” round magazine, but uses 3 rounds per shot; why 343 didn’t just make it a 4 round magazine is beyond me. Just keep an eye on your ammo count so you don’t find yourself catching a bullet from a vehicle that would’ve been shut down with one more shot.
Power Weapons (Melee)
 Gravity Hammer: Stop, Hammer Time. This massive, heavy weapon obliterates Spartans and vehicles alike in a single powerful swing, but leaves its user exposed during the long windup and recovery. Try to begin swinging while around a corner or when a vehicle is approaching for optimal timing. You can also press melee to swing without the gravity slam, consuming less power in exchange for only damaging targets with a direct blow.
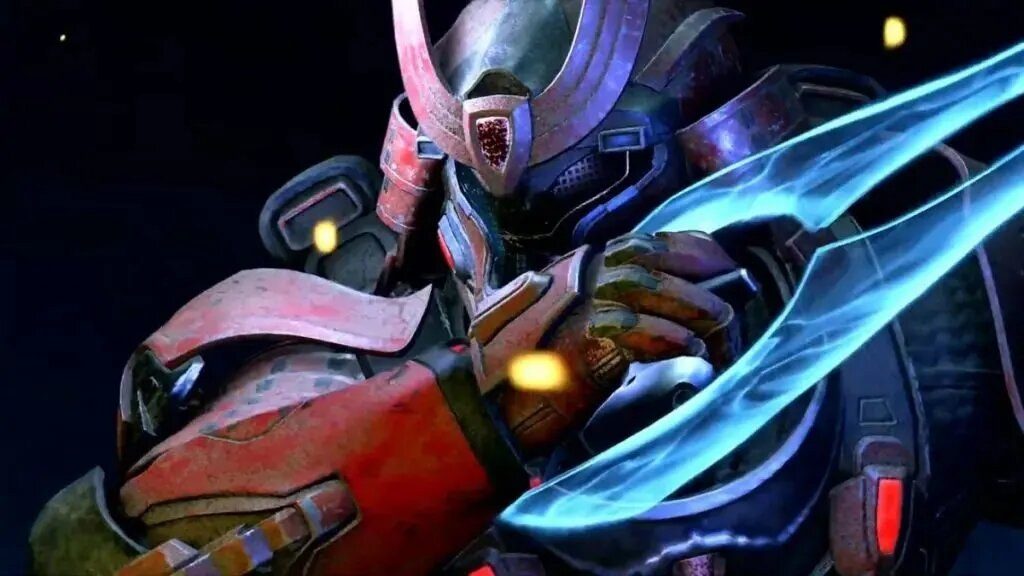 Energy Sword: Ladies, gentlemen, and those who know better, it is officially Energy Sword Sunday. A weapon so classic and evocative of Halo that it needs no introduction, this two-pronged blade decimates Spartans in a single blow and allows its user to lunge to enemies from a distance. Its only major weakness is its limited battery life; consuming 10-15% battery per hit, your rampage will unfortunately be short lived, but nonetheless vicious. If you have a sword of your own and are faced with an opponent likewise armed, keep in mind that you can clash an enemy’s attack to repel them and survive the attack by attacking at the same time as them.
Power Weapons (Precision)
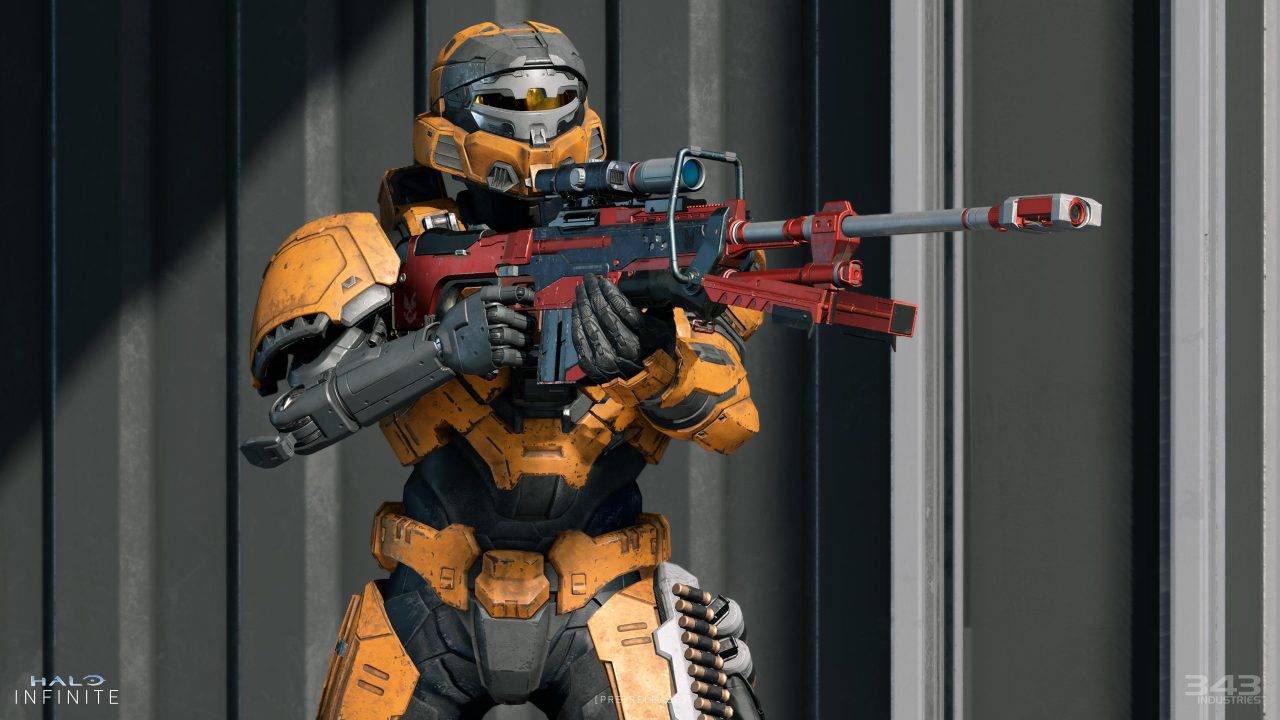 S7 Sniper Rifle: Does what it says on the tin. This powerful, precise rifle drops enemies in a single shot to the head, or two to the body, from any range. Keep an eye on your ammo, as you only get 4 shots in a mag and 8 total. Aim, deep breath, squeeze, scratch another tally into the side; this weapon collects skulls without mercy.
 Skewer: We’ve been throwing big hunks of metal at things for millenia, and you know what they say: if it ain’t broke, don’t fix it. Firing massive spikes, this weapon demolishes vehicles with ease, destroying smaller vehicles in a single shot and dealing massive damage to larger ones. It also kills Spartans in a single shot anywhere on the body, and deals increased melee damage; but let’s be honest, that’s not why you picked this thing up. Just be sure to keep in mind that projectiles drop over long distances, as the lengthy reload punishes missed shots heavily.
Power Weapons (Explosive)
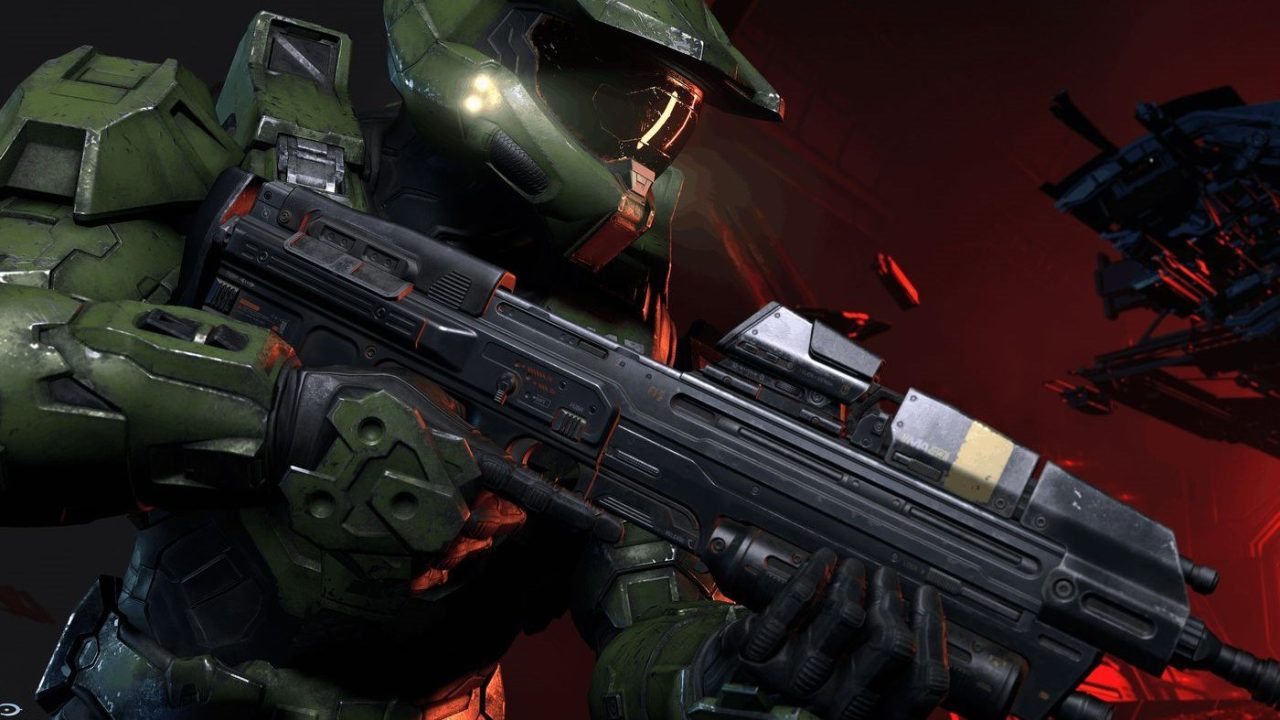
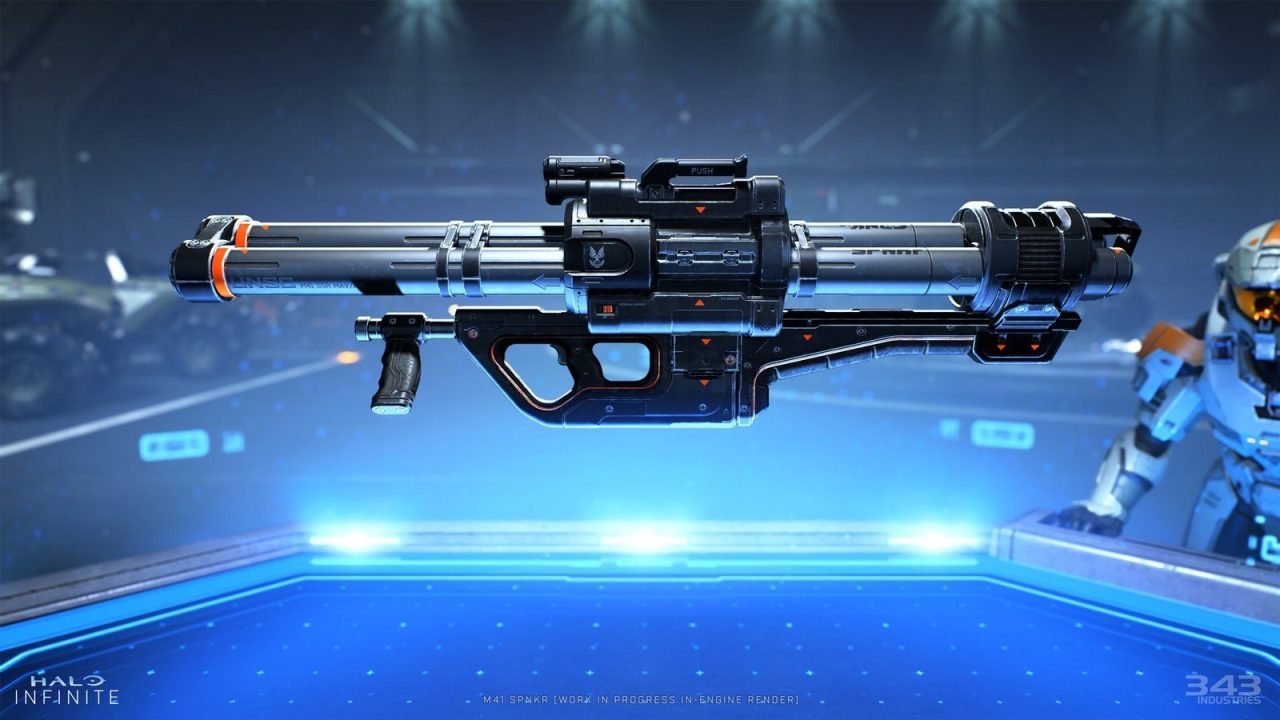 M41 SPNKR Rocket Launcher: It wouldn’t be a shooter without a bazooka, now would it? I almost don’t even need to tell you what this does. Firing powerful, slow-moving rockets, this weapon deals lethal damage in a sizable radius and flings vehicles aside if they aren’t destroyed, but holds a mere 2 rounds before requiring a lengthy reload. Be sure to lead targets heavily as the rockets travel shockingly slowly.
The gods gave us fire. But blowing stuff up? That was our idea. – Ahoy, Iconic Arms: Rocket Launcher
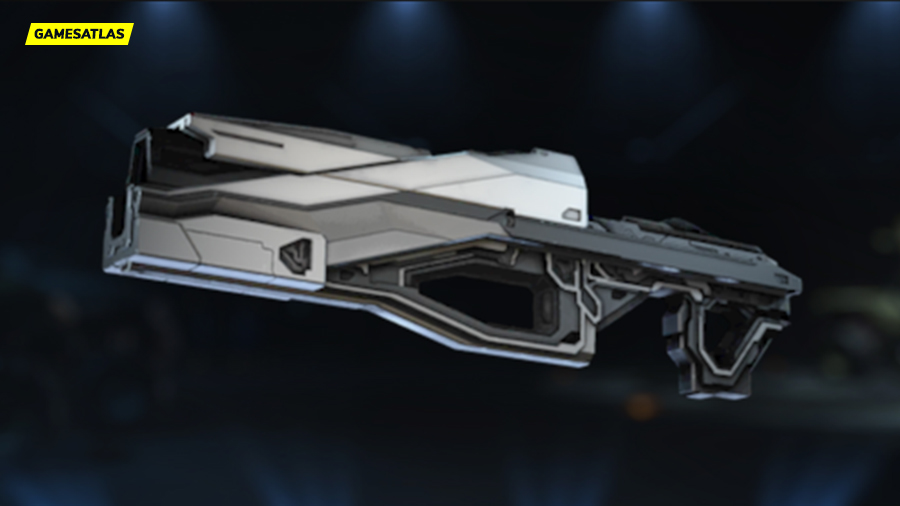 Cindershot: Remember Half-Life? This Forerunner grenade launcher pulls double duty as a regular grenade launcher and a laser-guided explosive a la HL1 RPG. Shots will detonate on direct impact with a target or shortly after rebounding off of a surface; when zoomed in, they can be guided by your reticle to hit a specific point. Vehicles, cover, this weapon doesn’t care; it’ll explode you, your grandmother and your dog. Recharges are lengthy and it usually takes two shots to kill, so keep an eye on your magazine.
Image Credits and Permissions
Cindershot and Ravager images belong to GamesAtlas.
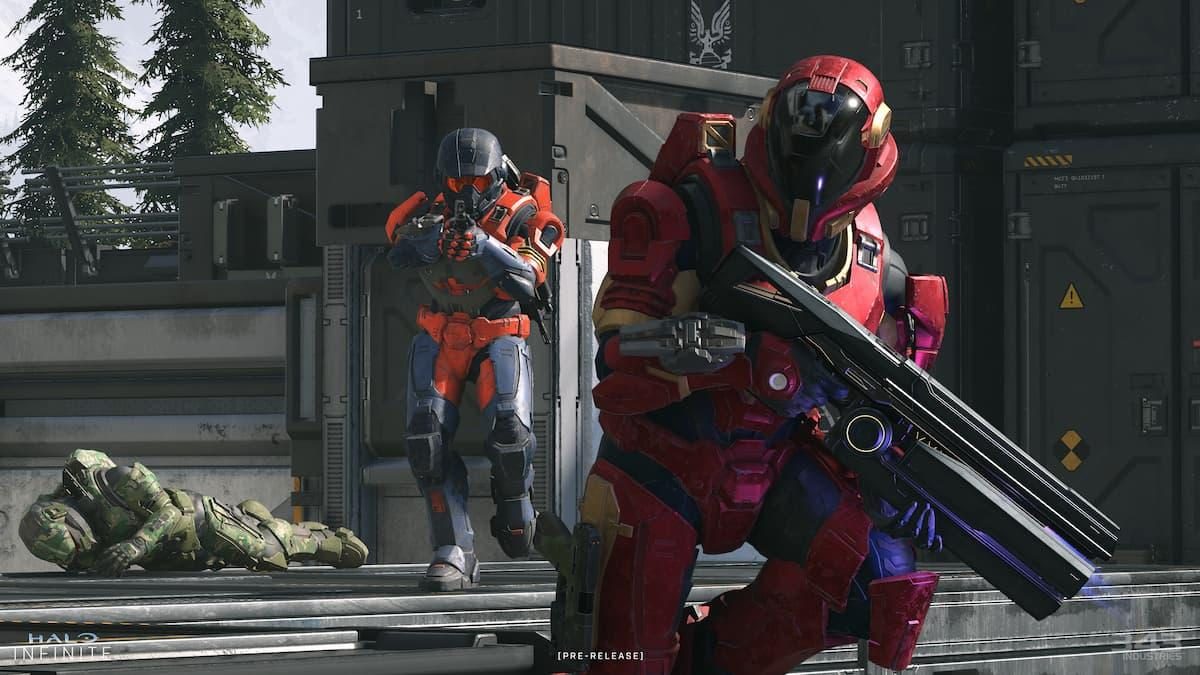
Promotional material and pre-release images created by and property of 343.
Pulse Carbine model posted by u/Glitch5970 in this Reddit post.
All other images found via an article by EarlyGame.
Halo Infinite, the Halo franchise, Spartans, and all game material property and trademark of 343.
Captain Price property of Activision-Blizzard and Treyarch Games.
Half-Life property and trademark of Valve Corporation.
Iconic Arms is the work of Ahoy/Stuart Brown.
Dead Space property and trademark of Electronic Arts.
More Guides:
- Halo Infinite: Multiplayer Weapon Damage Types
- Halo Infinite: Hidden Campaign Weapons
- Halo Infinite: Campaign Equipment Guide
- Halo Infinite: Achievement Guide
- Halo Infinite: How to Change Position of Your Weapons in First Person