Here are some general tips and tricks for the new Steam version of the MONSTER HUNTER RISE game.
MONSTER HUNTER RISE General Tips and Tricks
- At the start of the game, you will be hit with a lot of tutorials. Don’t worry! You can dip your toes into the game not understanding everything, then you can always reference hunter notes (or guides like this) later once you have a better grasp on things.
- Never, ever forget subquests. Always be working on subquests throughout the game, as the armor sphere rewards are important. Choose ones that you think you’ll complete within the next few quests; don’t sit on a bounty with a high reward if you won’t complete it for a while. You’re making the game much harder on yourself if you don’t keep a steady supply of armor spheres and keep your armor upgraded to a reasonable level. You don’t need everything maxxed out to succeed, but any level of defense boost is better than nothing.
- Hire lots of buddies early; you want to train a bunch and have them high level, ready to farm and dispatch as you unlock them.
- Some monster attacks are so dangerous, you need to DUCK AND COVER. That’s where the Superman Dive comes in! If you’re near a monster and have your weapon sheathed, start running directly away from the monster and hit the dodge button. You will leap into the air and flop ungracefully onto the floor. You are 100% invincible for the duration of this animation, which is immensely useful for the most dangerous attacks that large monsters will throw your way. Just remember these in order to pull it off:
- Your weapon must be sheathed.
- You must have enough stamina to dodge.
- You have to be running, facing away from the monster. This has a different animation than regular running.
- If you get hit hard enough to fall over prone to the ground, you are invulnerable until you get back up. It’s sometimes a good idea to not press anything and wait for the monster to finish attacking before pressing any buttons to get back up. This is not a perfect solution, though: after a few seconds you’ll automatically stand up, so if the timing is poor you’ll just get back up right into another attack.
- Don’t be afraid to quickly jump away to higher ground to get a breather, heal up, and reload/sharpen if things get too crazy to handle.
- If you’re at low health and close to camp, feel free to run back and get into the tent. It will fully restore your health, cure all status effects, sharpen your weapon, etc.
- Listen to Hinoa or Minoto as they talk to you. They may remind you to eat if you’ve forgotten to do so, or they may ask you to look into a special quest if you haven’t taken it yet.
- You can eat dango at camp during hunts if you forgot to eat, but the Kamura Daily Special won’t be available.
- Listen to your own hunter. They may shout lines like “It’s up to something!” to warn you when a monster is winding up a powerful attack.
- When fighting a monster and it runs away to another part of the map, don’t just run after it; prepare. Heal up, sharpen, reload. Sometimes it will be faster to check the map and fast travel to a camp closer to the monster than to go by foot. If you’re feeling cheeky, go to a nearby unrelated monster to mount it and bring it to the next part of the fight.
- If you are struggling against a specific quest solo, try doing it multiplayer. Don’t forget about the Join Request function; that’s what it’s there for. If you’re struggling to do a quest in multiplayer, try doing it solo. Trust me on this, a lot of difficult monsters can be easier to handle alone. Even though their attention is on you more often, they have smaller health pools and deal less damage, meaning less chance of deadly combos or one-shot kills.
- Don’t forget about endemic life while going through hunts. You’ll survive a lot more if you take a short time picking up spiribirds to increase your stats, and Hunting Helpers can turn the tide of battle in a pinch.
- Spiribirds are most likely to be found in higher elevations, so take the high route when seeking them out.
- You don’t have to sheathe to sharpen your weapon. While your weapon is out, simply use your whetstone or whetfish and your character will begin sharpening as normal. These are the only items that you don’t need a sword & shield to use while unsheathed.
- Avoid fighting in small, tight areas like corridors between zones. Try to keep the fight in large open areas to give you and your hunting party more room to maneuver around the monster. You don’t want to be holed up in a hallway of death should another angry monster or two come by.
- Pitfall Traps and Shock Traps hold a monster longer if they’re exhausted. If enraged, monsters break out of traps faster.
- Bring some flash bombs against monsters that like to fly out of reach. If you can get a flash in front of their eyes while they fly, it can cause them to fall to the ground, helpless.
- Fighting a monster over and over to get its materials? Mount another monster and use strong attacks on it; the extra monster drops on the ground might be what you need. It can also help to bring a Gathering palico or two.
- If you’re planning to use a bowgun at some point, pick up the free ammo in the blue supply box at the beginning of each hunt and deposit it in your item box in Kamura for future use. Just be careful if you’re in a multiplayer hunt; you wouldn’t want to steal the ammo from an actual gunner. That would be rude!
- If the supply box at camp gives you extra materials you usually don’t get, those are hints to exploiting the quest monster’s weaknesses or easy uses to environmental hazards. For example, if the box has poison kunai, the monster is weak to poison. If there’s EZ Raw Meat in the box, you’ll likely be fighting the monster in the water, and you can use the EZ Raw Meat to attract giganhas to attack the monster without having to bring your own.
- At some point in the game, the Power Charm and Armor Charm will be available for purchase from the merchants. Simply keep them in your inventory and they will provide a bonus to your attack and defense stats respectively. Later on in the game, you’ll fight a specific monster that drops something you need. By using item combination, you can combine the Charms with that monsters’ drops to create the Power Talon and Armor Talon, which have a stronger effect. These effects stack with the Charms, so go ahead and buy another set from the merchants. From then on, always keep the Power Charm, Power Talon, Armor Charm, and Armor Talon in your inventory, as they are permanent stat buffs.
- If you’re playing multiplayer and another player is stunned, asleep, or paralyzed, you can hit them to break them out of their status ailment early. This can save their life if the monster would have hit them otherwise.
- This game has auto-crafting: you can set options to automatically craft items when you pick up the raw materials out in the field. The game has most useful auto-crafting on by default, so from the beginning you’ll automatically craft potions out of herbs, for example. Keep this in mind if you realize you picked up an item but can’t find it in your inventory: you probably automatically crafted it into something else. Autocrafting has few downsides, as base ingredients rarely have other uses. If you find yourself needing an item that you’re automatically crafting away, you can always turn off that particular auto-craft in the options menu.
- Take a thorough look through the options; there’s plenty of stuff to customize, like having an outline of yourself while you’re behind a monster for visibility, or choosing how fast you mount your palamute.
- Disable auto-sheathe in the options. Despite the name, you’ll still sheathe automatically when attempting to run or use items. It just turns off sheathing when standing still for a few seconds.
- Customize radial menus. You can use items much faster if you become accustomed to the radial menu.
- Set up item sets to reduce down time between hunts. Save item sets after radial menu customization, as radial menu setups are tied to item sets.
- Try not to sell talismans. It’s recommended to hold onto them until you can recycle them into a possibly better talisman with Rebirth melding.
- Need more zenny? Don’t forget to sell those trade-in items! Go to your item box and select Sell Item. Hit the button to auto-sort your items (it’s a good idea to do that every now and then anyway). Go to the final page or two of your items; before all the scraps should be trade-in items. Their item descriptions will say that they sell for a high price. These have no other use except for selling for money. You might want to sell a few extra monster parts you probably don’t need, either. Have 25+ Rathalos Shells? You’ll never use that many; sell a few!
- Still strapped for cash? It’s time to go mining! Keep an eye on expeditions with “Locale Info: Upsurge: Mining Outcrops”. Go around on a palamute mining every node you can, gathering 9 ore with each hit rather than 1 or 2. If you have a maxxed out Geology skill (easy with low level armor or decorations), you’ll get 12! Just note that you only get 10 minutes before the upsurge expires. GaijinHunter has a great example of a route here. If you’re handy with the wirebug for traversal, you can take this more lucrative route. If you want variety, here are some more routes for each map.
- If you’re on the hunt for Kamura points instead, here is a map to gather account item nodes using a similar method to the zenny farm.
- To speed things up a little more, you can skip the end-of-hunt cutscene by being mid-air when it ends. The easiest way to pull this off is to hold onto a wirebug when there’s less than 10 seconds left.
- Not terribly useful, but you can attract a Rathian or Rathalos to your position if you pick up an egg from their nest.
- If you’re carrying a heavy item for a quest, you’re still able to use your wirebug to move around faster. Long gone are the days of dropping the egg accidentally while trying to move.
- Need an egg from a Gargwa? Sneak up from behind before attacking it, and it’ll lay an egg in surprise. You can use a kunai from a distance if you’re having trouble.
- Small insects such as Bnahbra and Altaroth have a high chance to disintegrate if killed, making it so you can’t carve them. They’ll have a higher chance of leaving behind a carveable body if you kill them with throwing kunai, and a 100% chance of leaving behind a body if you kill them with poison. Altaroths will leave behind extra items if you wait until they gather from a nearby area, in which case they’ll have a bright-colored sac.
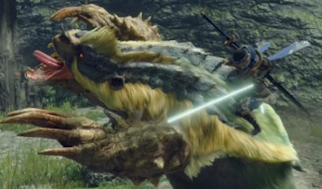
- Kunai deal cutting damage, so they are able to cut off monster tails. Take a few potshots while running up to a monster or when it’s unsafe to approach during a dangerous attack. You might just make the cut.
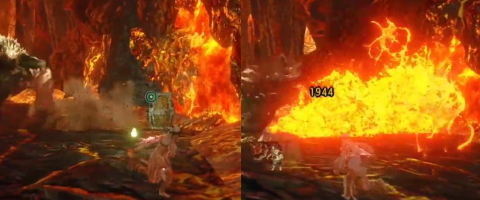
- While in the volcano area, you can make good use of the geysers embedded in the walls. Place a bomb next to one, then detonate it while a monster is nearby to deal heavy damage, knock it over, and inflict fireblight or waterblight to it.
- Rock Lizards, Boulder Lizards, and Scale Lizards only provide one piece of loot when kicked or directly attacked. You can get up to three items if you throw kunai at them instead.
- If a Diablos charges at you and hits a wall or pillar, it can get its horns stuck, giving you an opening.
- Remember the Felvine option in the Action Bar during hunts! It will tell your palico to use felvine and make them much more active. They will use their skills faster and they will attack more ferociously for a while.
- Don’t forget you can use items while riding on your Palamute. You can sharpen or heal up while chasing a monster as it runs. You can also ride mid-fight to heal up while still being able to dodge attacks.
- Your palico can tell you when a monster is ready for capture, even before the blue skull icon appears.
- Multiple monsters can be hit by the same trap if they’re close enough together. This can give you a good opportunity to lock them in place to attack both at once, or even capture them at the same time.
- You can throw small bombs and baits by using them while aiming as if you were going to use the wirebug.
- If you use barrel bombs while in the air, you will throw them straight down and they will detonate immediately on impact. It’s a neat trick to style on a monster during a fight, or give you extra airtime while traversing the map.
- You can get more distance mid-air by rolling between each wirebug jump.
- You don’t have to spam the button to carve a monster; holding it down will allow you to continuously carve.
- Your whetstone is infinite use, so feel free to sharpen whenever you like, as many times as you like!
- You may find some small, closed-off areas while exploring that, if you approach, the game will tell you that you have discovered a good spot for a subcamp. Once you go back to town, Kagero the Merchant will offer you a request that, when completed, will add a tent to that area and allow you to fast travel there during hunts. Here[i.imgur.com] is Azilorn’s guide to all sub camp locations and unlock criteria.
- You’ll get Kamura tickets at regular intervals by completing villager requests and rampages. They are used to craft unique weapons and armor.
- Items out in the field respawn every 4 minutes.
- Watch out for aggressive felynes out in the field. They’re called Melynx, and if they successfully hit you, they will steal an item and try to run away. You get it back if you attack them, but if they successfully flee, you have a second chance by going to the Melynx’s home on the map and picking it back up at the location marked “Melynx’s Gatherings”.
- These quests unlock particularly important features and can be missable if you’re only focusing on the story, so keep an eye out for:
- Only the Good Eggs – Unlocks Dango Insurance
- Cultural Exchange – Unlocks second Argosy (farm) slot
- Economic Stimulation – Unlocks third Argosy (farm) slot
- If you see requests that reward weapon designs, those are unlocks for new weapons to craft at the smithy.
- Tired of hearing the same music while wandering around? Talk to your housekeeper; they have an option to change the background music that plays around different parts of town.
- If you progress through most of the village quests, you are able to take on Special License Test quests which will grant you the ability to skip low rank online progression.
- You can view all cutscenes you’ve already seen by talking to your housekeeper.
- You don’t unlock anything special by completing all LR or all HR quests.
By ̧҉ ҉Minorou ꧁💀꧂
More Guides:
- MONSTER HUNTER RISE: How to Choose Your Weapon
- MONSTER HUNTER RISE: Runner’s Sandals Achievement Guide
- MONSTER HUNTER RISE: All Endemic Life Locations (Rare Creature)