Welcome to my achievement guide for Harvestella!
Storyline
 The Adventure Begins
Complete Chapter 1
 A Chance Meeting
Complete Chapter 2
 An Abnormality in the Seaslight…
Complete Chapter 3
 Suppress Welt Geist
Complete Chapter 4Use Orange Juice (if available) to cancel out Poison from the FEARs.
 Outside of Eden
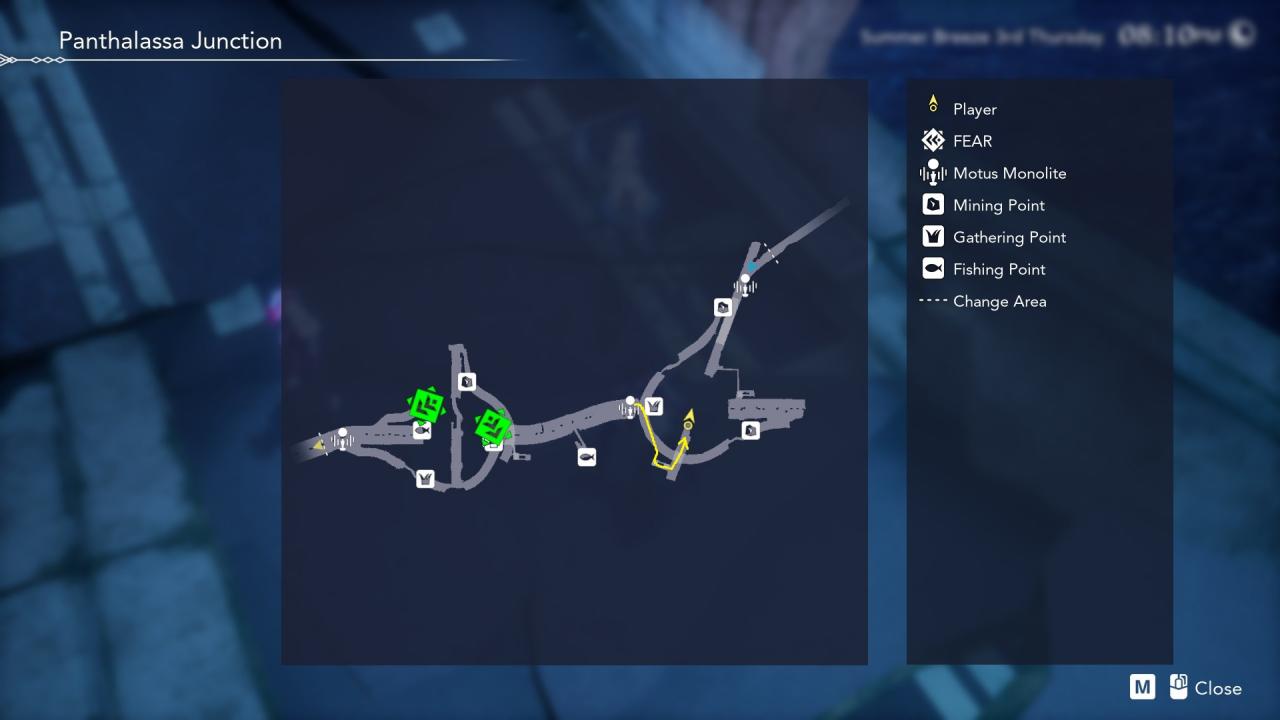
Complete Chapter 5One of the Faerie Orders is to repair 39 locations, so having enough Repair Kits will help you obtain a Faerie Stone required for the Aristotle secret job. Keep note of how many Sturdy Screws you get. If you just zoom past Castle of Illusion and Panthalassa Junction you may get bottlenecked by L2 Repair Kits. The crafting table ingredient inspection will suggest Castle of Illusion to farm, but disregard this as the Hornets there are spread too far apart. Instead, farm your Hornets in Panthalassa Junction. There are more Hornets and easy access to a Monolite.
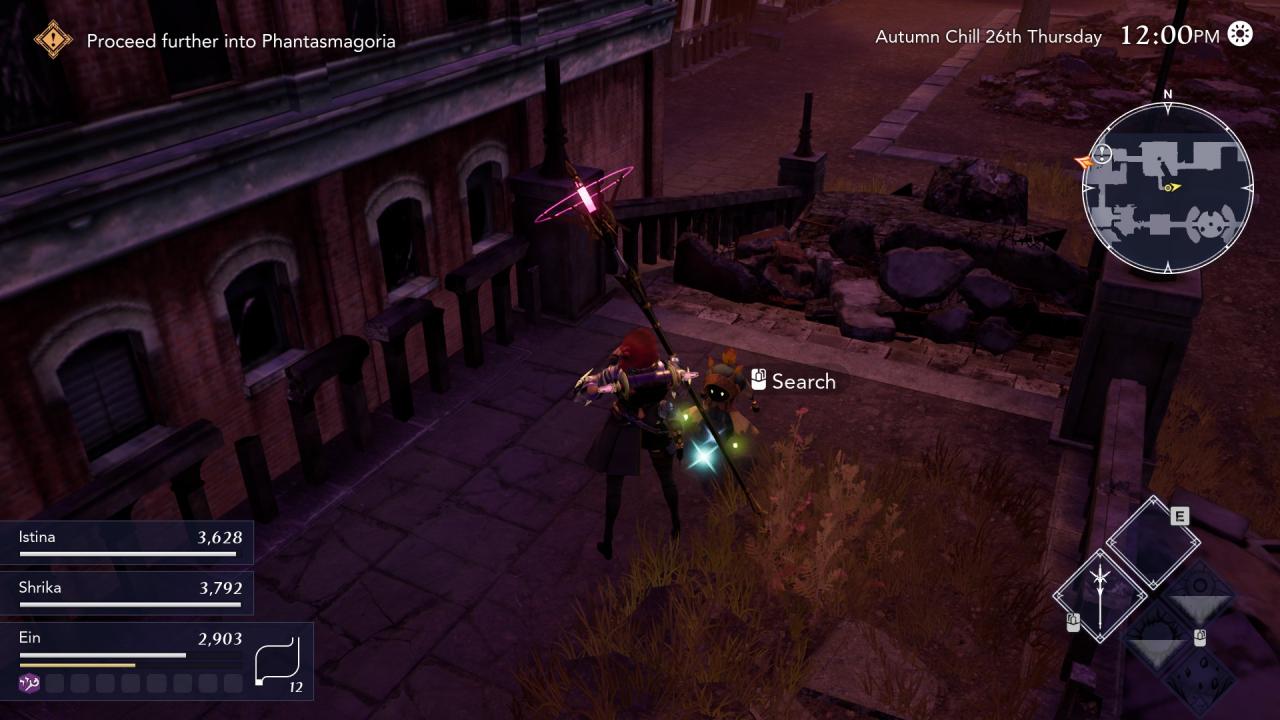
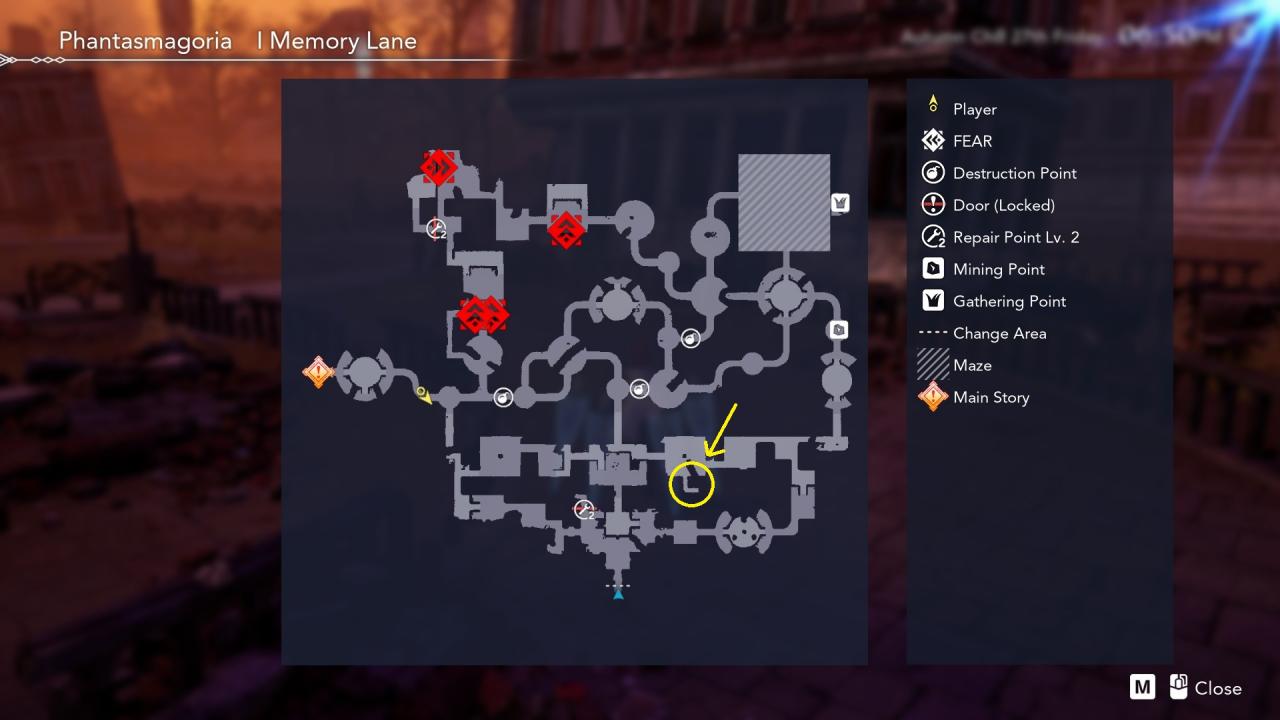
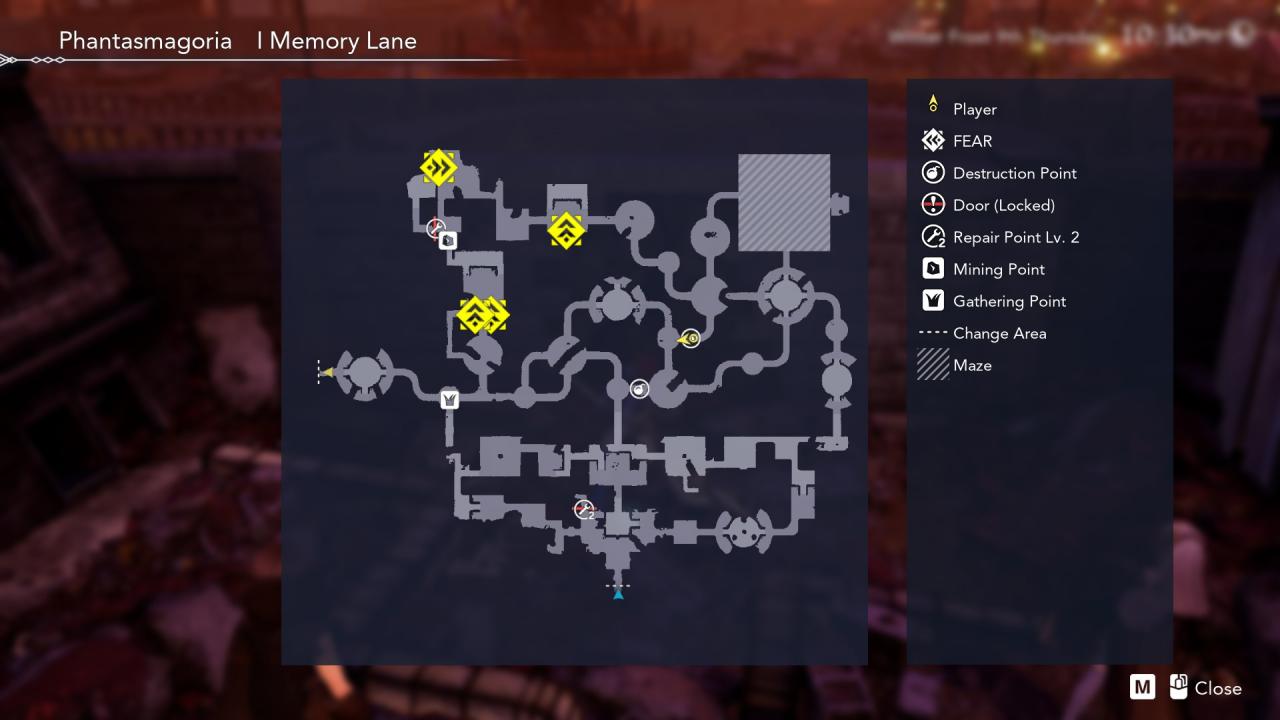
I usually only get 2-4 per day from Panthalassa Junction so if it’s still early in the day, proceed to Phantasmagoria which has Red Jackets that also drop Sturdy Screws. It will help if you blow up the walls first. I usually only do the first area of Phantasmagoria (I Memory Lane), but if you have time, the next area is great for Hornets too.

Complete Chapter 6
 Goodbye
Complete Chapter 7
 The Moment of Decision
Complete Chapter 8
 Beyond Aporia
Complete Chapter 9
Try to leave the room. Argue with Geist and suggest getting rid of Quietus.
 A World Without Quietus
Complete Chapter 10
Benevolent & Problem Solver
 Good Communicator
Improve closeness 5 times
 Benevolent
Reach maximum closeness with everyoneThere are 10 people you need to Improve Closeness with (8 of which are your party members). Improving closeness generally just consists of triggering a cutscene indicated by a blue quest marker that appears after you get mail from the character or someone close to them. There are benefits to improving these as early as possible:
- Aria (+10% Break Gauge Fill Rate; +10% Critical Hit Rate)
- Cres (Crafting Materials)
- Unicorn (Crafting Materials/Cooking Ingredients)
- Emo (+10% Magic Defense; +10% Physical Defense)
- Heine (+20% Physical Attack)
- Asyl (+10% Physical Attack; +10% Physical Defense)
- Istina (+20% Critical Hit Rate)
- Brakka (+20% Break Gauge Fill Rate)
- Shrika (+20% Magic Attack)
- Dianthus (+10% Magic Attack; +10% Magic Defense)
 Exchanging Vows
Exchange vows with a partner
After beating the story, wait a few days and the Mayor will drop by your home with the recipe to craft a Promise Ring. Craft one and decide on who you will give the ring to and Juno will mail a letter for you. Wait a few more days to receive a reply and the corresponding time for the event (and achievement).
 Good-Natured
Complete 5 quests
 Problem Solver
Complete all quests
Lethe Village
- Milika’s Secret
- Van and Vent’s Top Secret Mission
- Friends Forever
- A Voice from the Well
- The Mayor’s Pen Pal
- The Suspicious Letter
- The Haunted House
- Soldier of Misfortune
- Waiting for the Day
Shatolla
- The Bartender’s Secret
- The Bartender’s Secret: Another Round
- The Bartender’s Secret: Last Order
- Get that Sahagin!
- Shatolla’s Crisis
- Lights Out
- Sins of the Lighthouse Keeper
- A Light for the Future
Nemea
- The Hidden Doctor’s Expedition
- The Truth Behind the Mischief
- Return to Sender
- Two Secrets
- The Missing Wife
- Homecoming (Njord Steppe)
Chain Quests (Multiple Locations)
- She Who Wants to See the Sea
- The Consequences of Escape
- Memories Restored
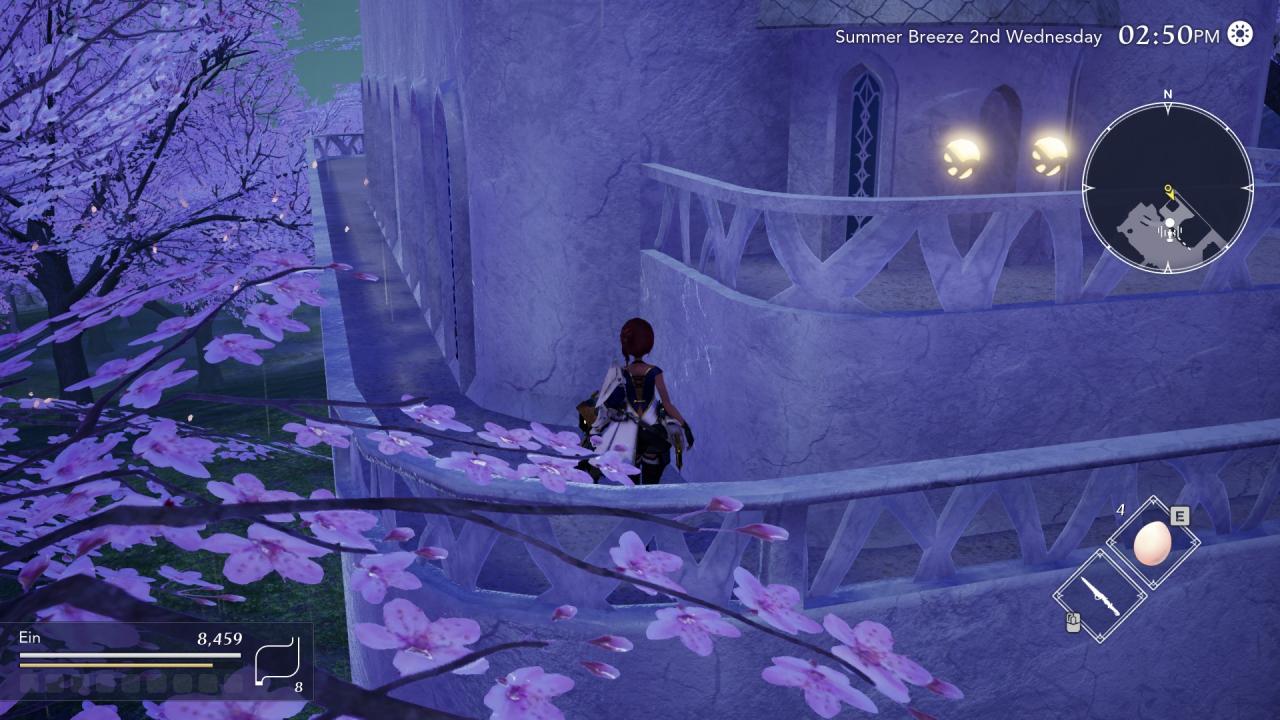
- The Cherry Blossom’s Tricks
- We’ll Meet Again
Argene
- Punctilious Parents
- A Lie Turned Truth
- The Woman Who Gathered Snow
- Good Intentions Pave the Road to Hell
- To Keep Me Warm
- You Shall Not Pass
- The Capital Inn’s Secret
- Mr. Coco’s Secret
Castle of Illusion
- Over the Wall
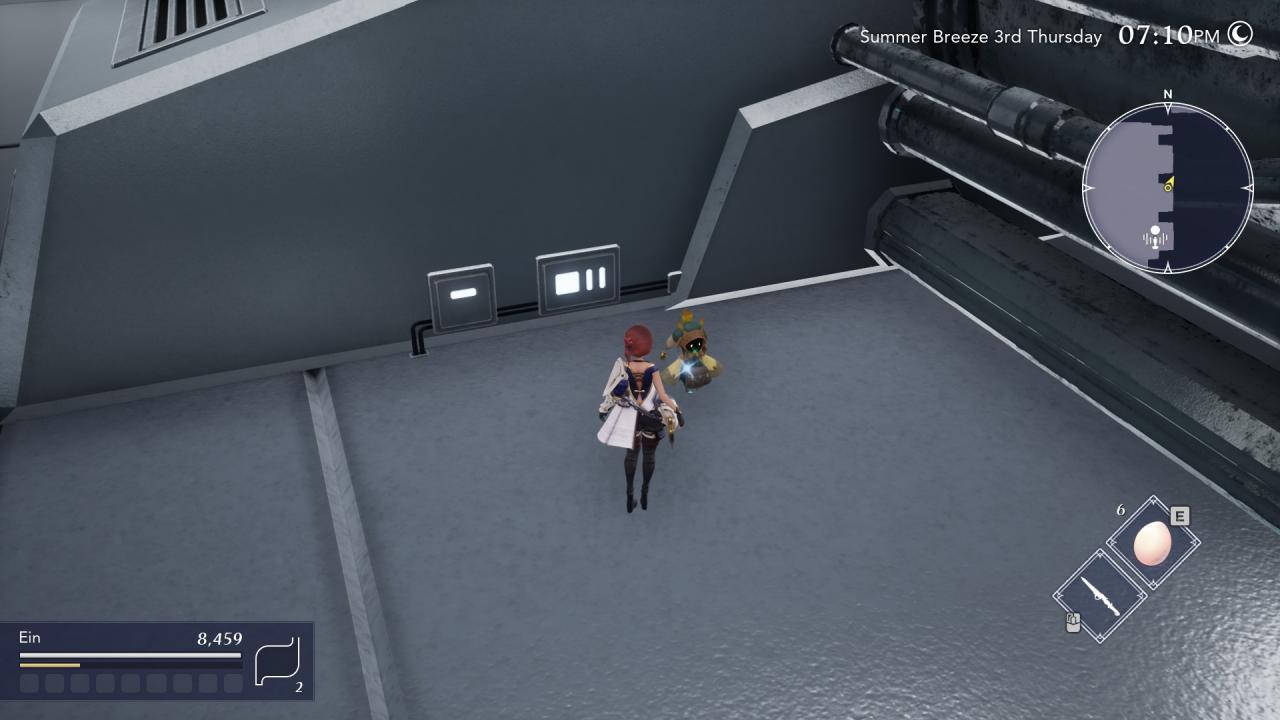
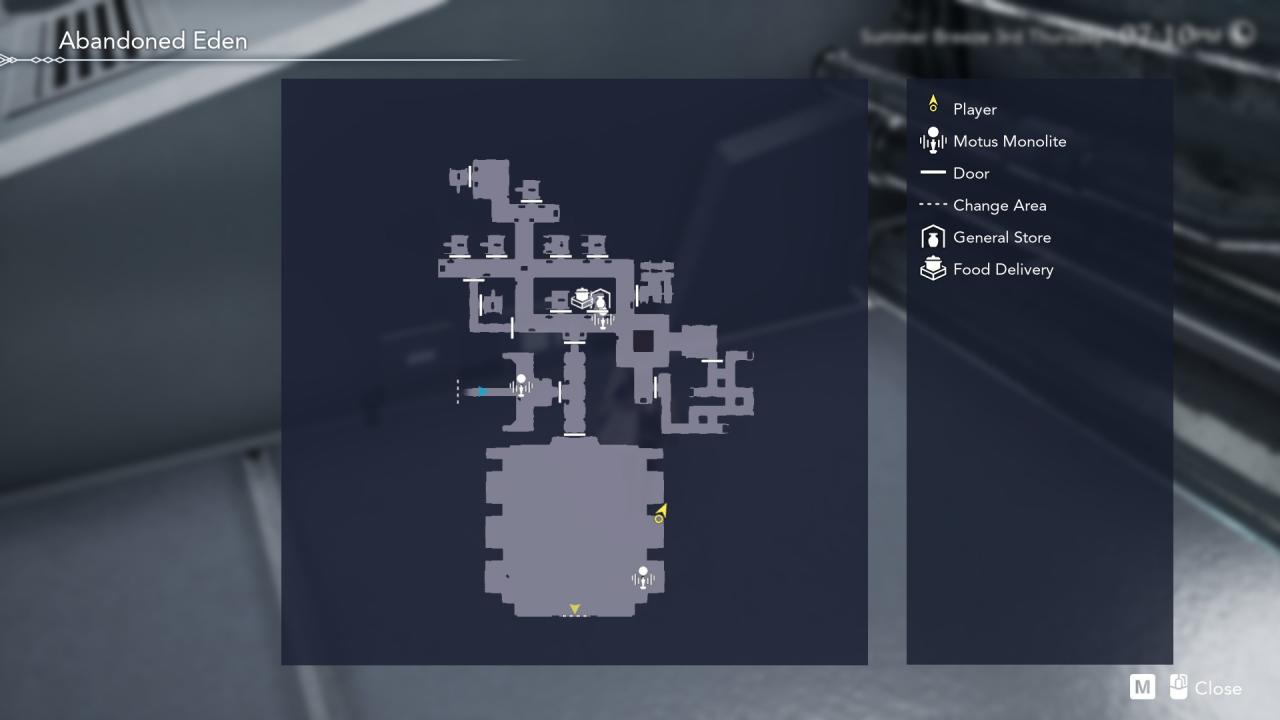
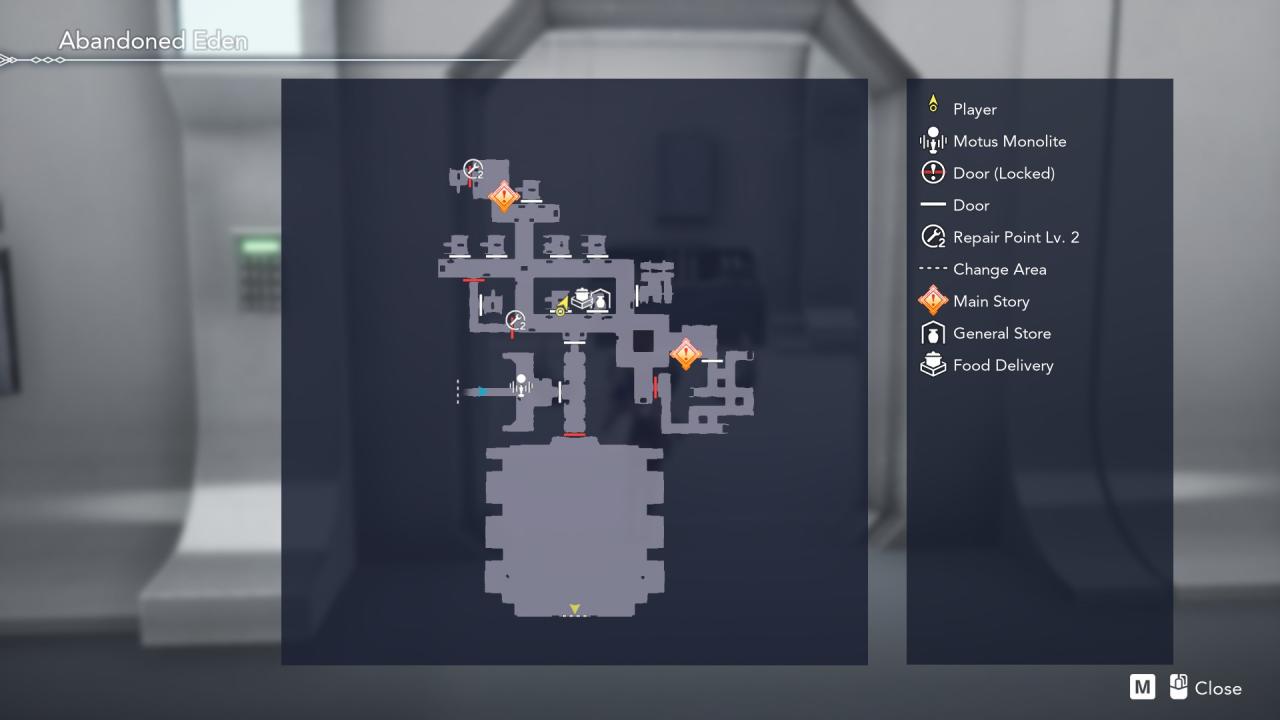
Abandoned Eden
- Take me to ReGaia!
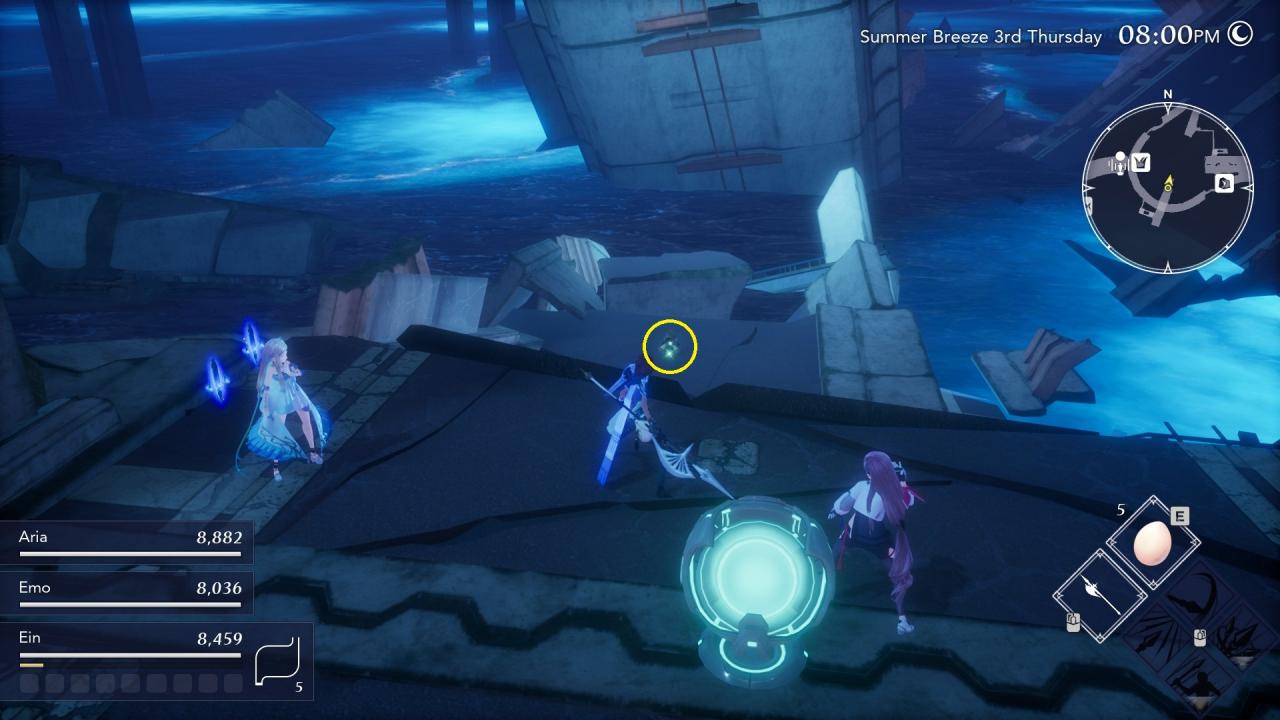
Panthalassa Junction
- Toodle-Loo, Humans
On top of the 36 quests mentioned above, ALL blue quests (Closeness) count towards this total. I got the Problem Solver Achievement after maxing Closeness with my final party member—Aria.
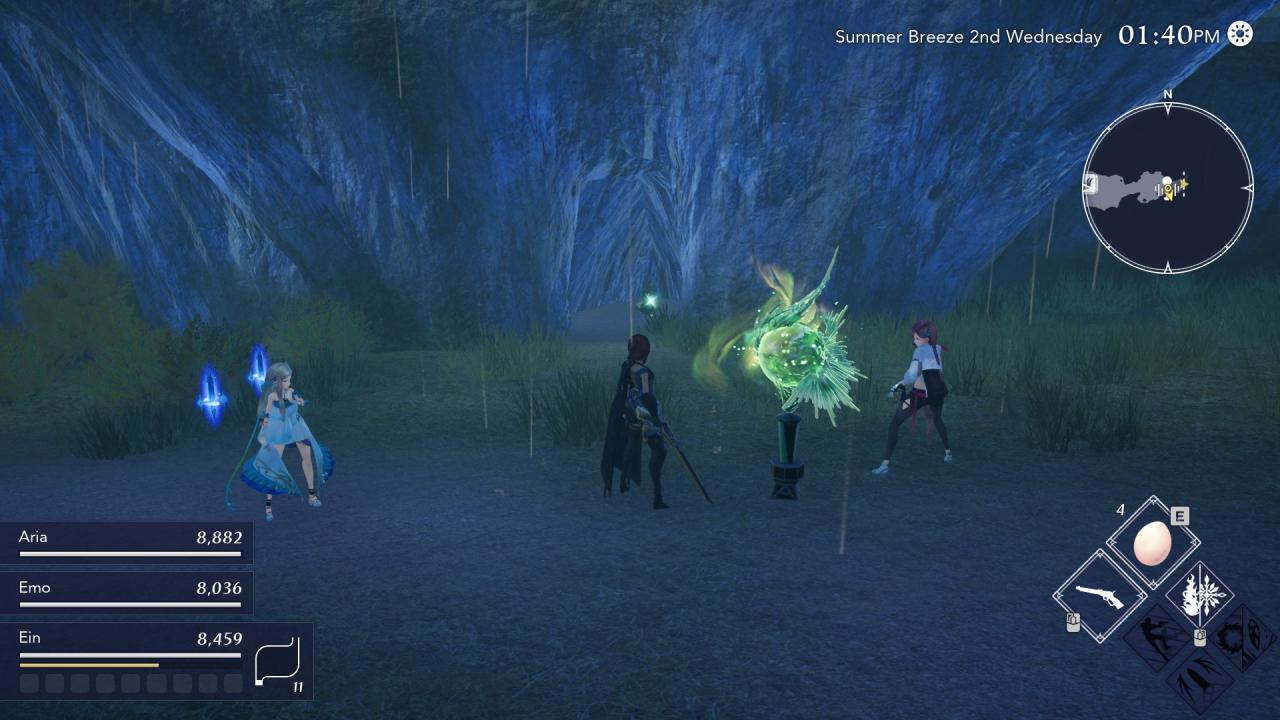
Conellu Mania (All 40 Locations)
 Conellu Collector
Collect 10 Conellu Dolls
 Conellu Mania
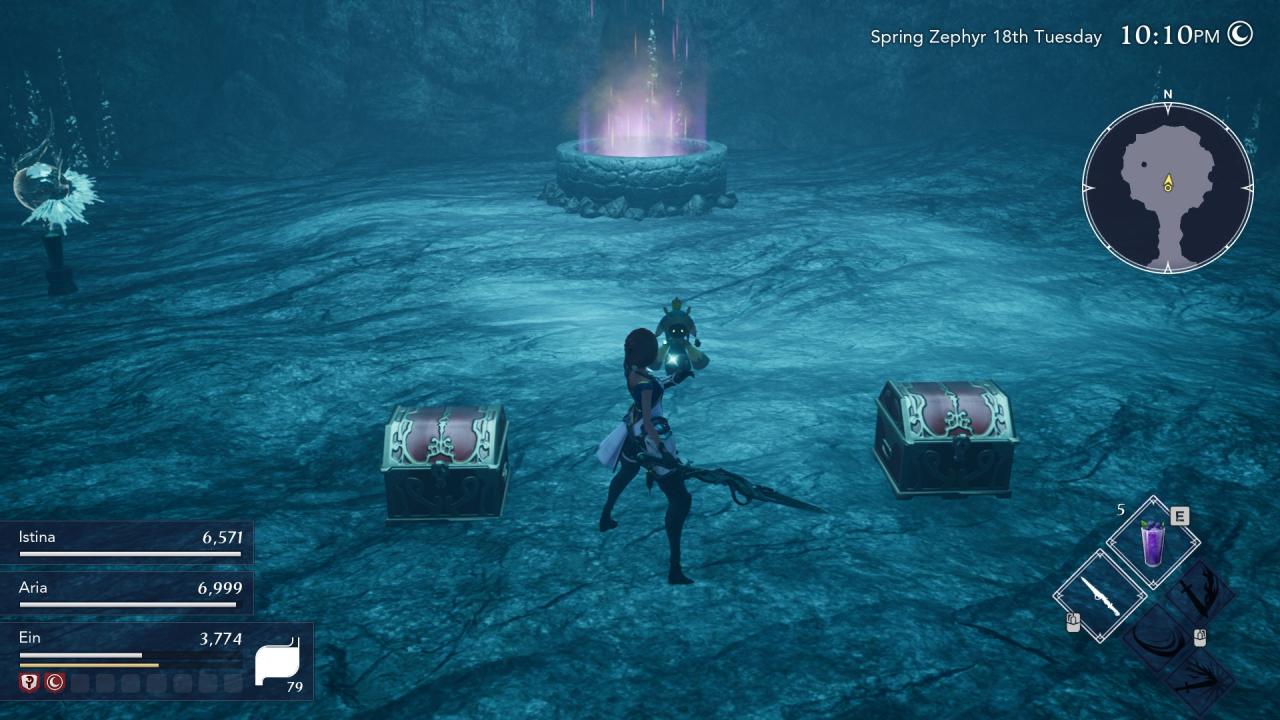
Collect all Conellu DollsNotable rewards for the dolls:
- 15 dolls – Accessory Snythesis Jar (combine rings)
- 25 dolls – JP UP IV Ring (great combined with another JP ring accessed via Totokaku)
- 30 dolls – Feed Maker Lvl. 3 (super useful)
- 35 dolls – Ring with Status Resistances
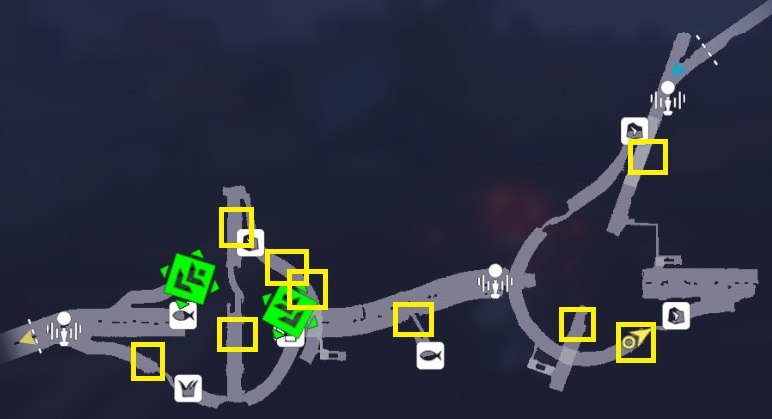
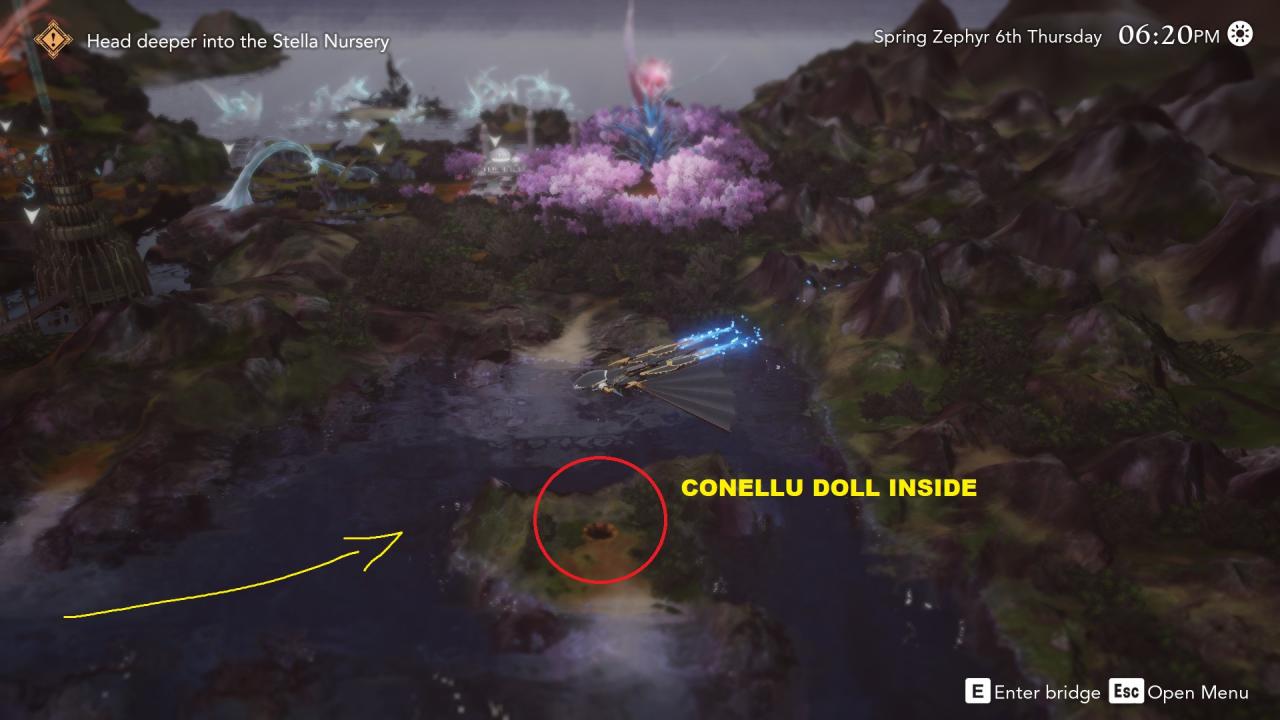
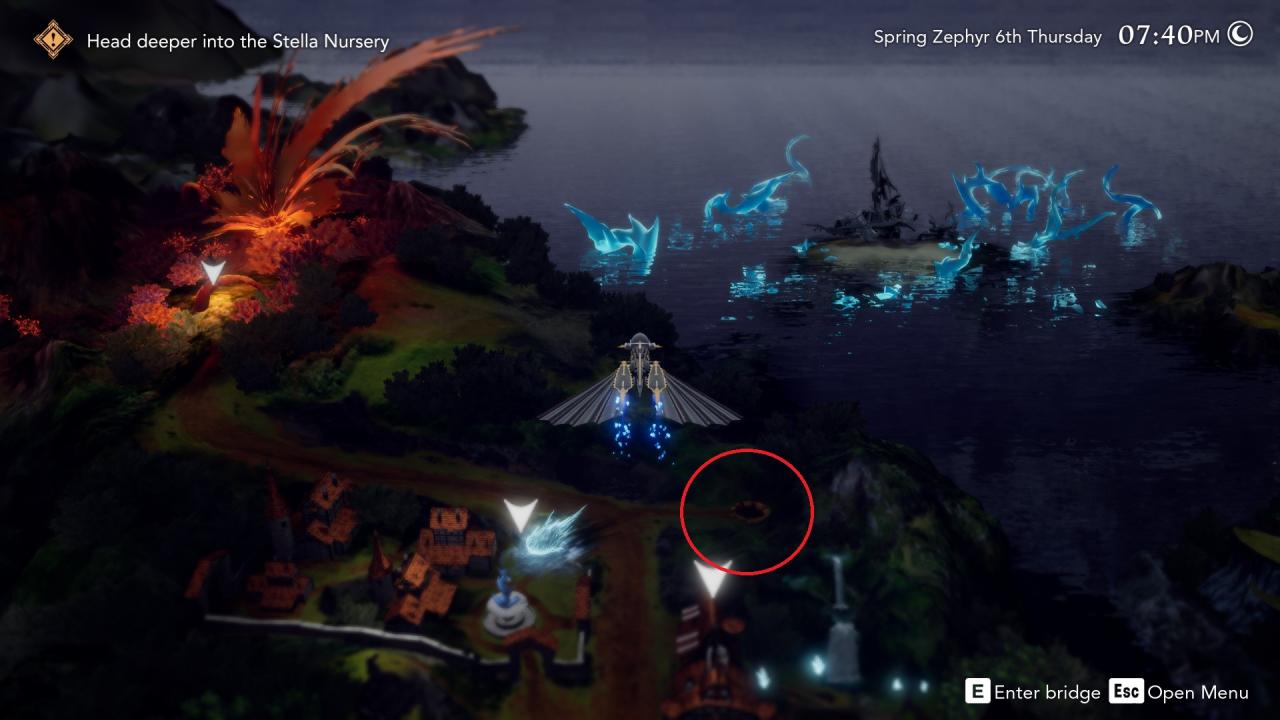
Here are the locations of all 40 dolls:
#1 Behind the L1 Bomb wall.
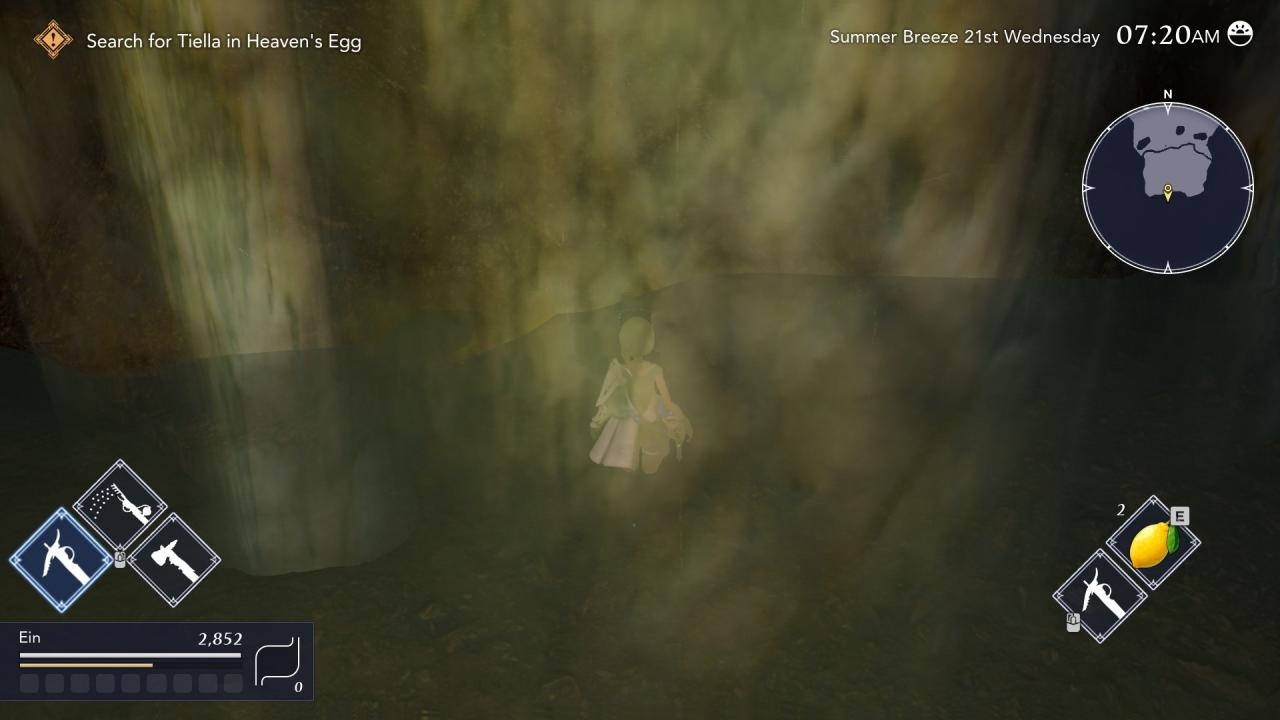
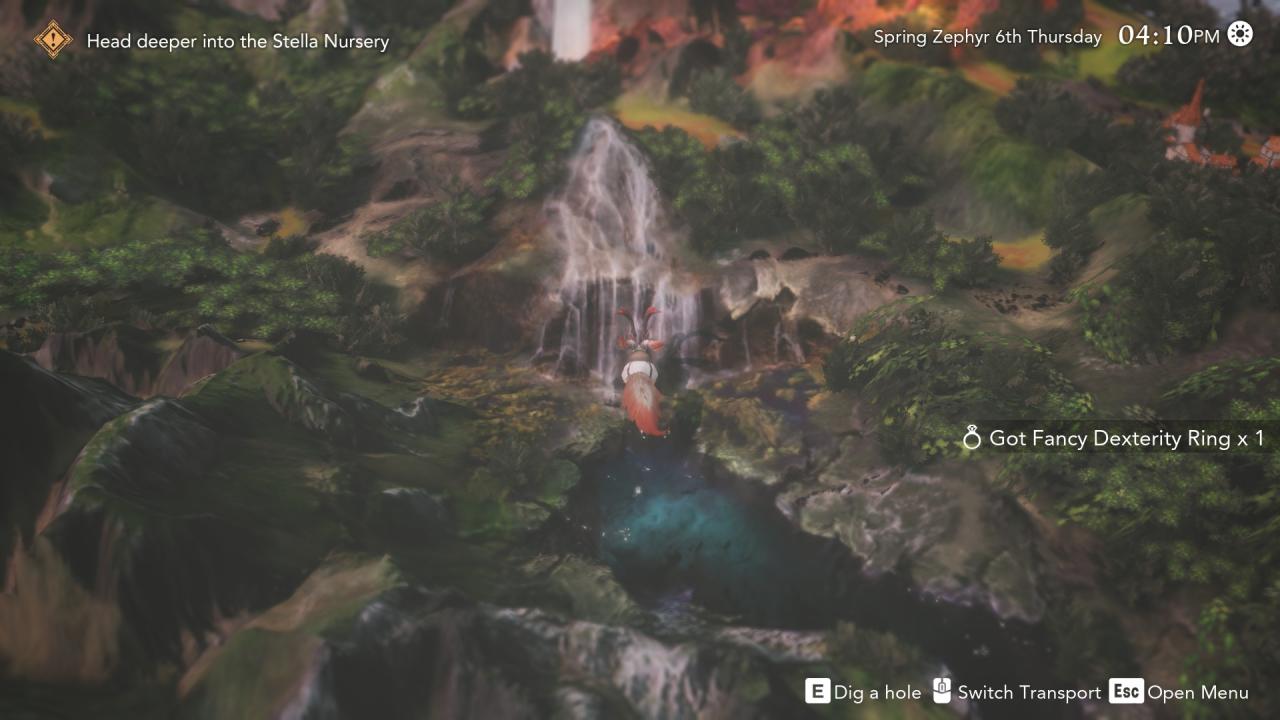
#2 Behind the waterfall in the cave biome.
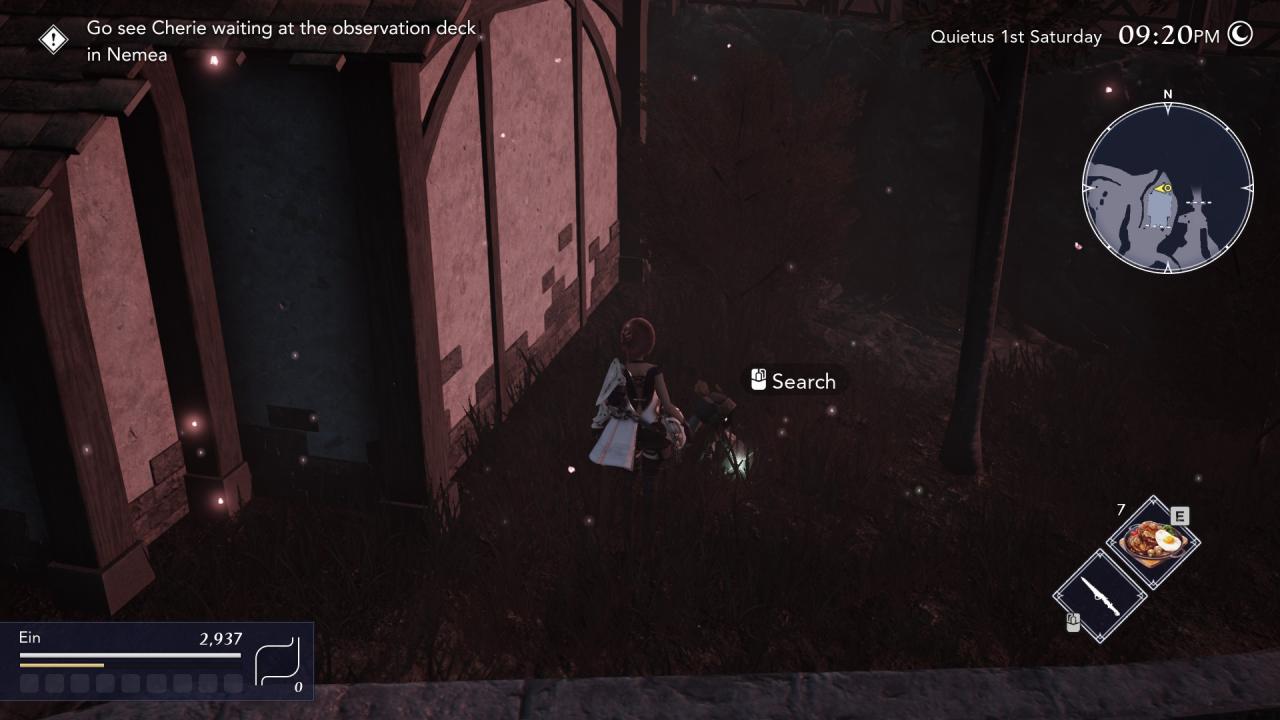
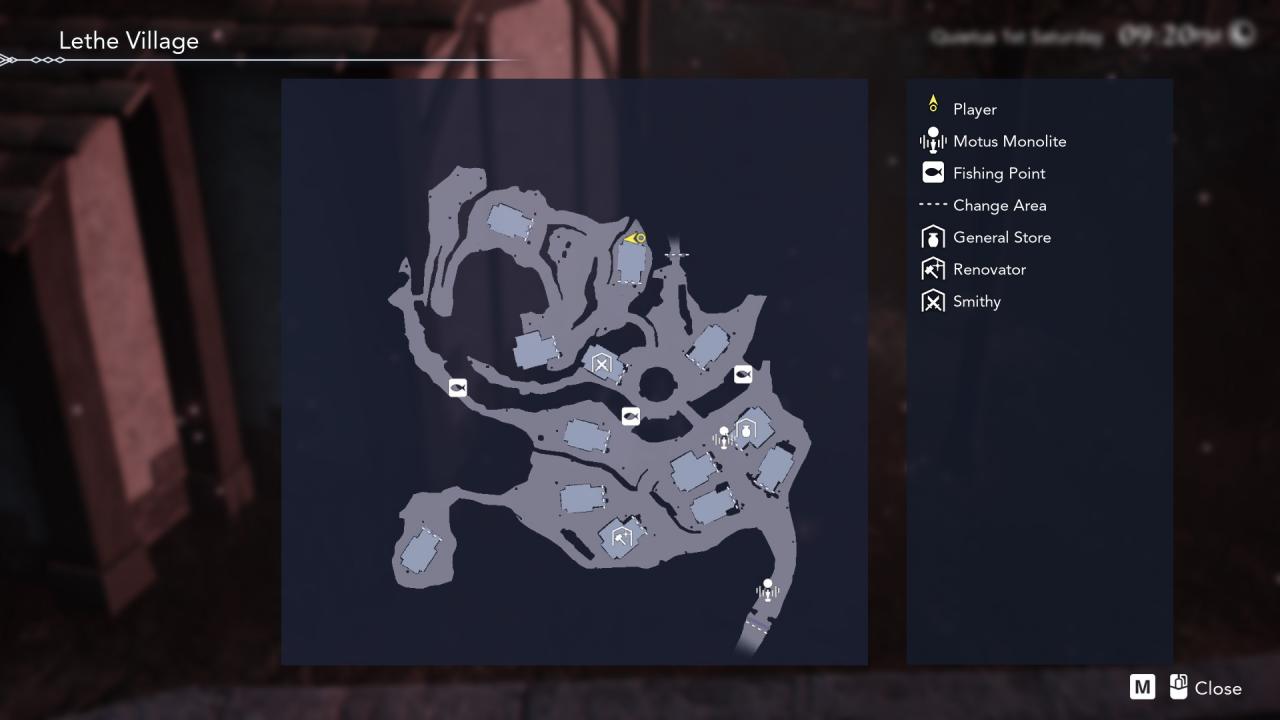
Behind the house directly behind the Conellu’s shop.
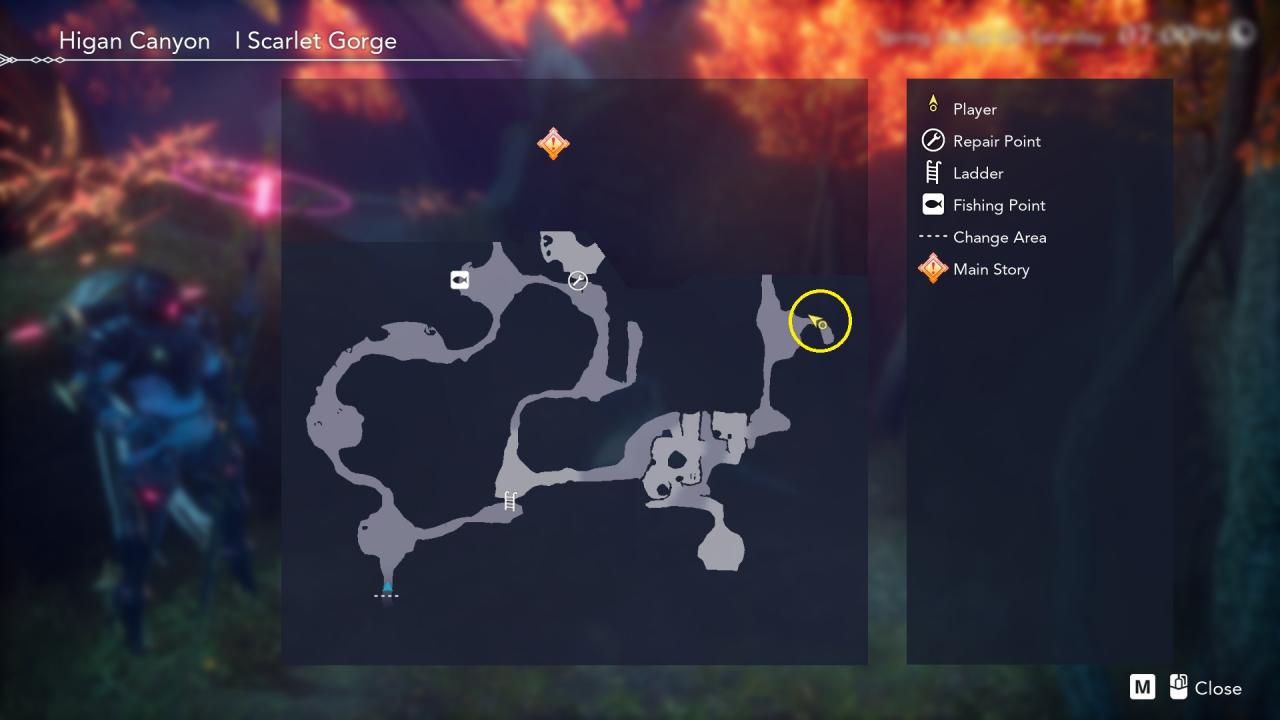
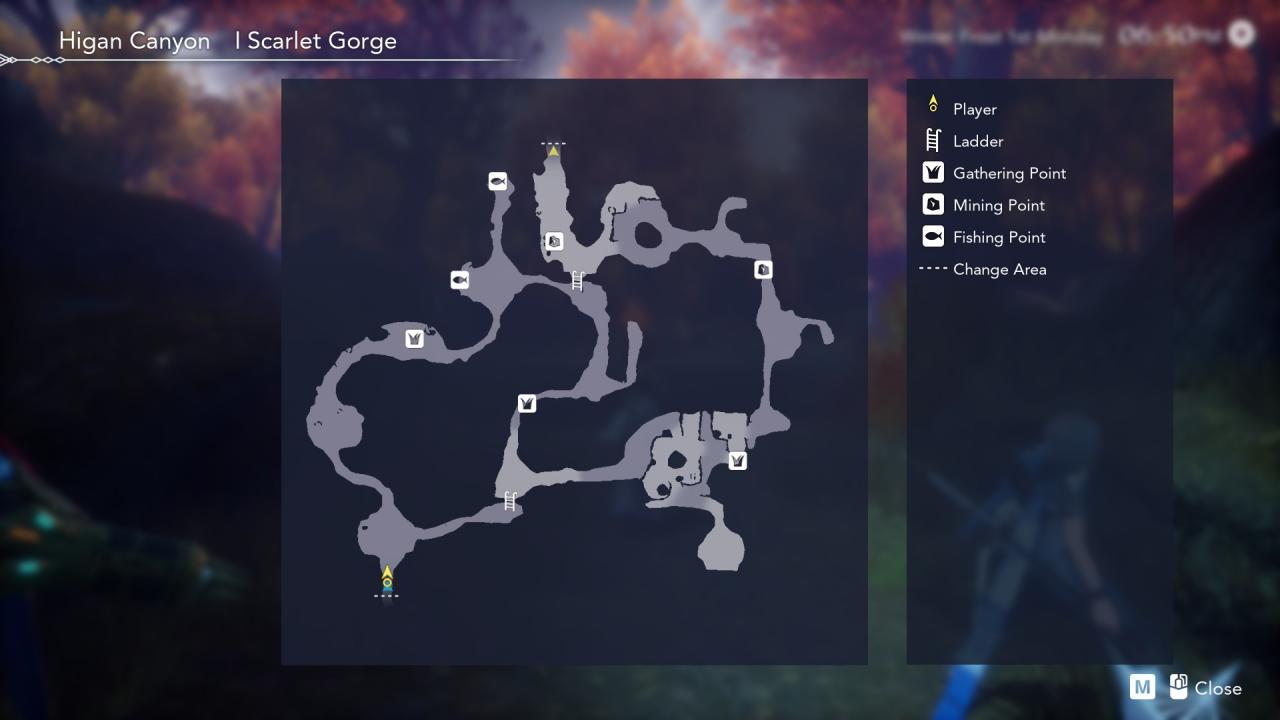
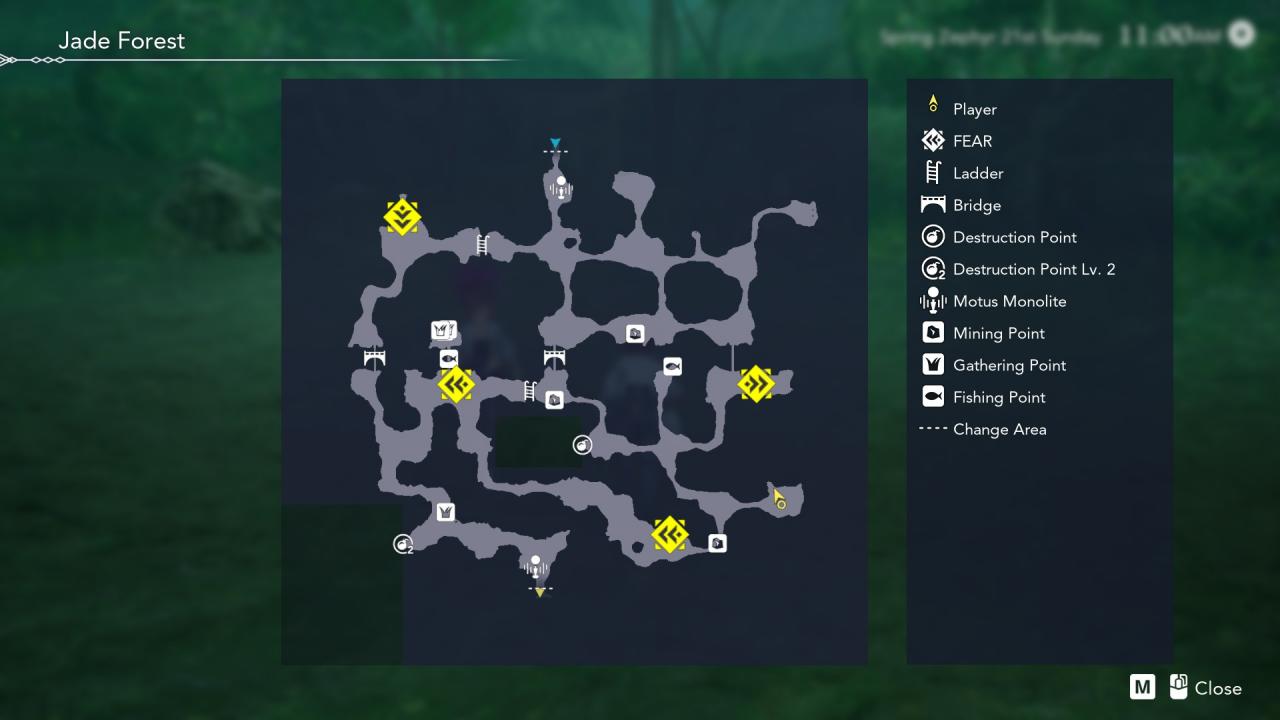
#1 I Scarlet Gorge
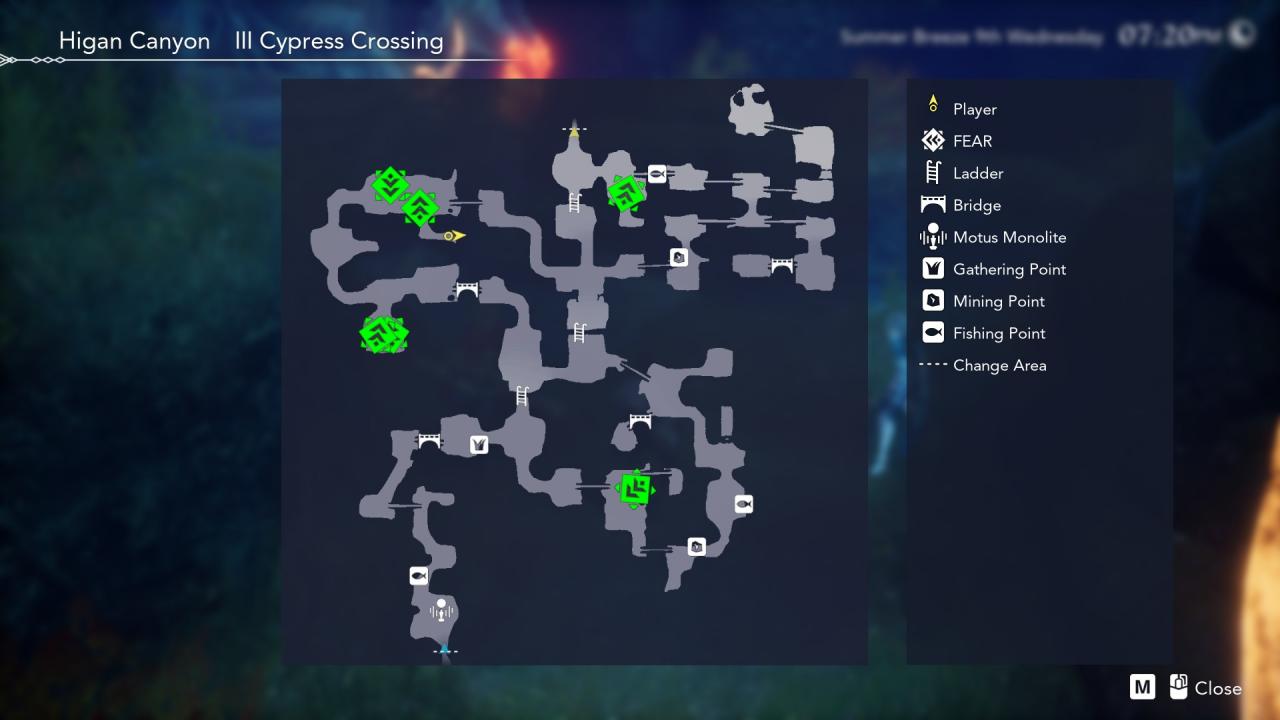
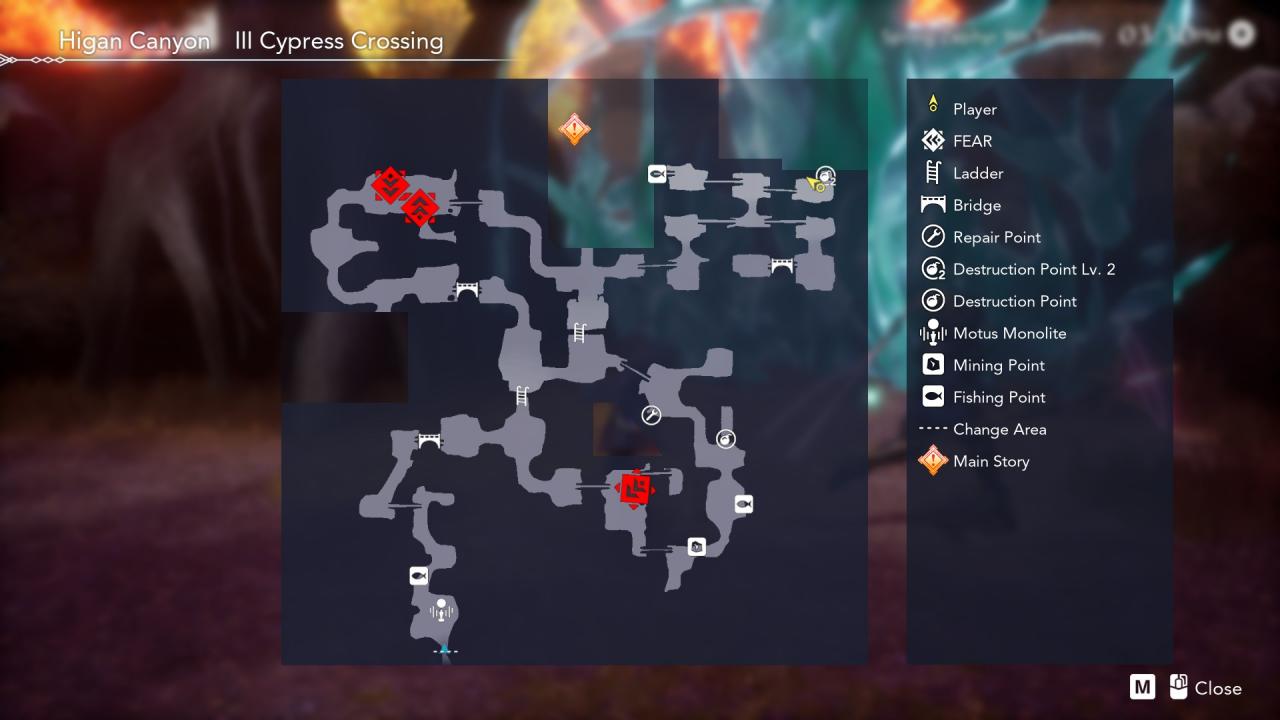
#2 III Cypress Crossing
In a crevice beside the Nemea side Motus Monolite.
Accessible behind the Orphanage through a very narrow passage.
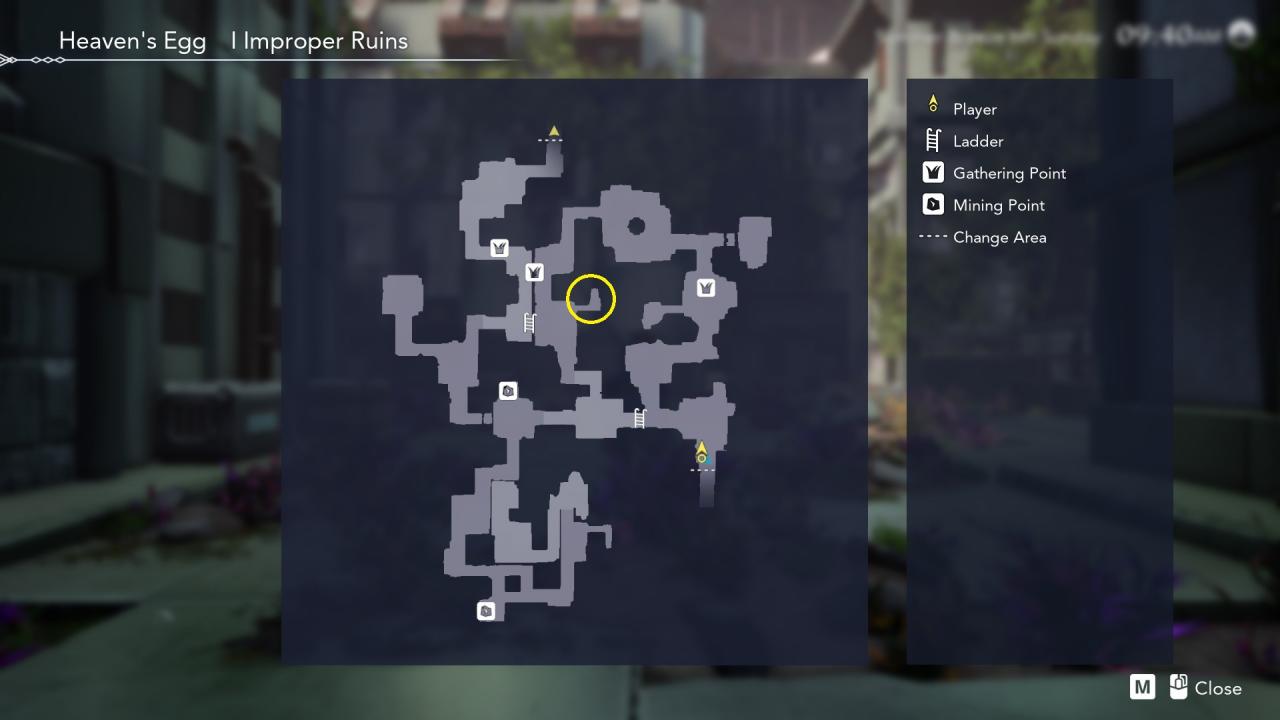
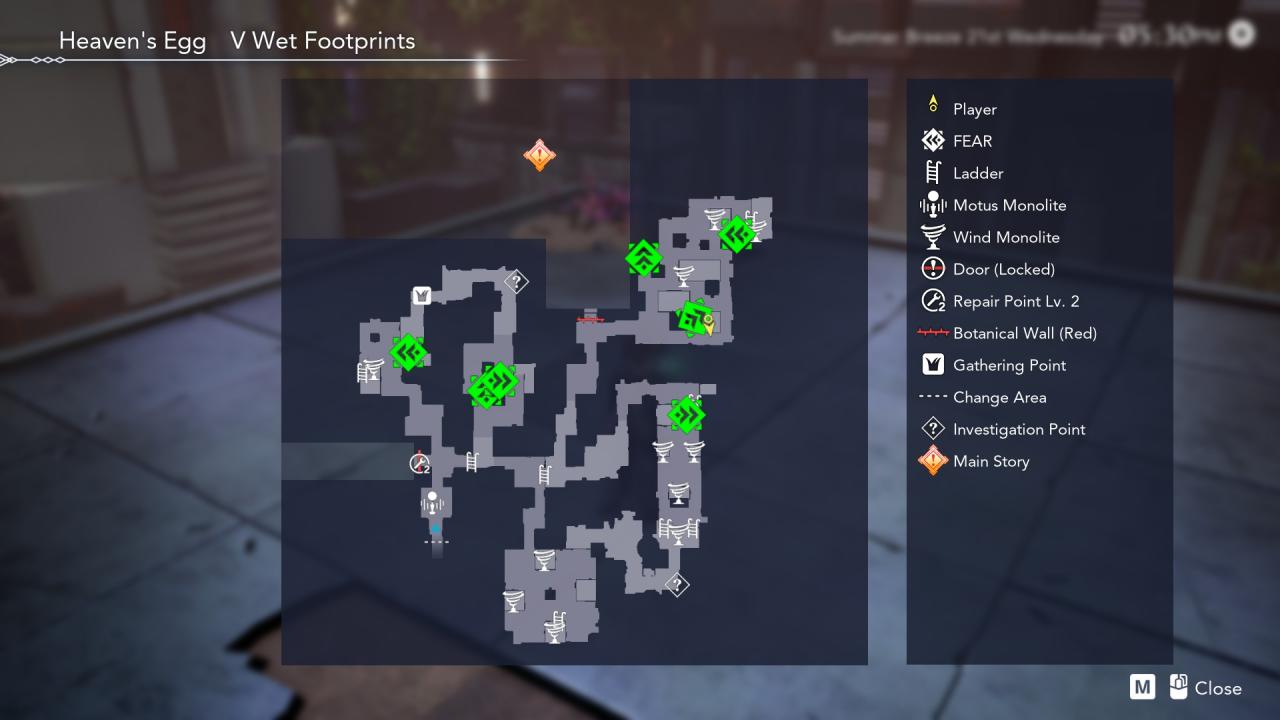
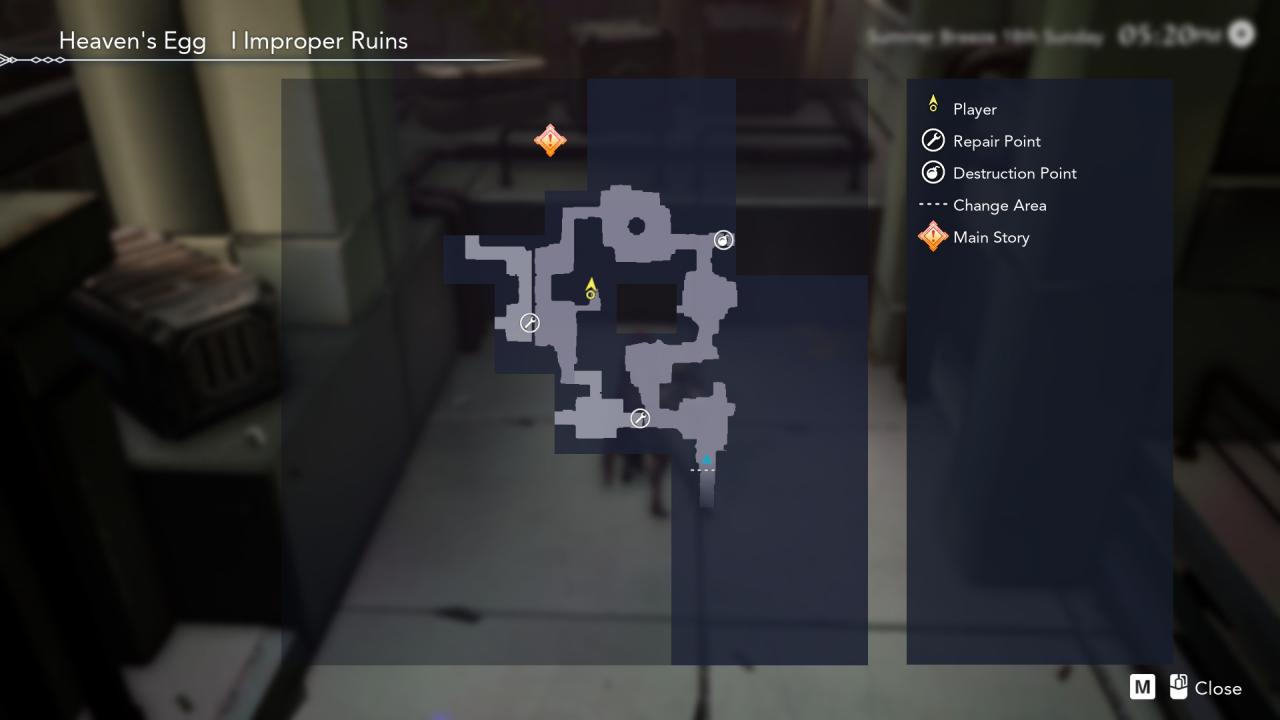
#1 I Improper Ruins
#2 III Mutant Vegetation
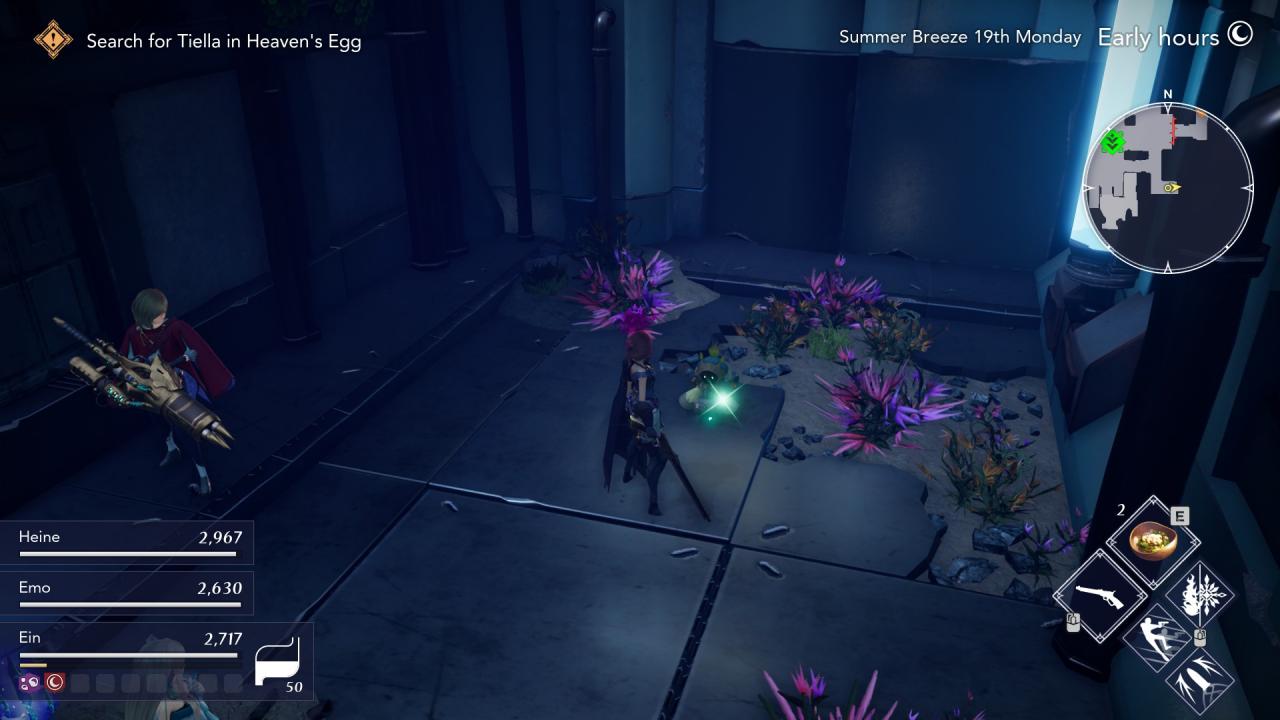
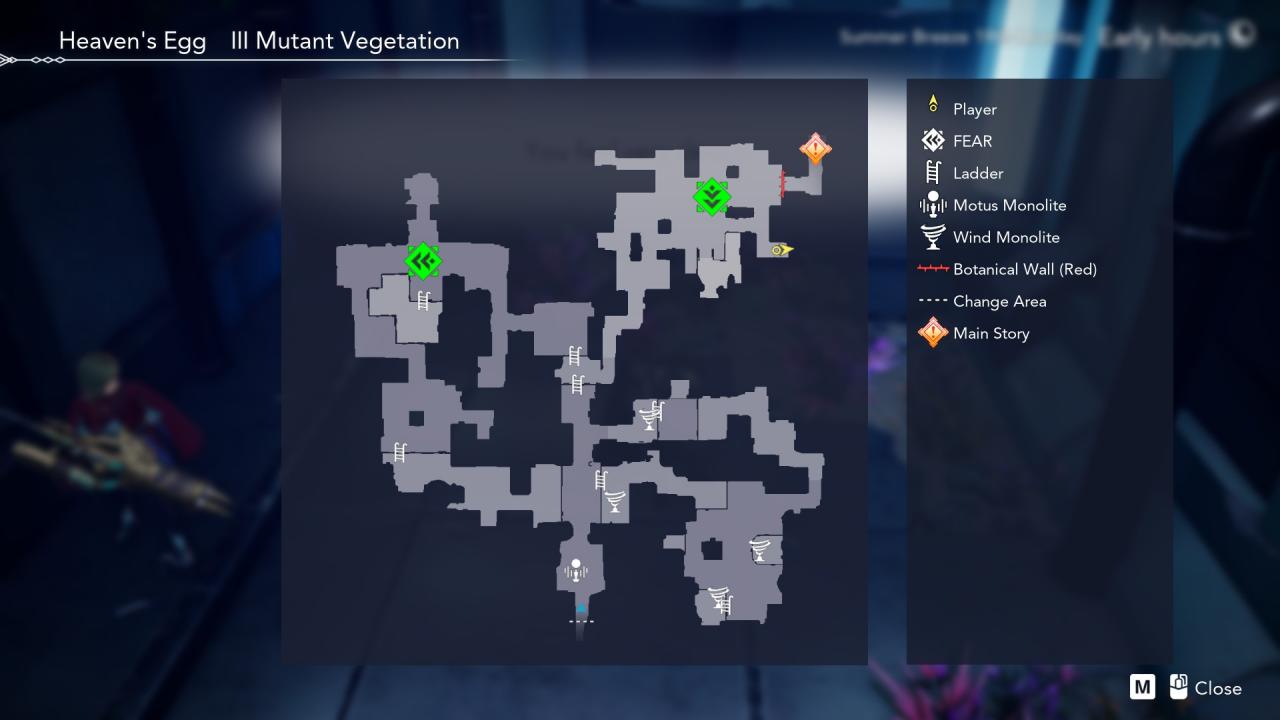
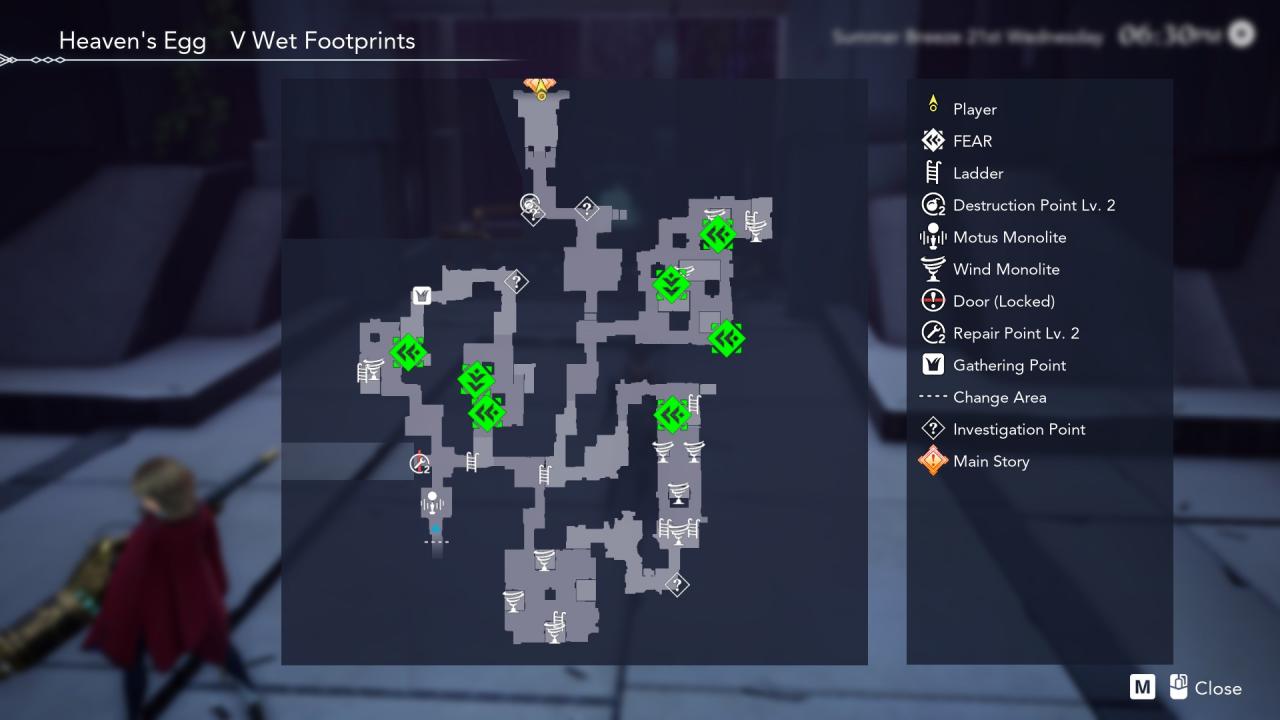
#3 V Wet Footprints

East—patrolled by FEAR.

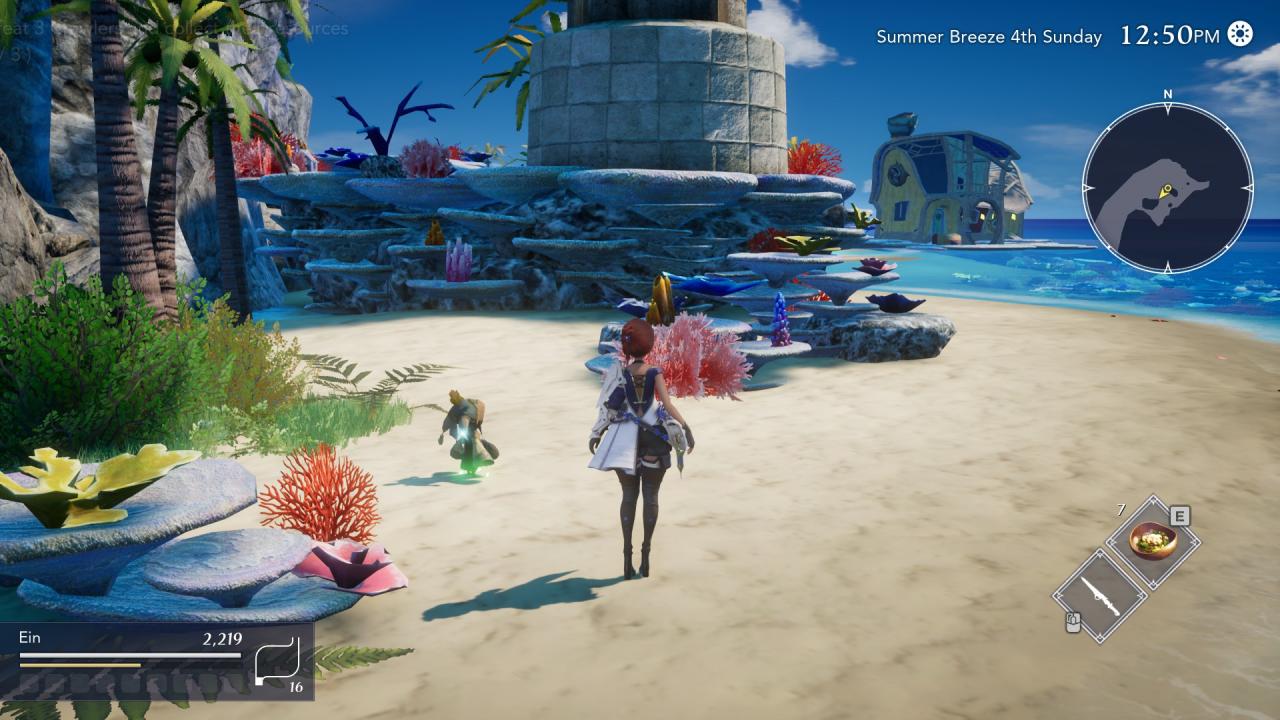
North along the coast. Visible from the lighthouse.
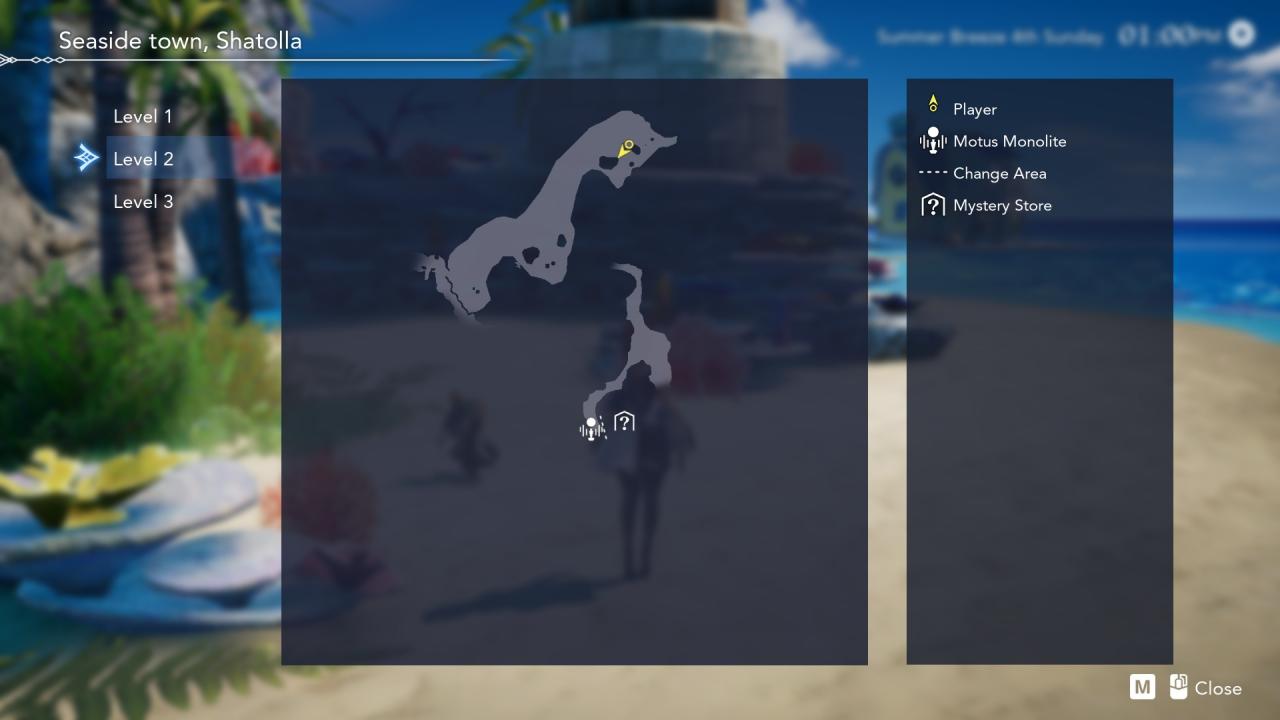
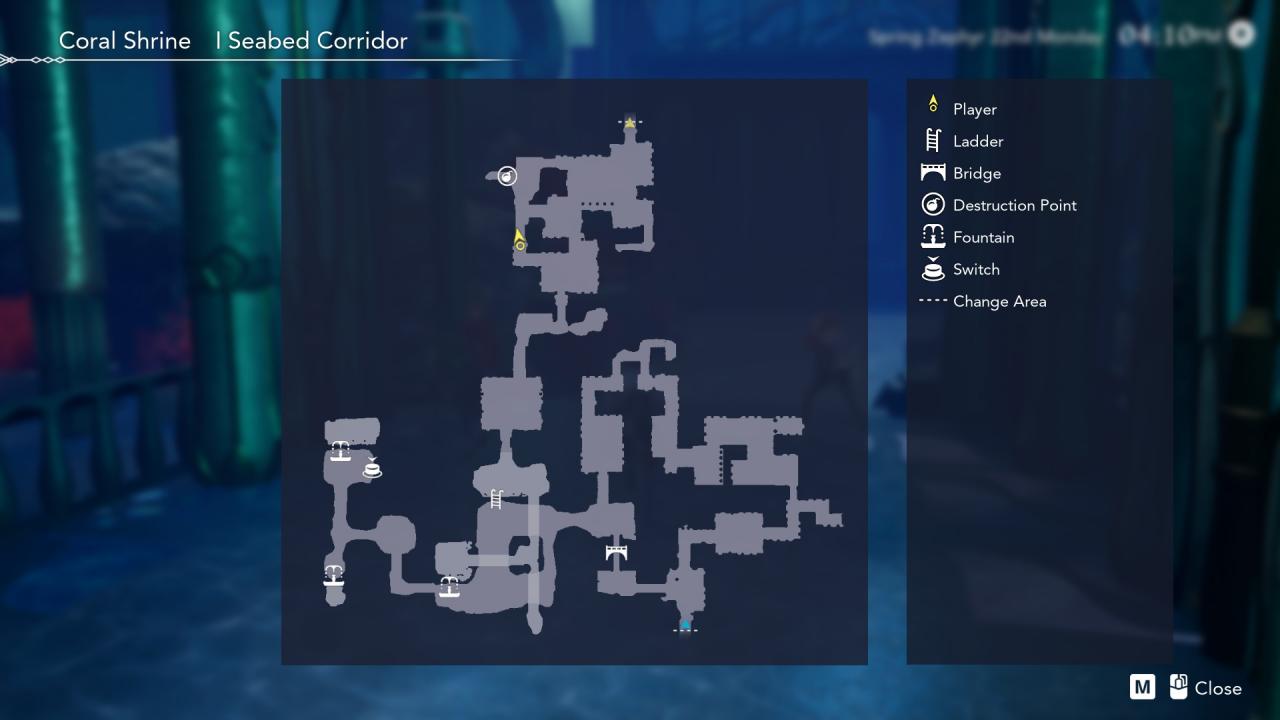
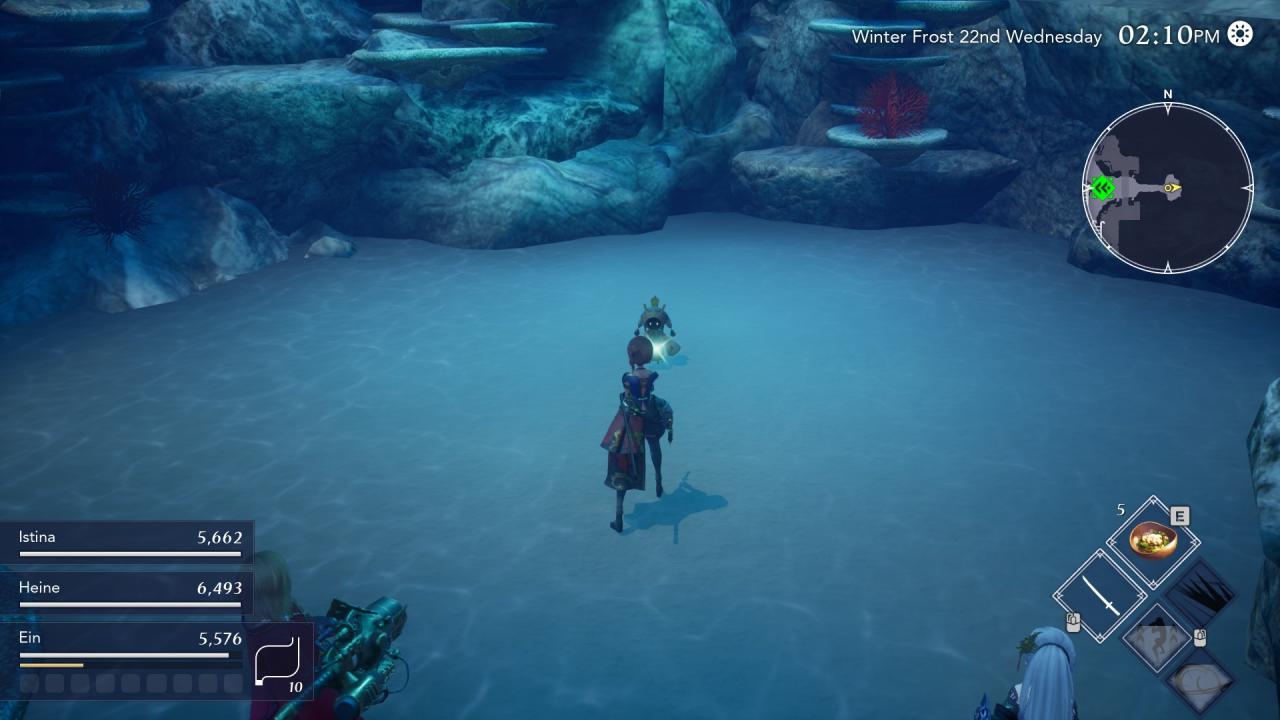
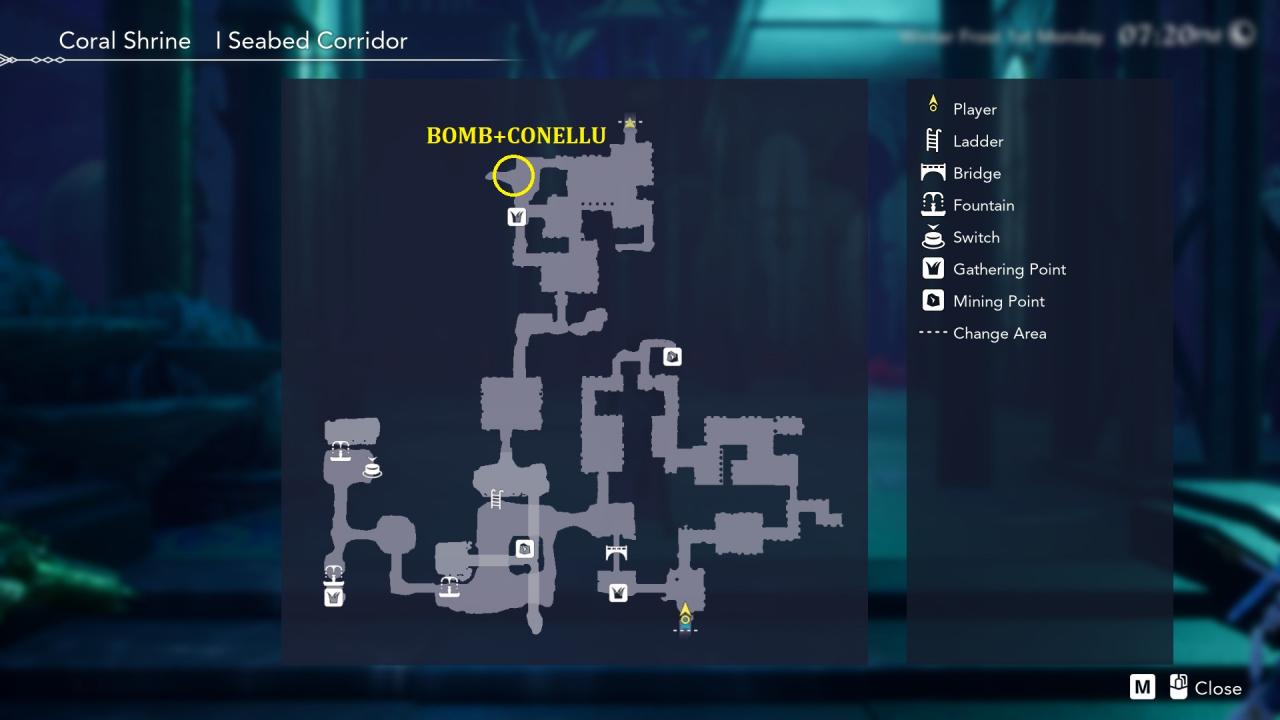
#1 I Seabed Corridor – locked behind L1 Bomb Wall
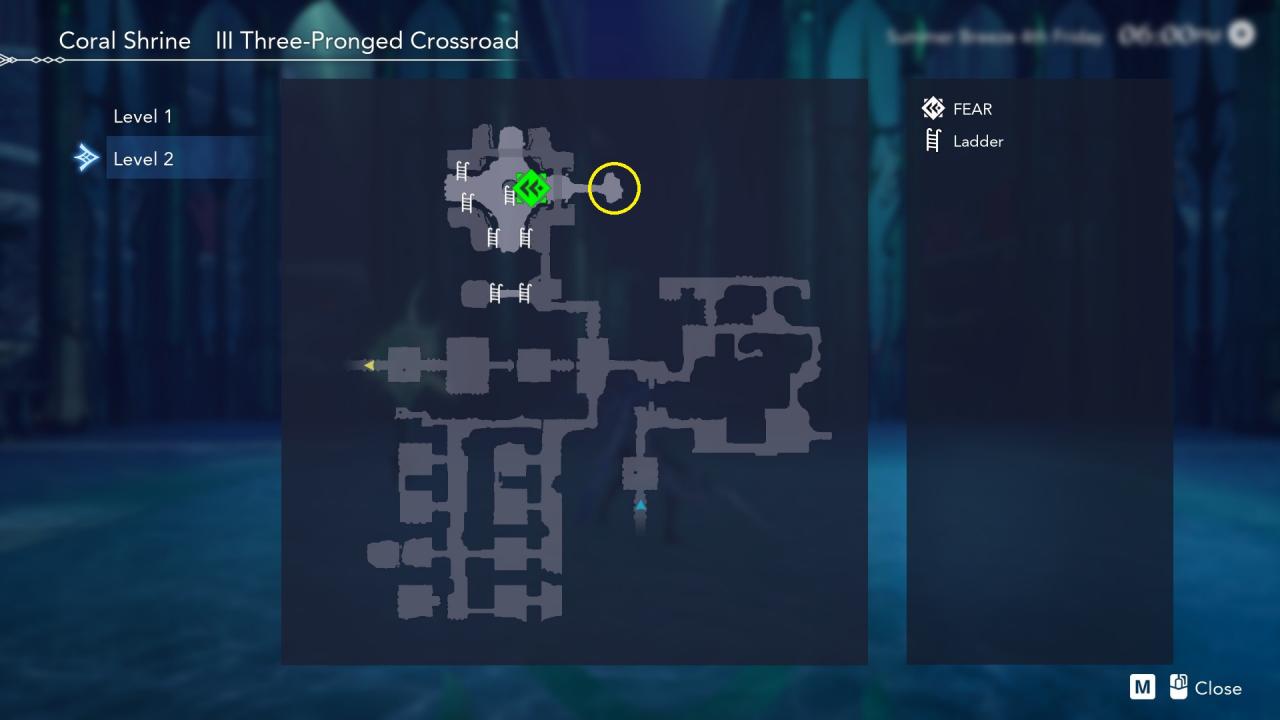
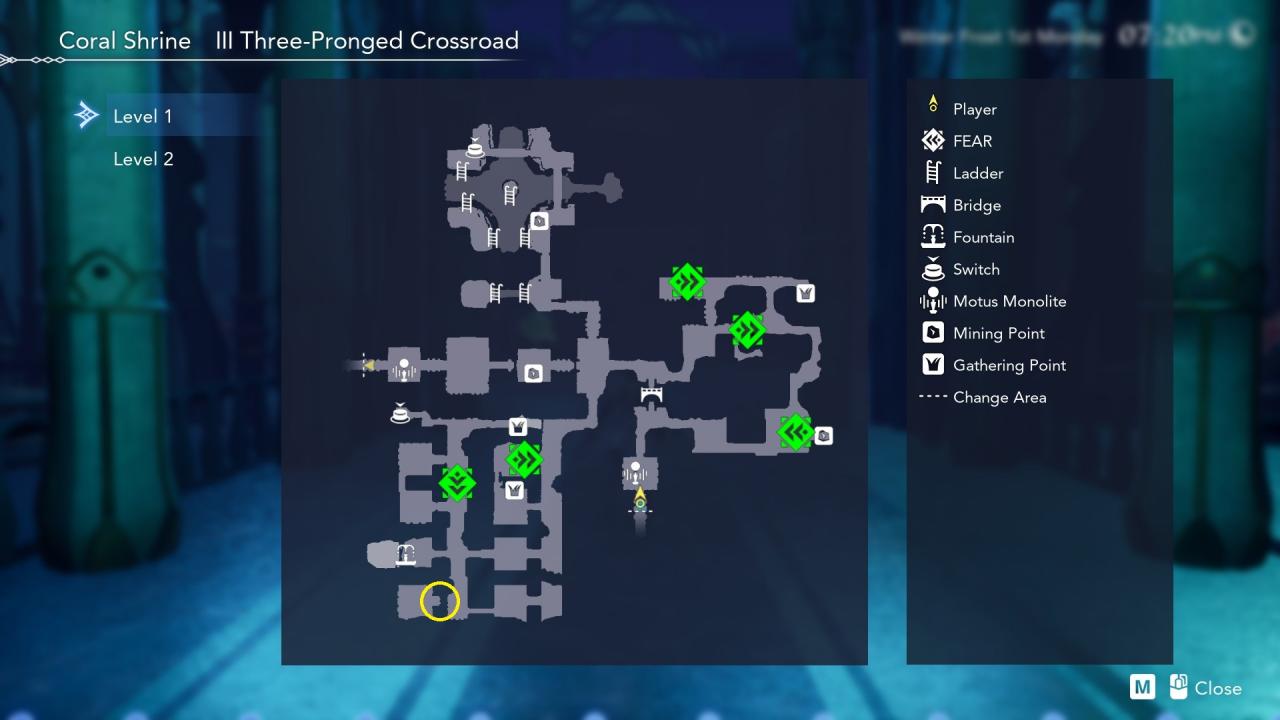
#2 III Three-Pronged Crossroad
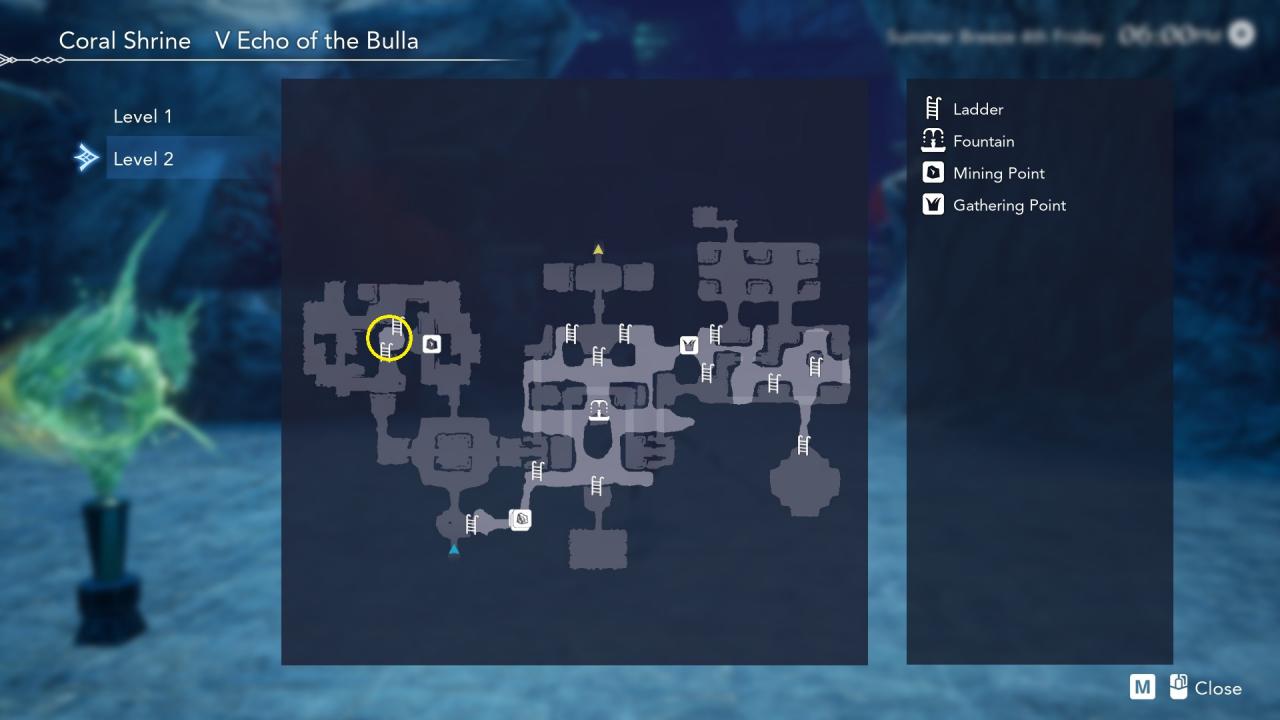
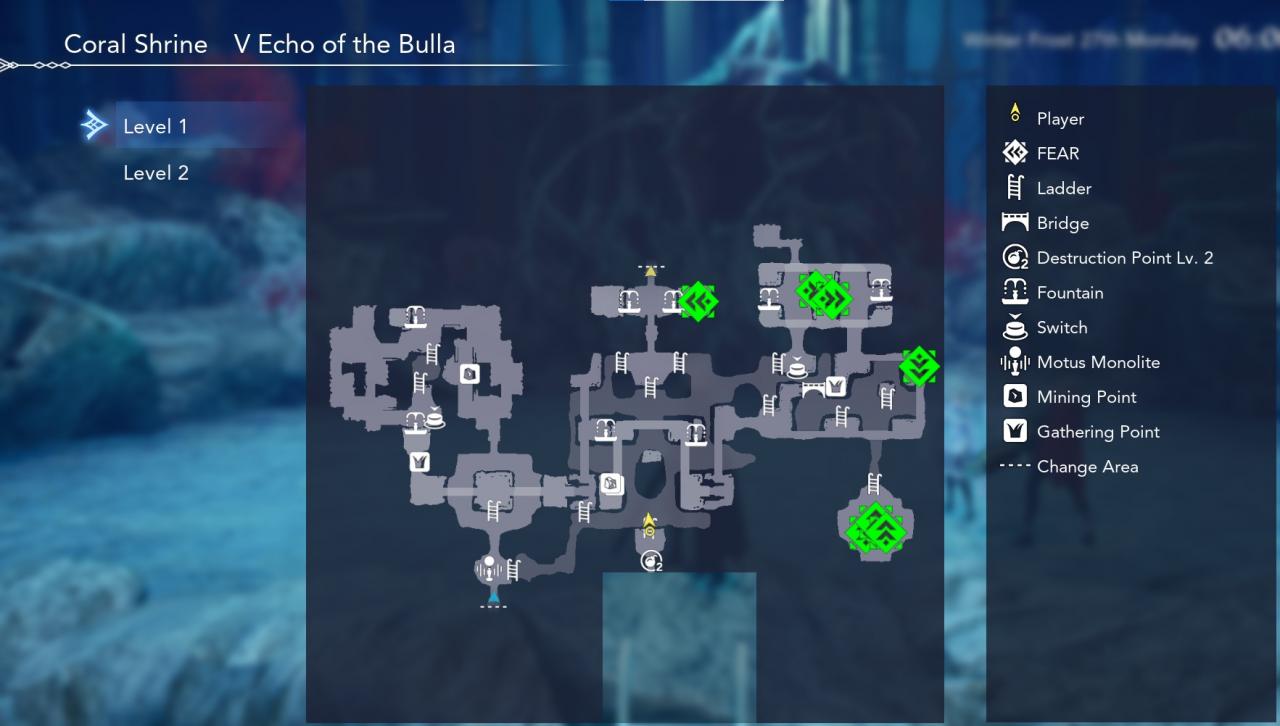
#3 V Echo of the Bulla
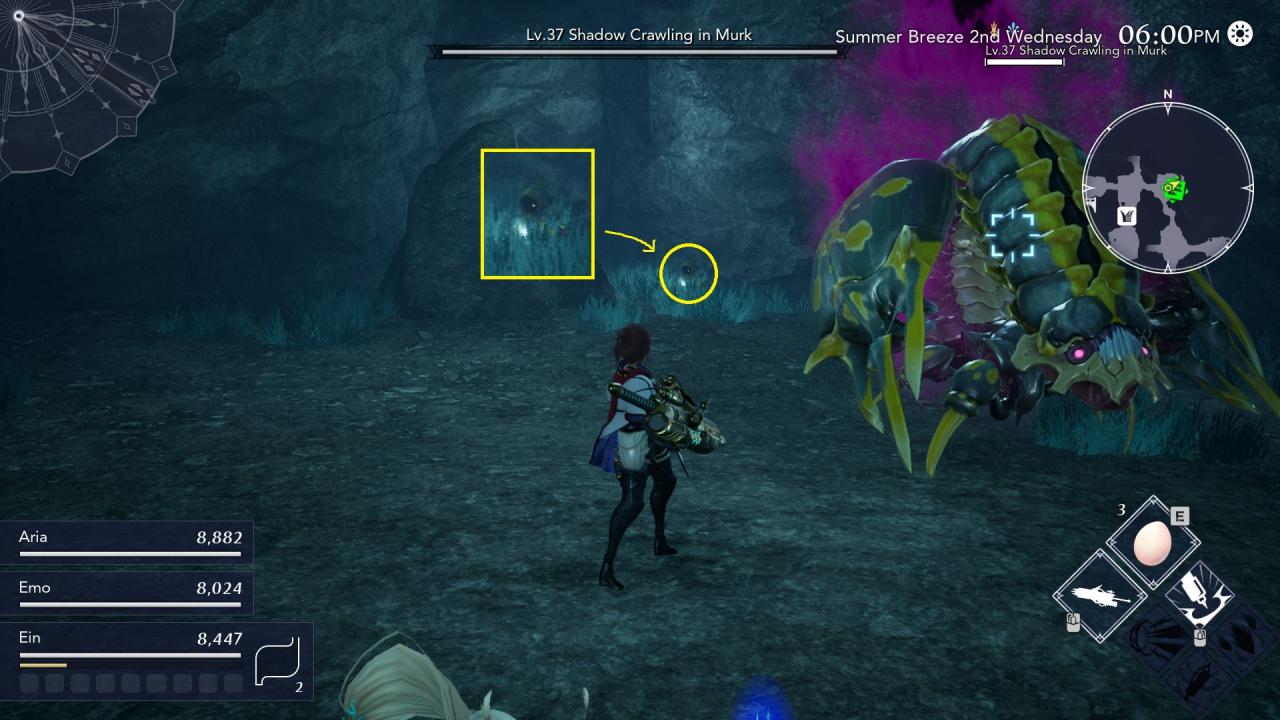
East beside a FEAR in a small grassy patch.
Outside of Temple Indulgentia (right side).
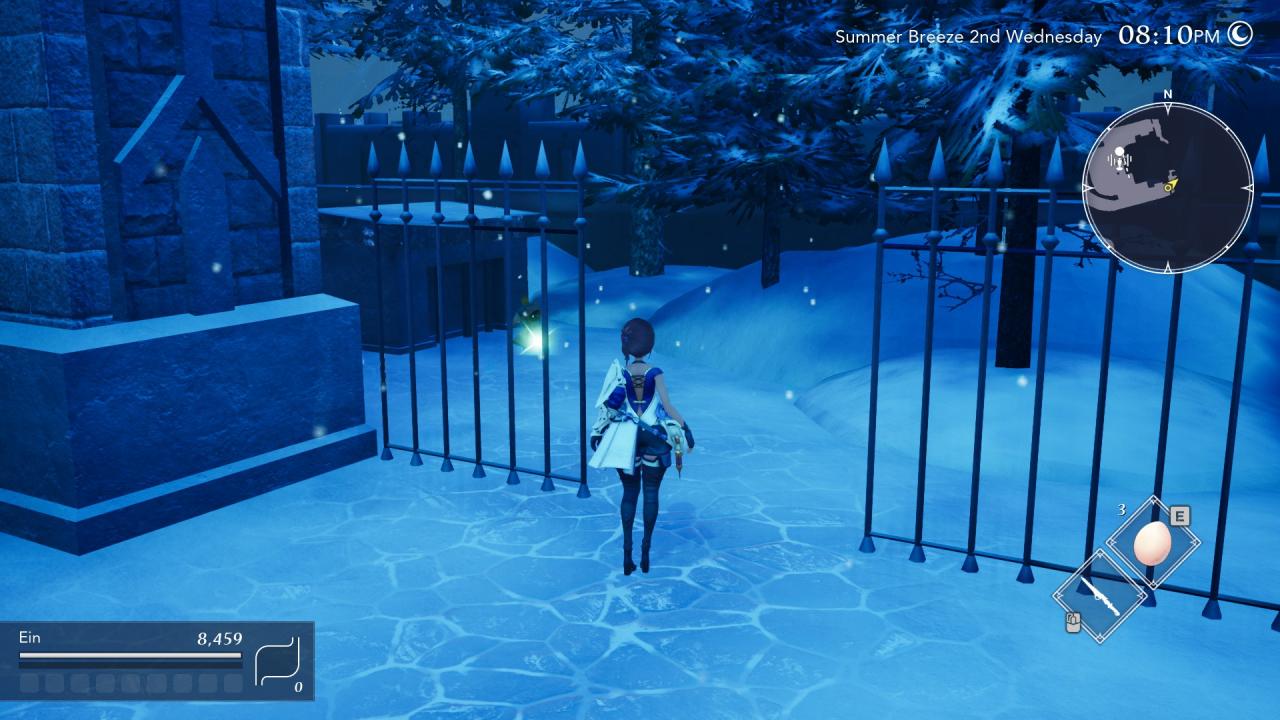
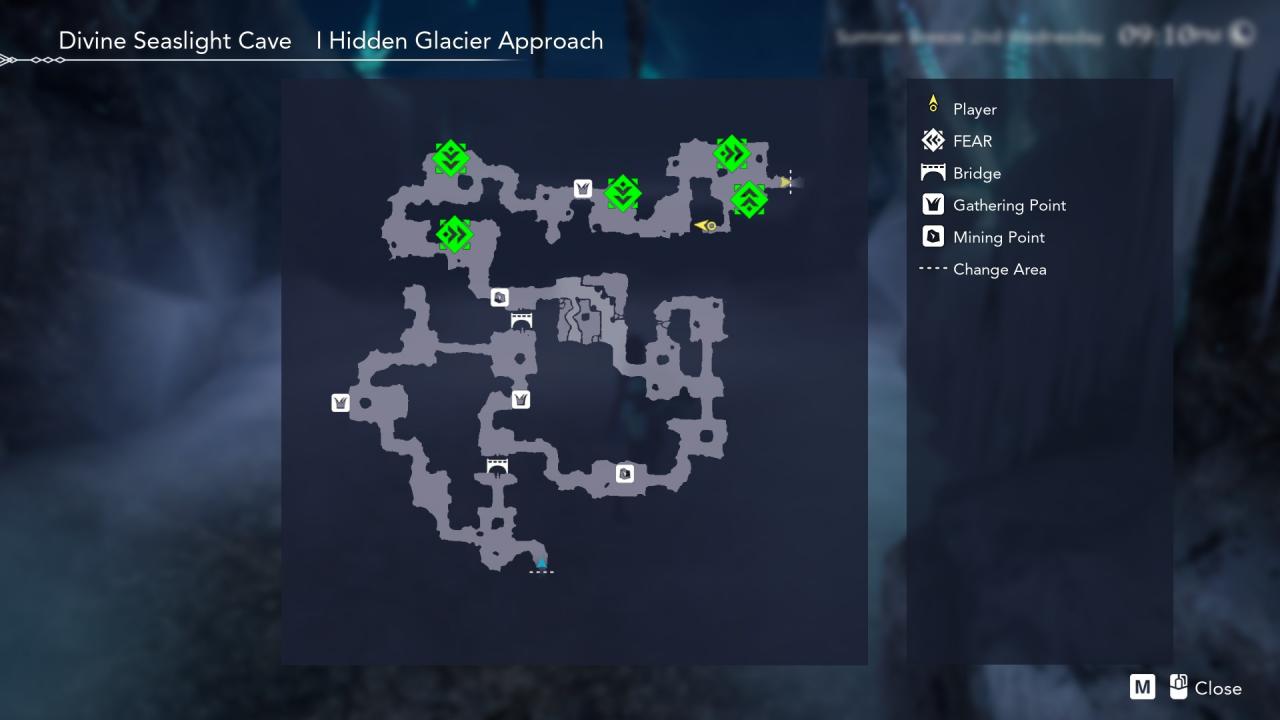
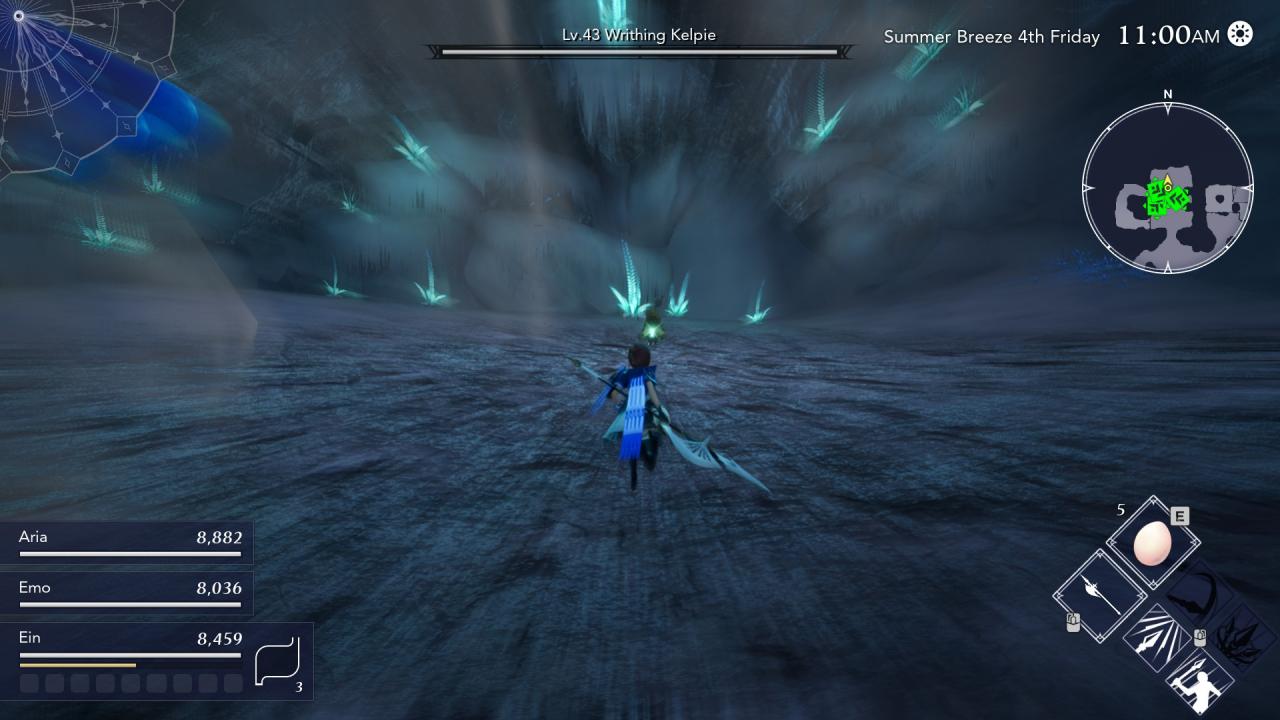
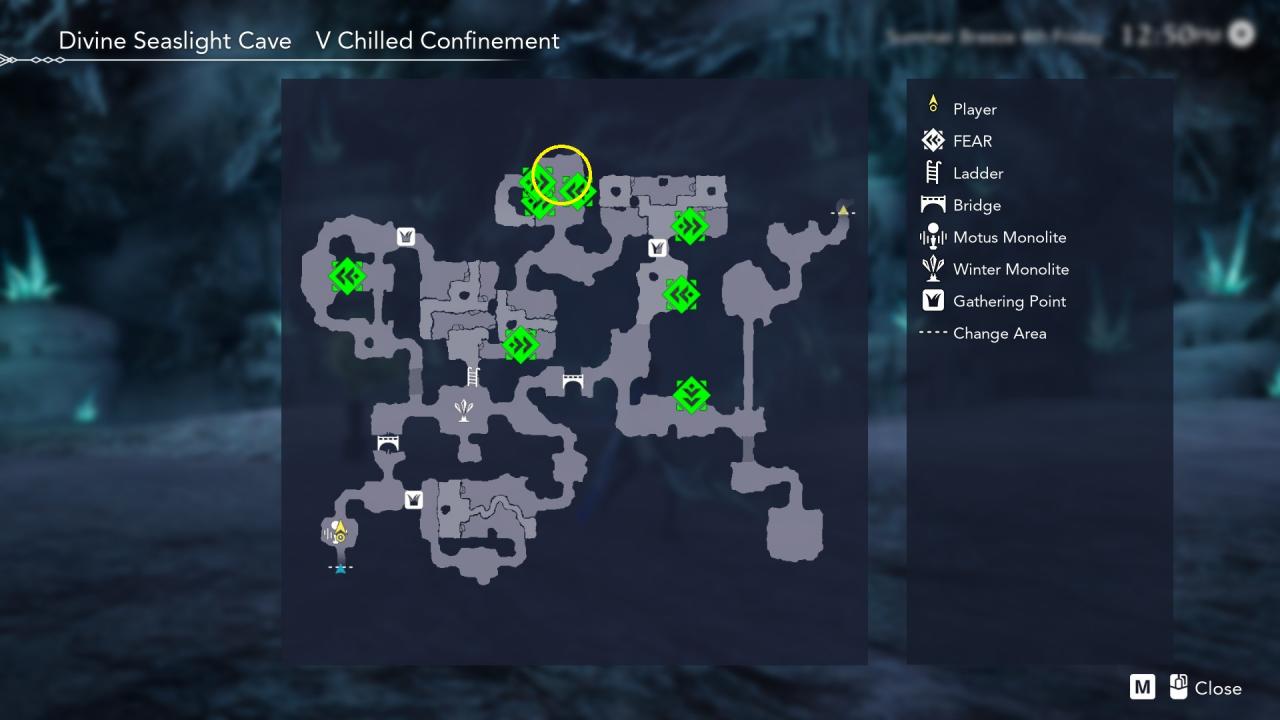
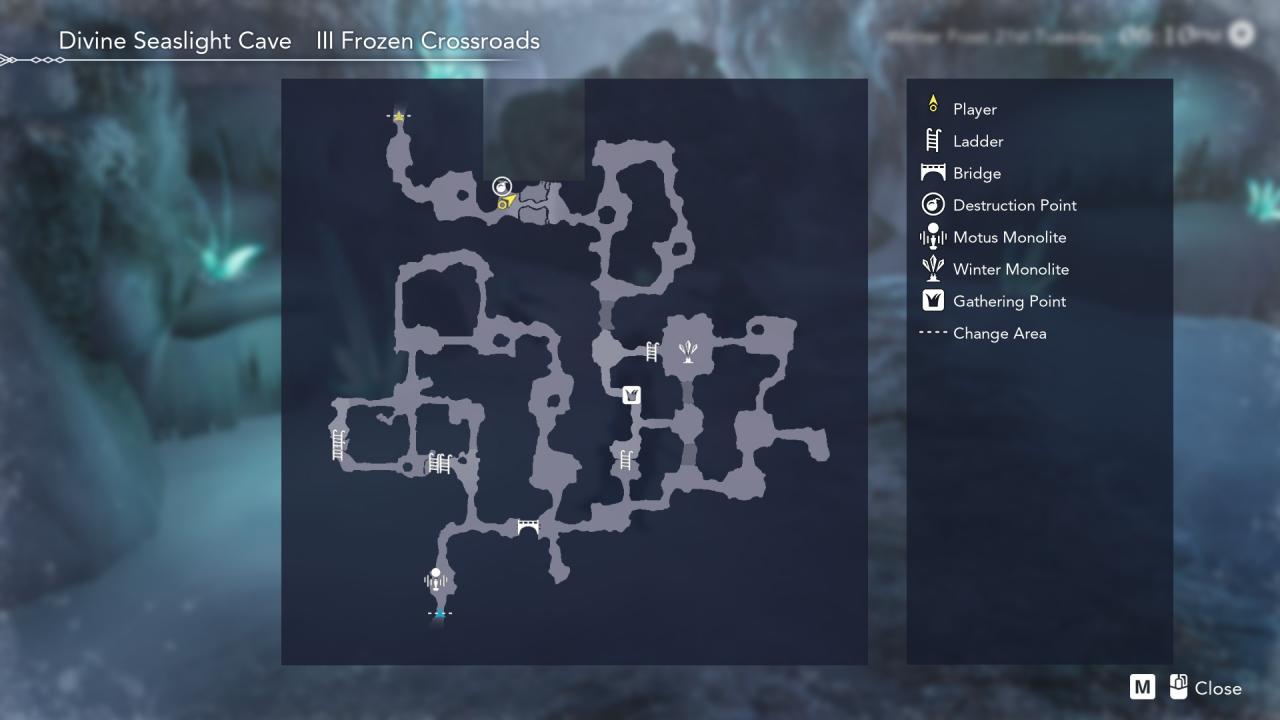
#1 I Hidden Glacier Approach

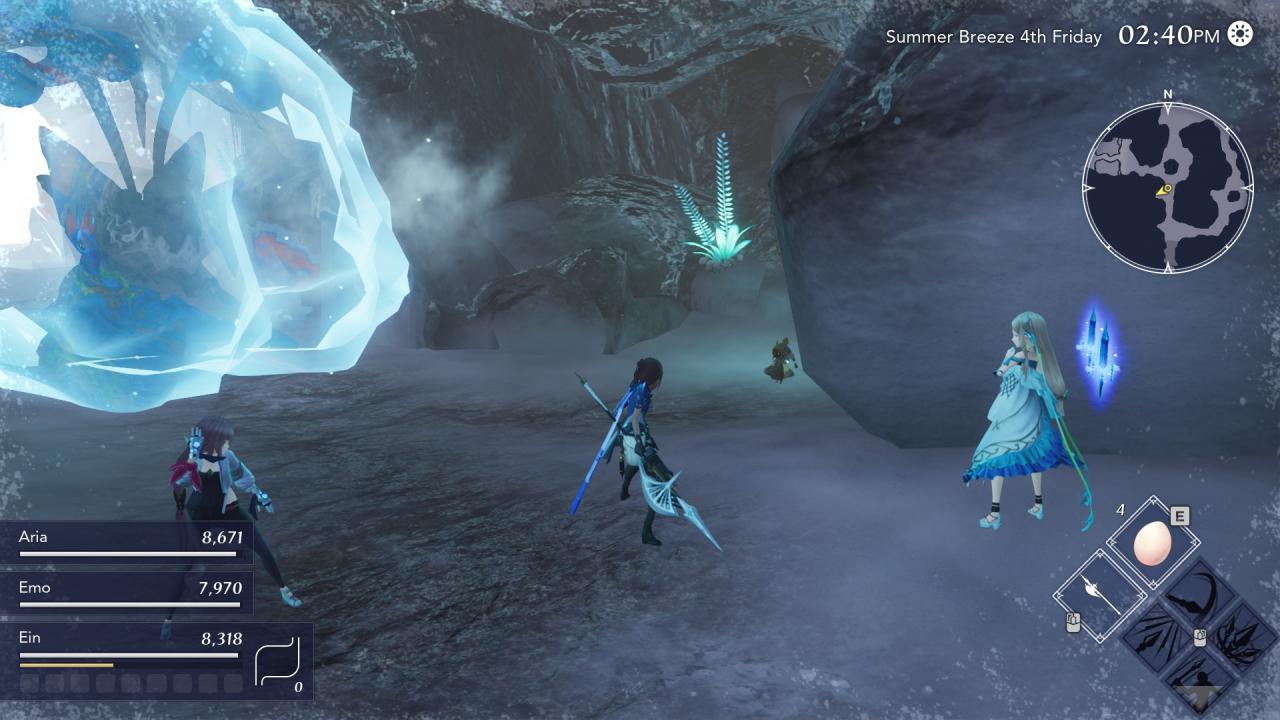
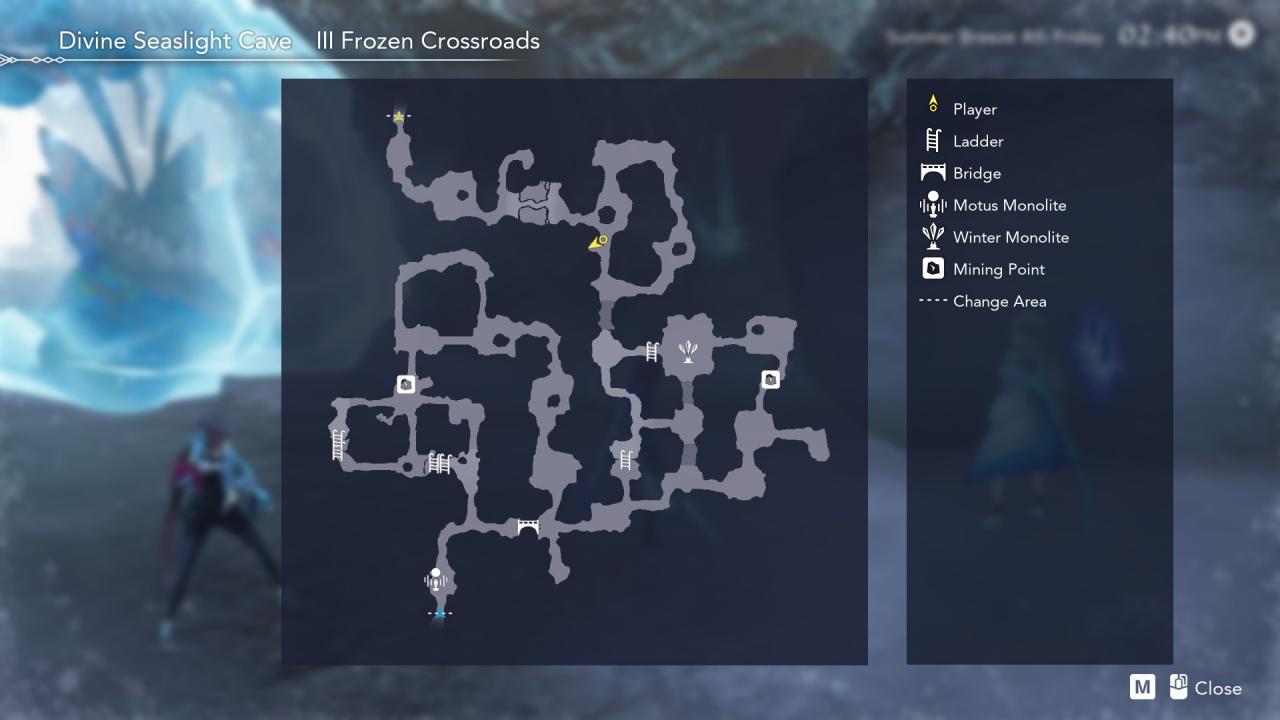
#2 III Frozen Crossroads
#3 V Chilled Confinement
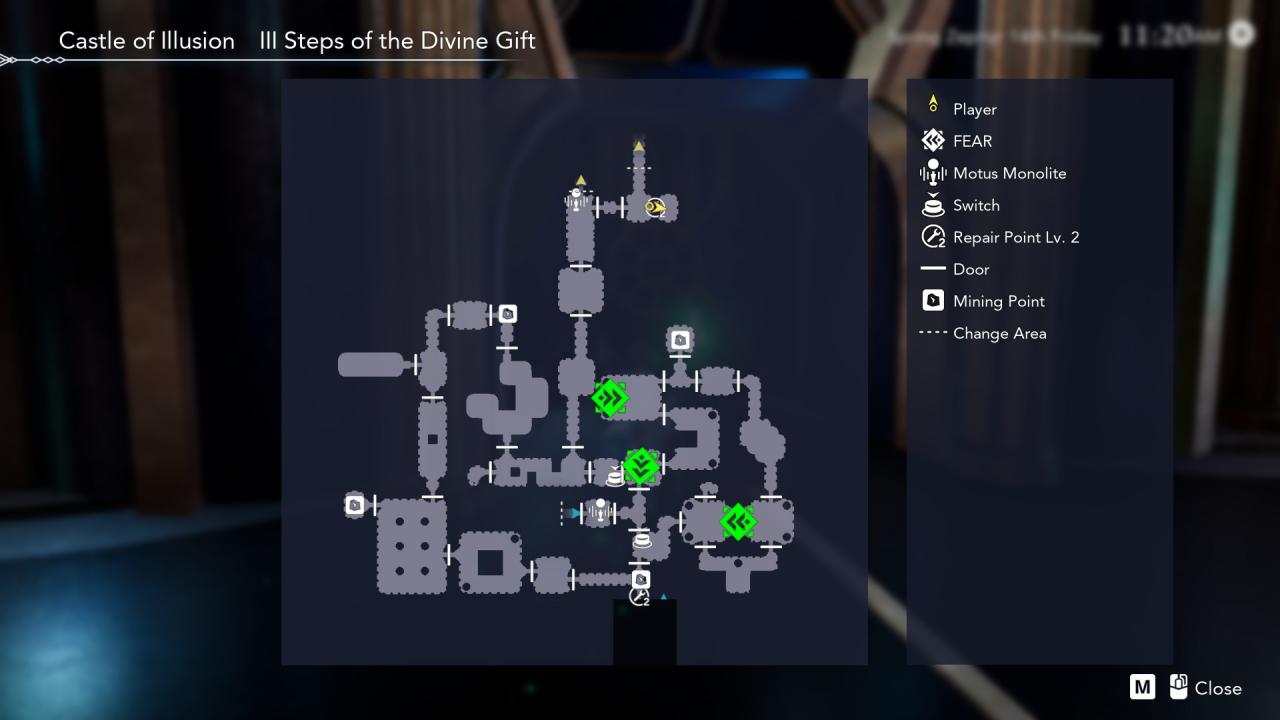
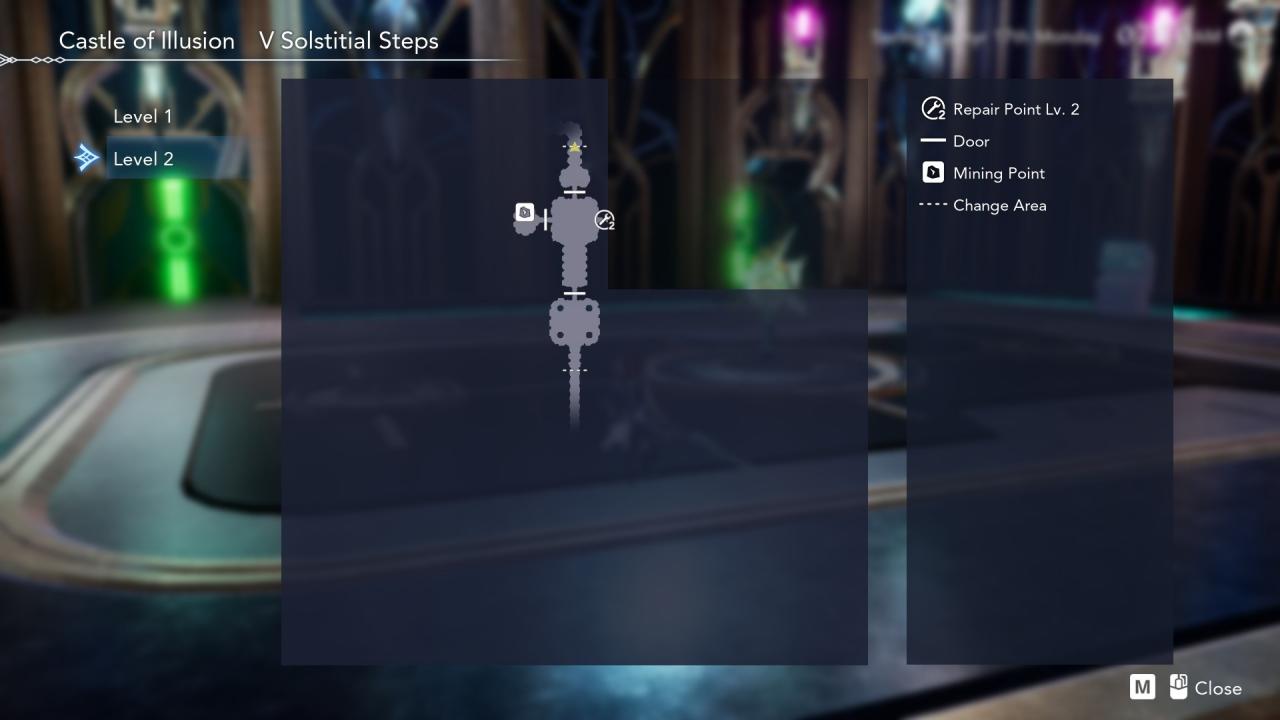
#1 I Steps of Truth
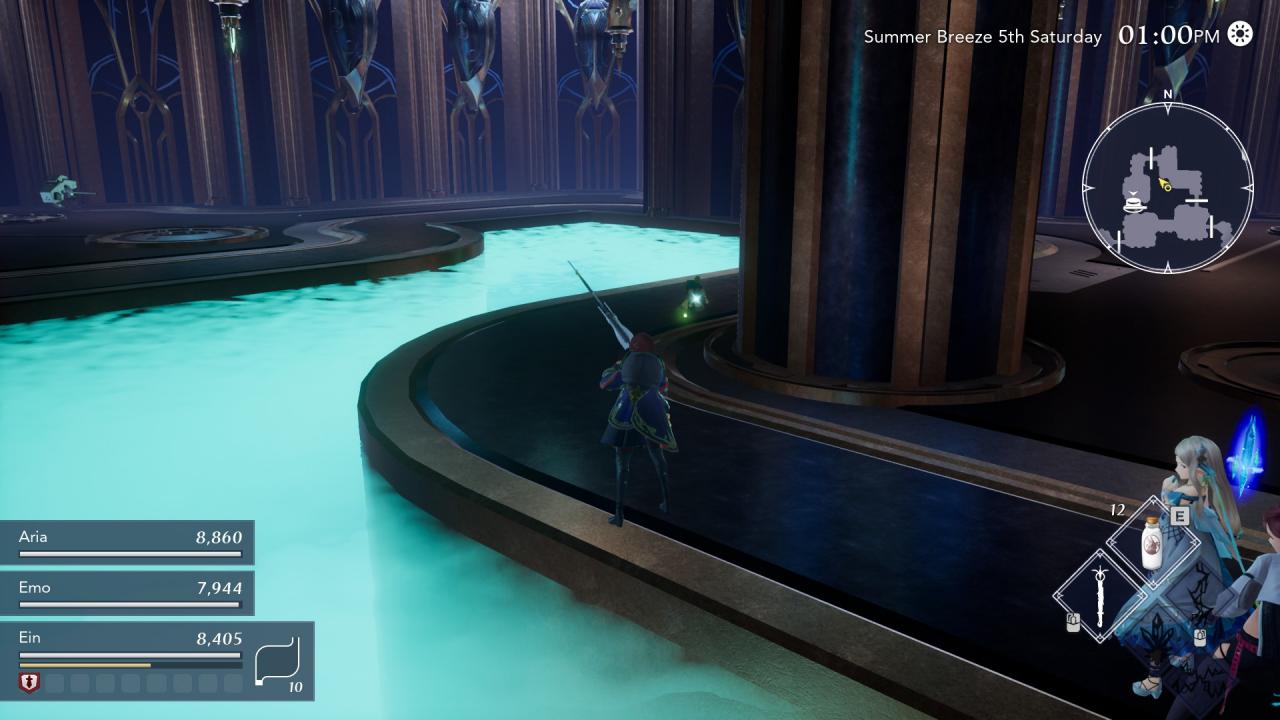
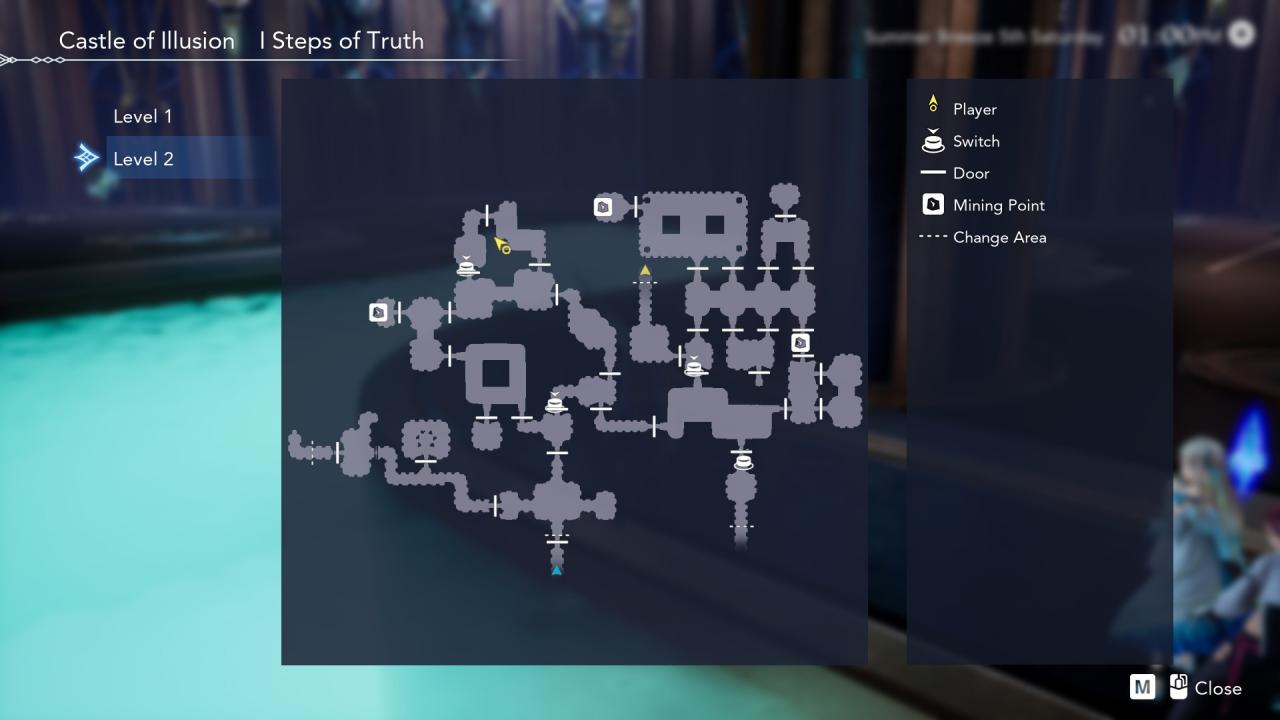
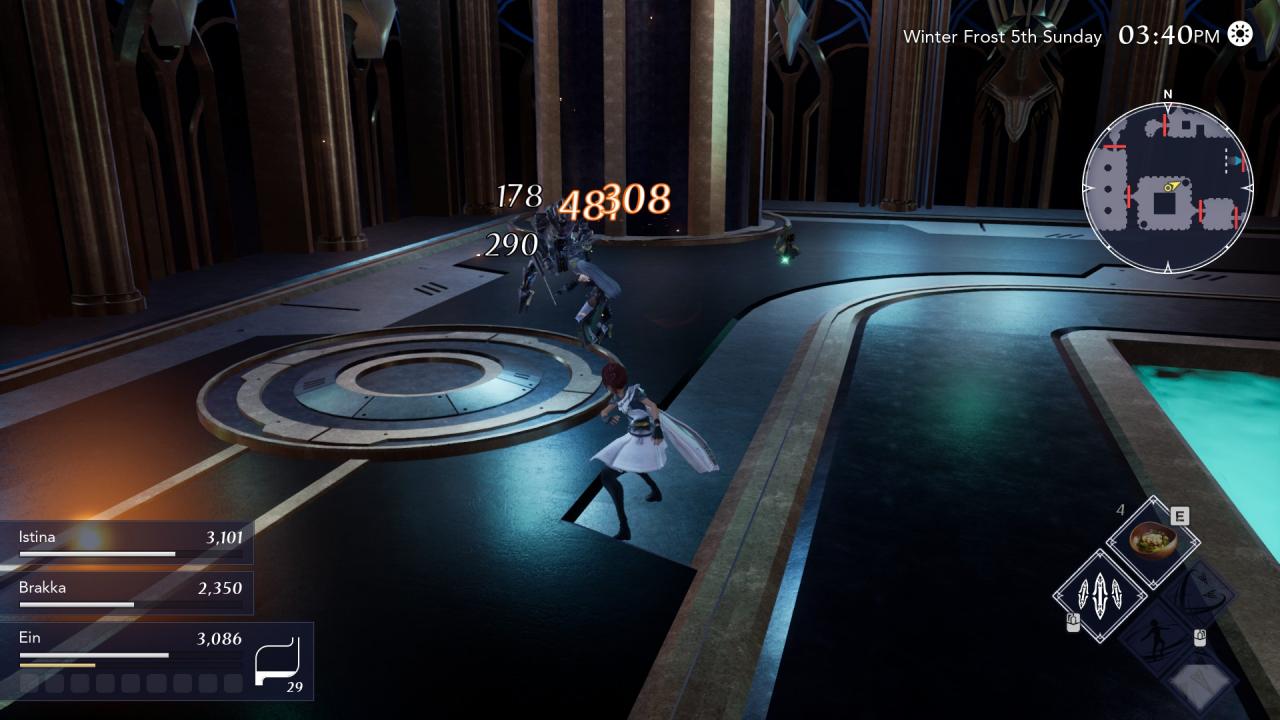
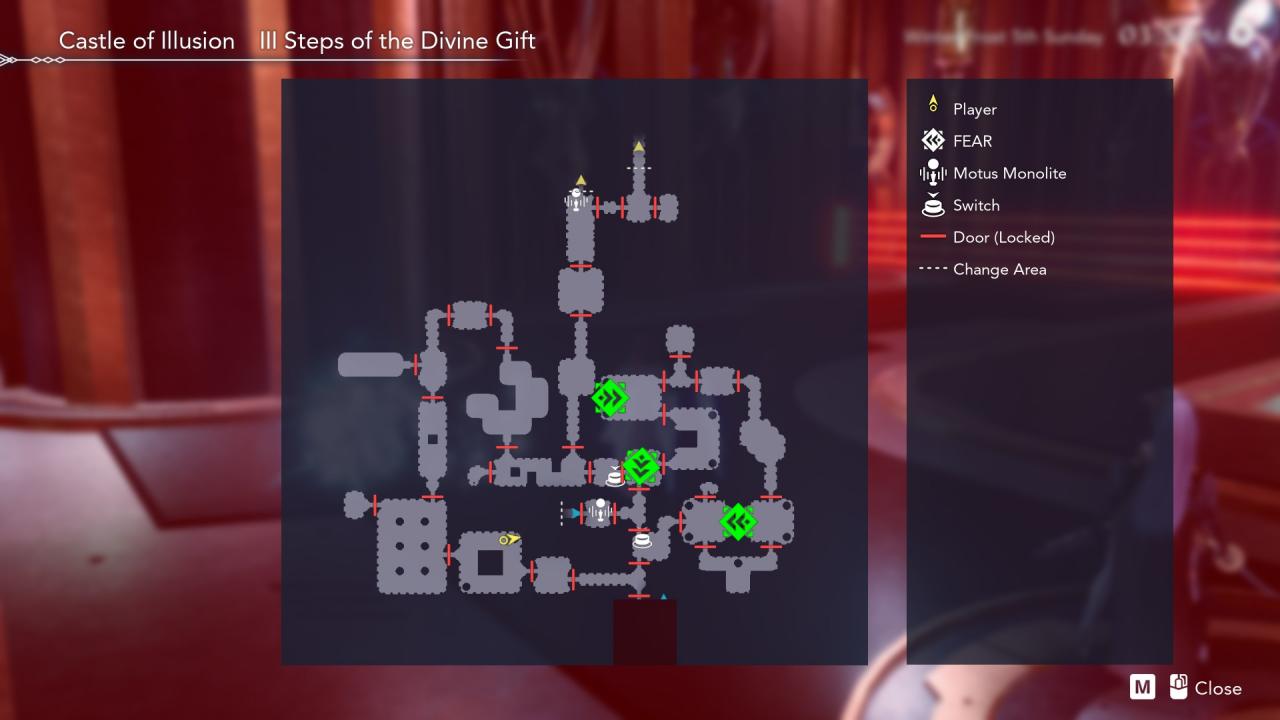
#2 III Steps of the Divine Gift
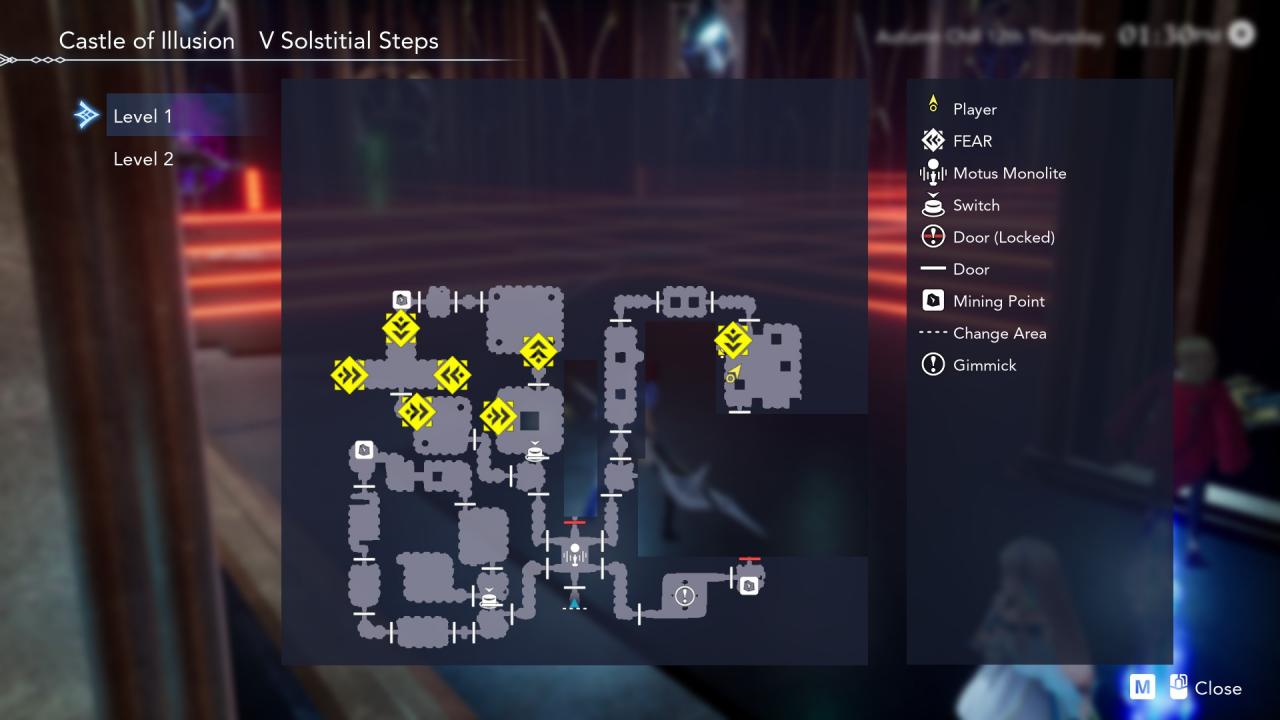
#3 V Solstitial Steps


#1 I Heaven’s Steps
Room H in plain sight.
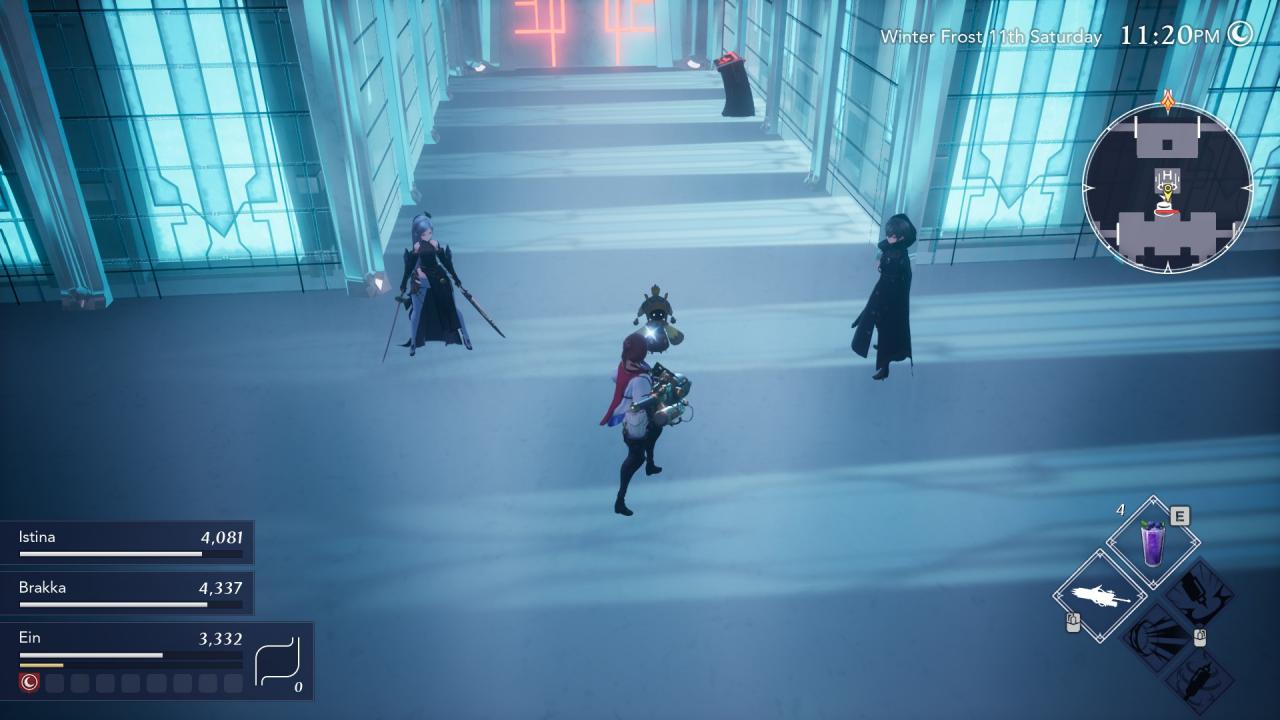
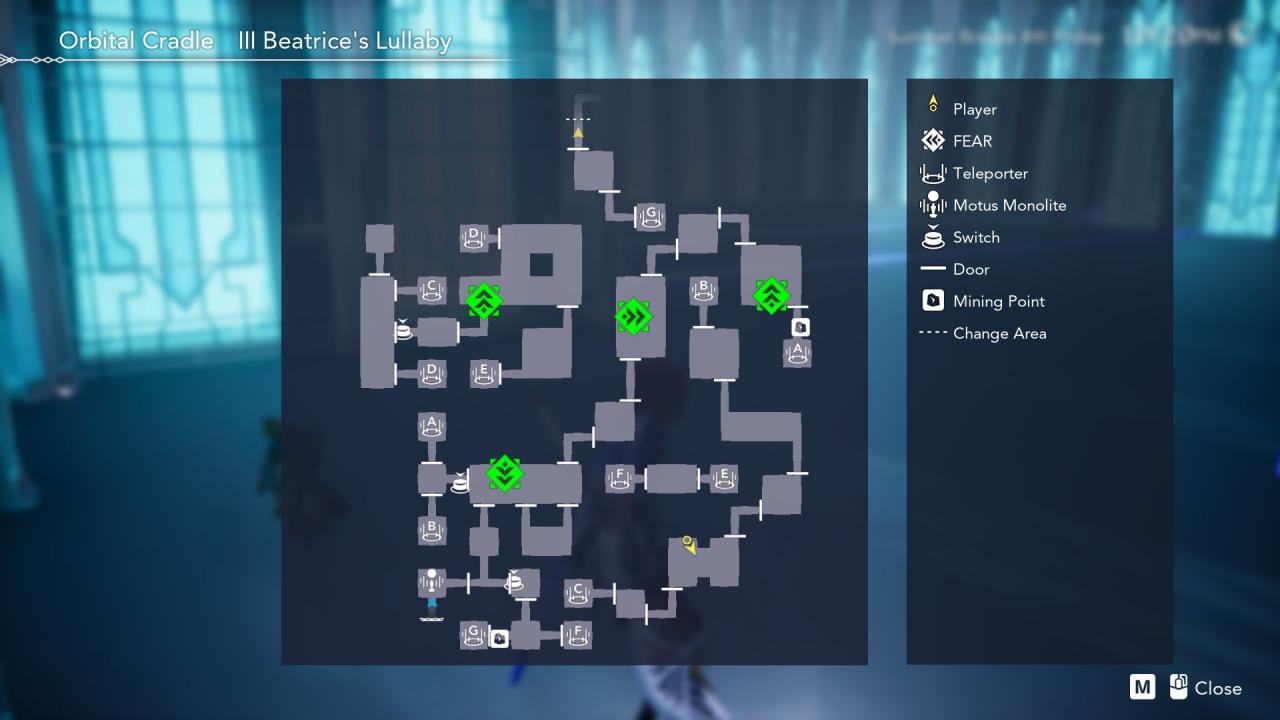
#2 III Beatrice’s Lullaby
Double Laser room between Teleporter B and C.
#3 V Empireo
Behind the FEAR between Teleport I and J.
Just north of the Motus Monolite near the wall.
Go down the South stairs of center Monolite It’s past the chest and down the ramp.
#1 I Memory Lane
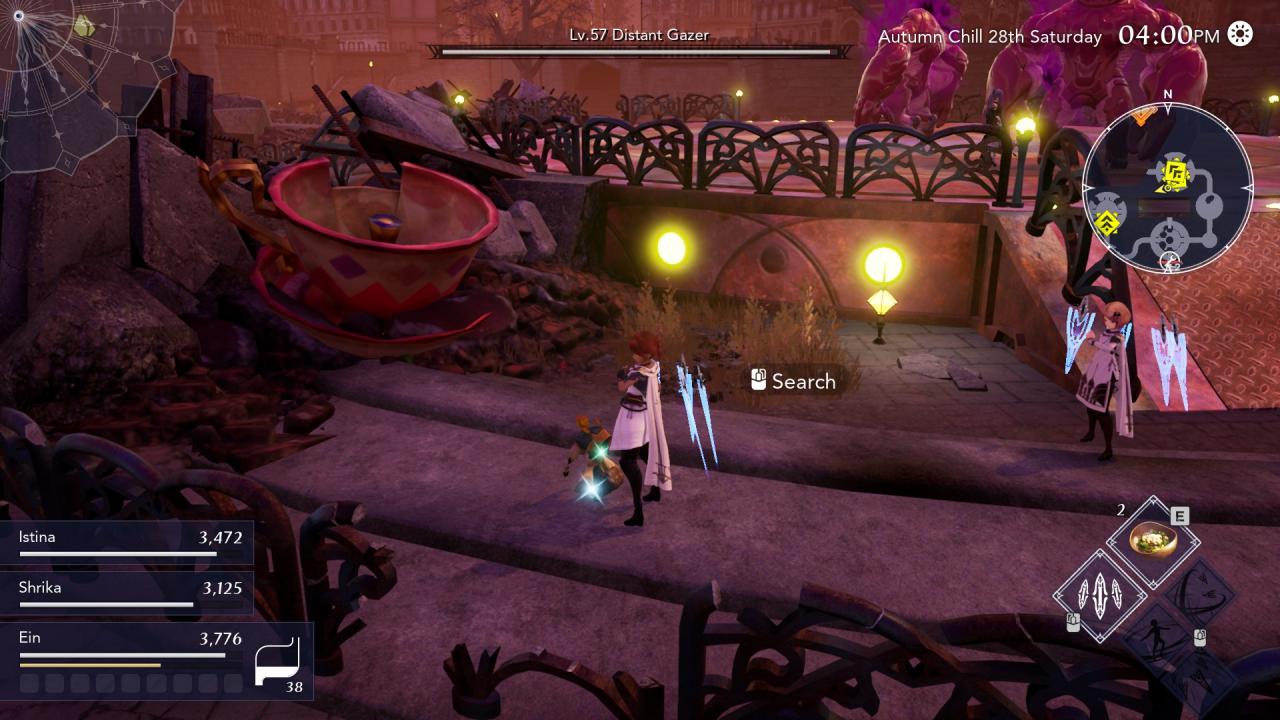
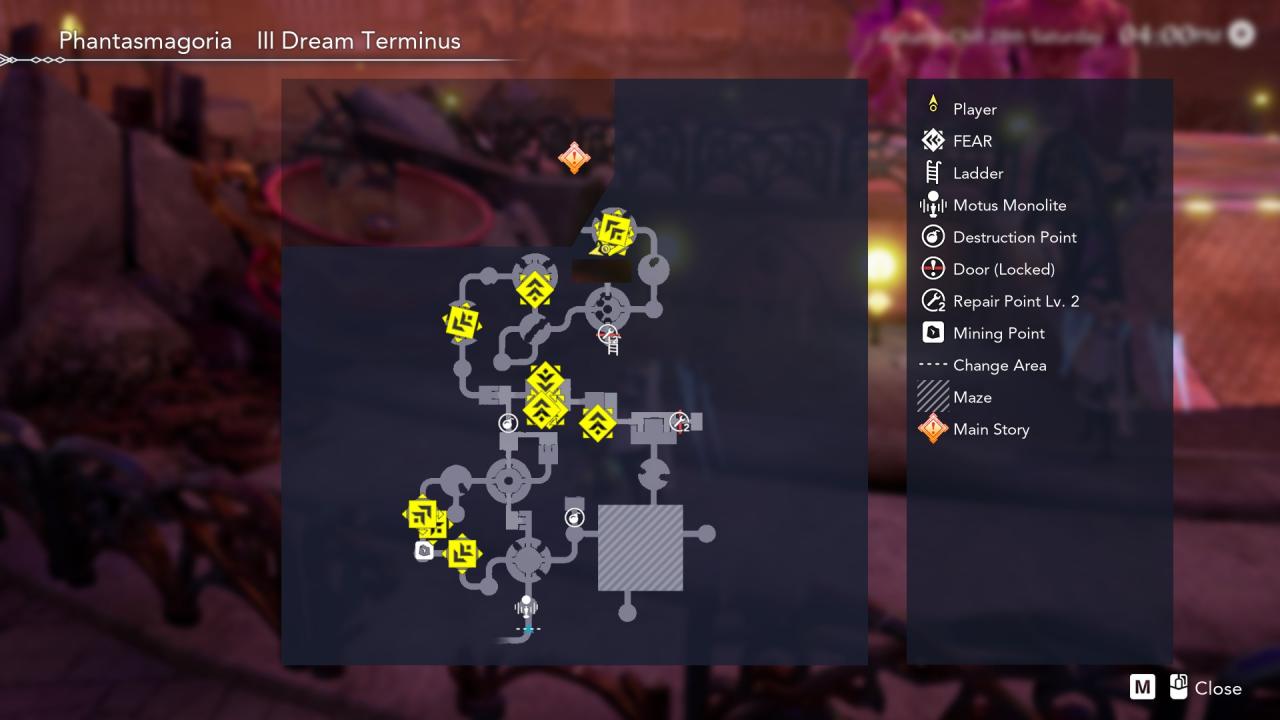
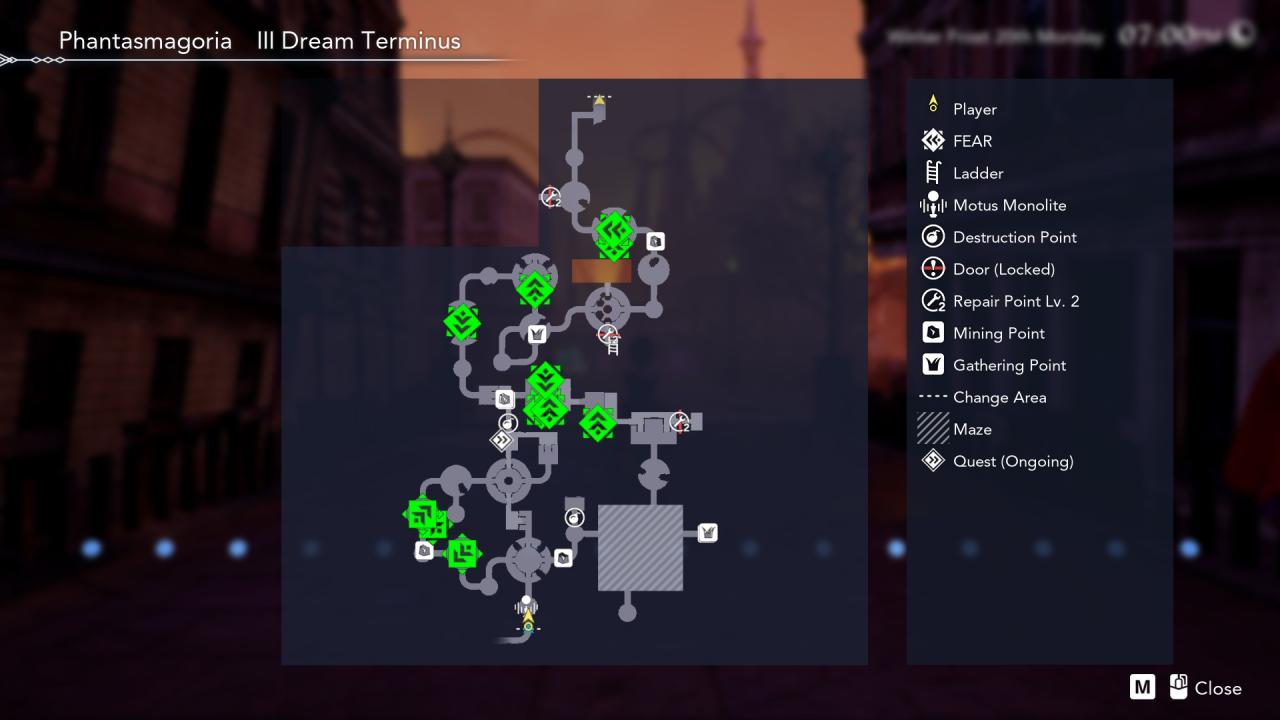
#2 III Dream Terminus
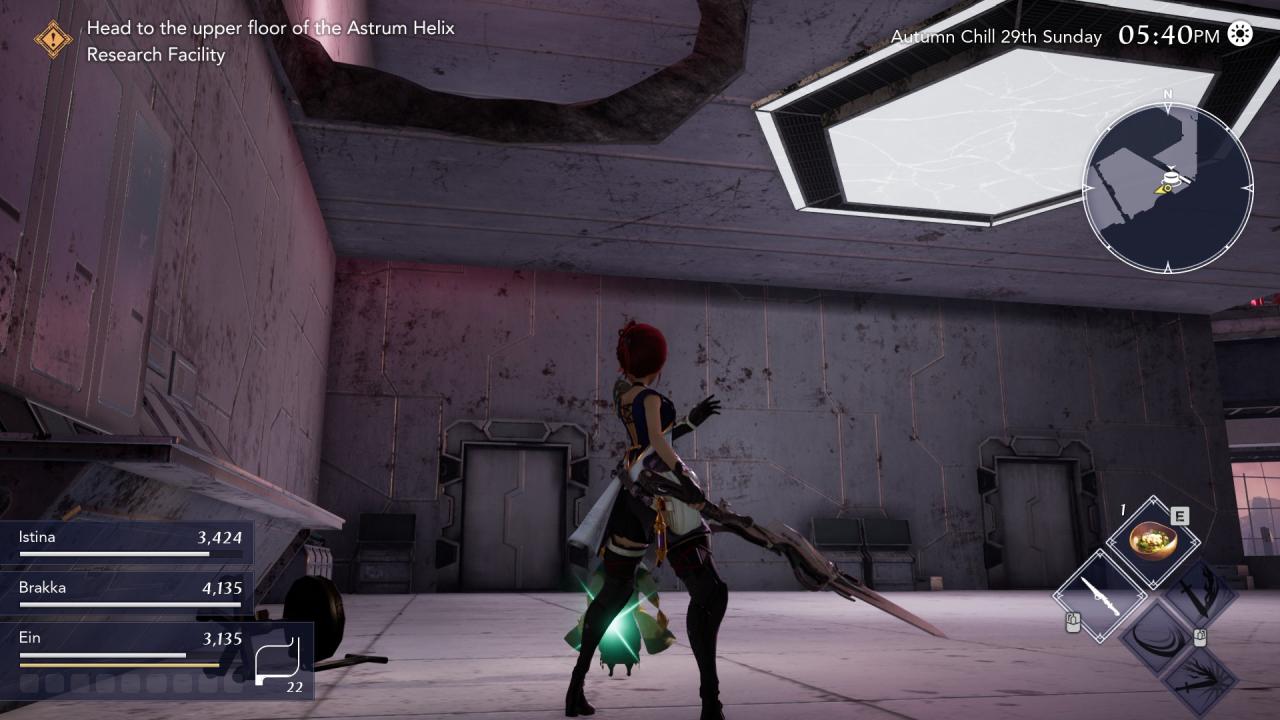
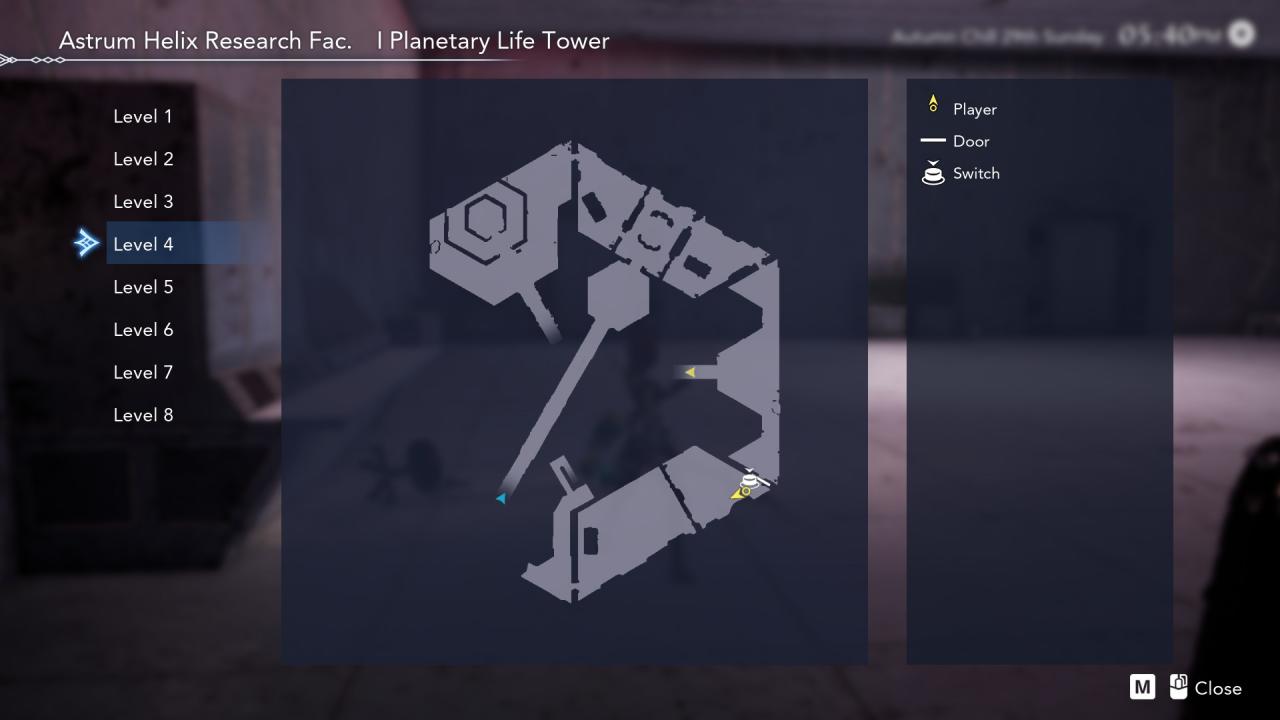
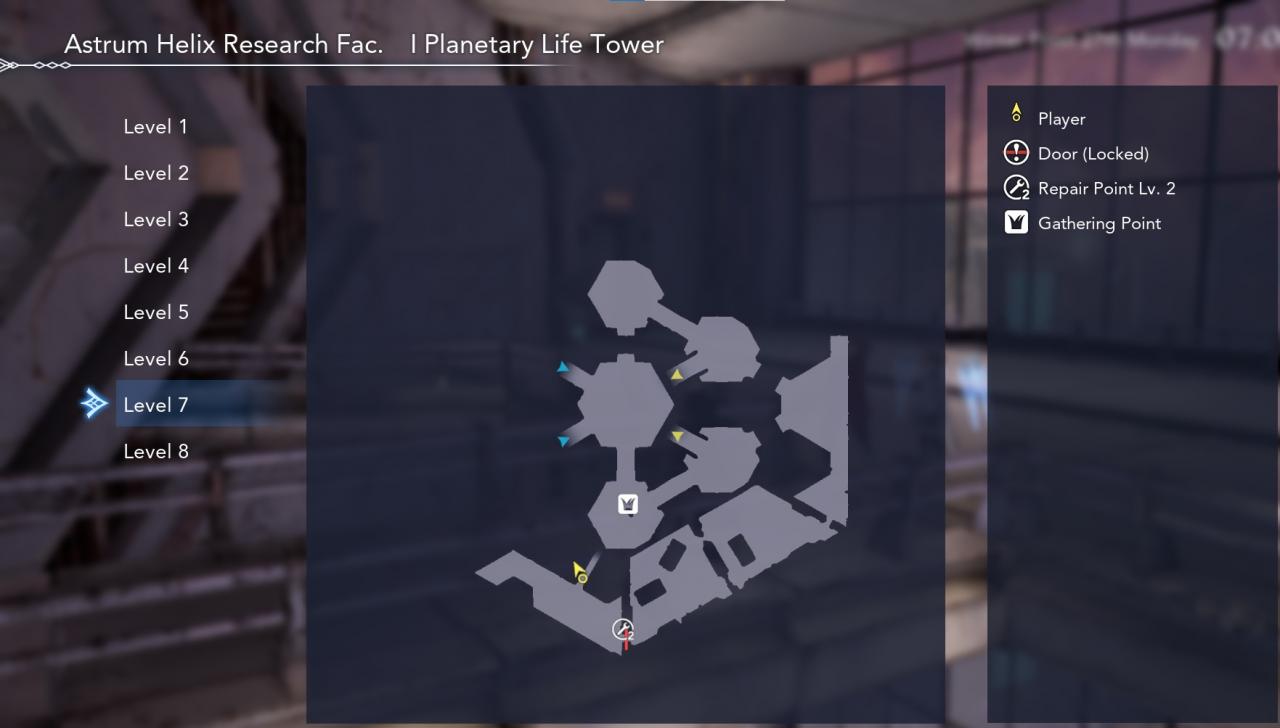
#1 I Planetary Life Tower (Floor 4)
#2 III Seraph Memorial Garden
Take the elevator to the middle layer and fall from the ledge beside you.
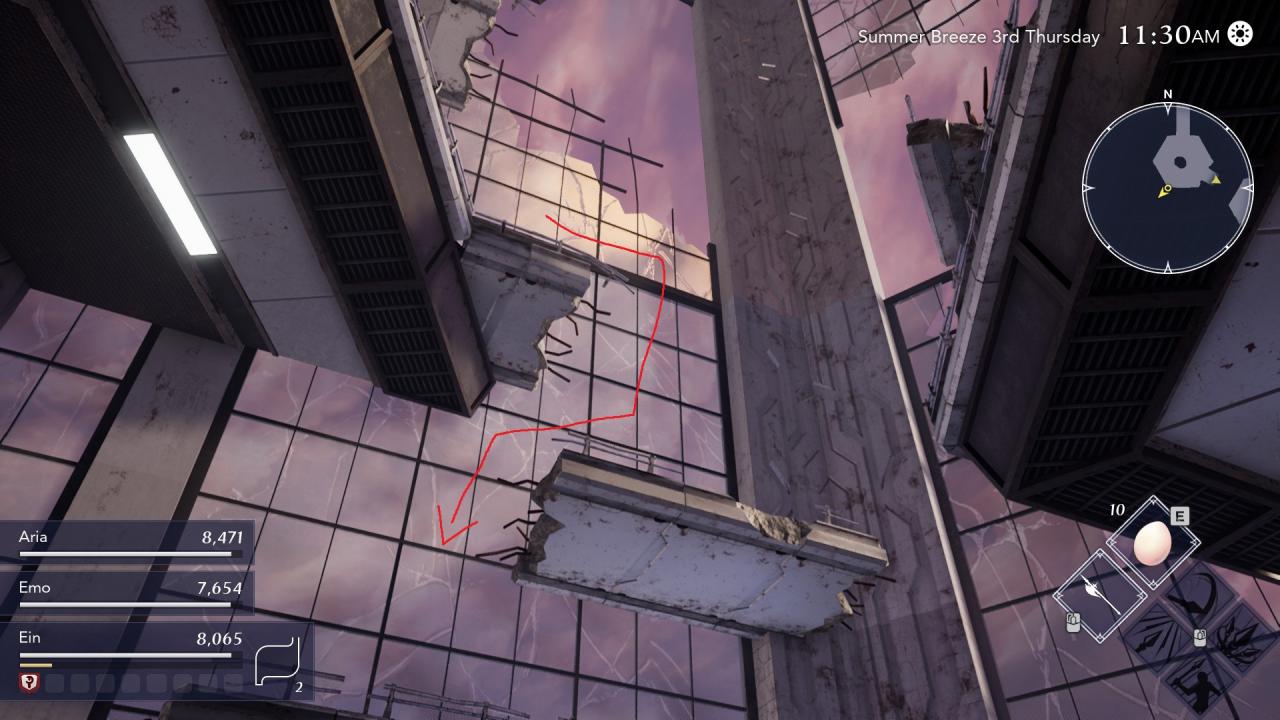
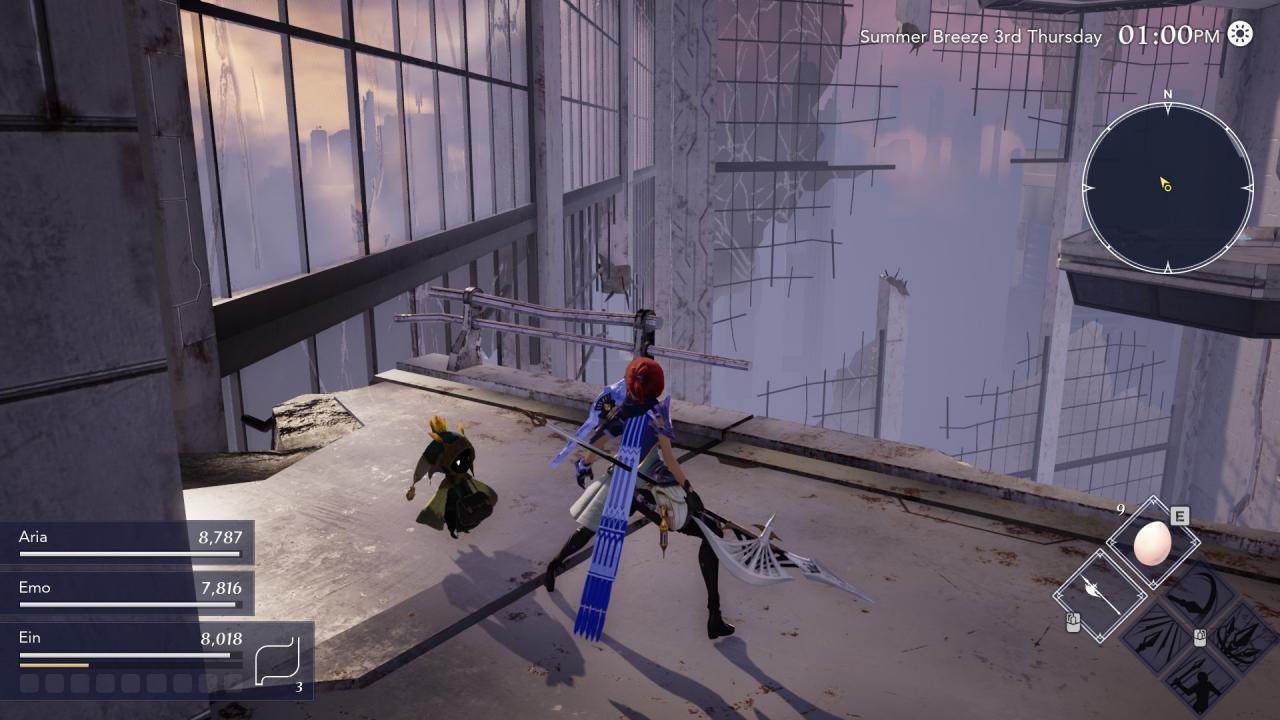
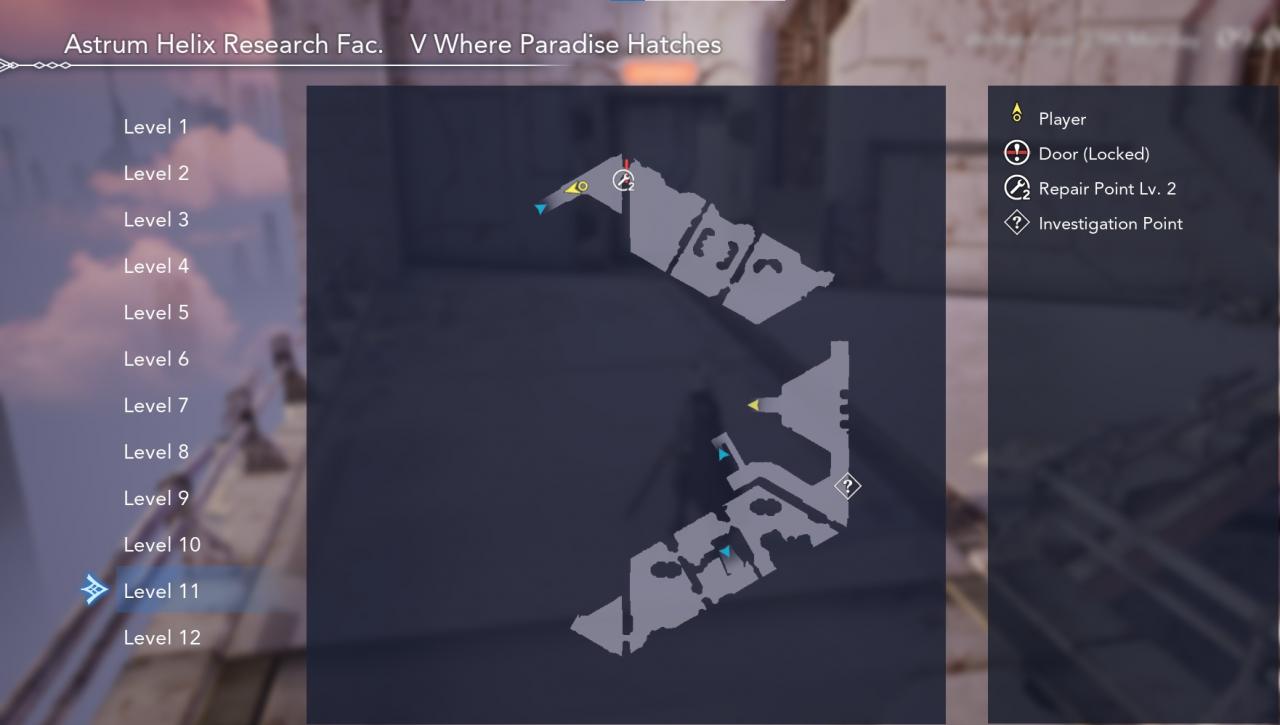
#3 V Where Paradise Hatches (Floor 8)
Both guarded by FEAR.
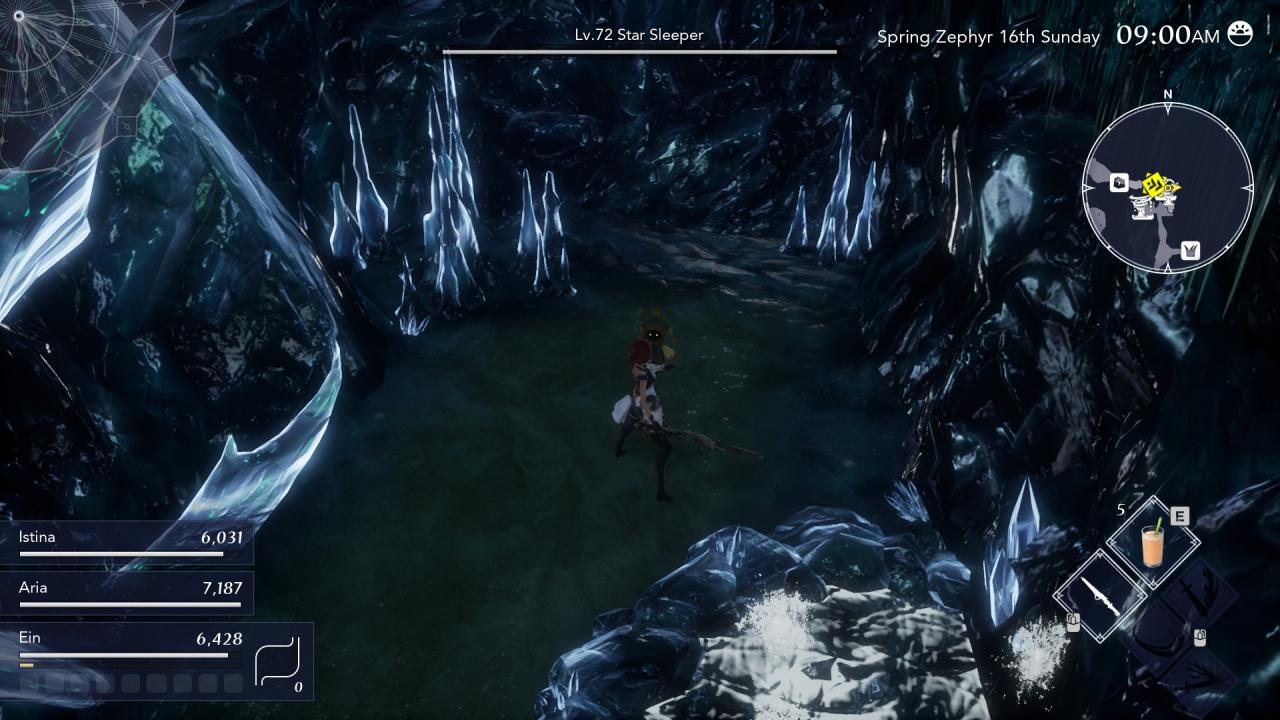
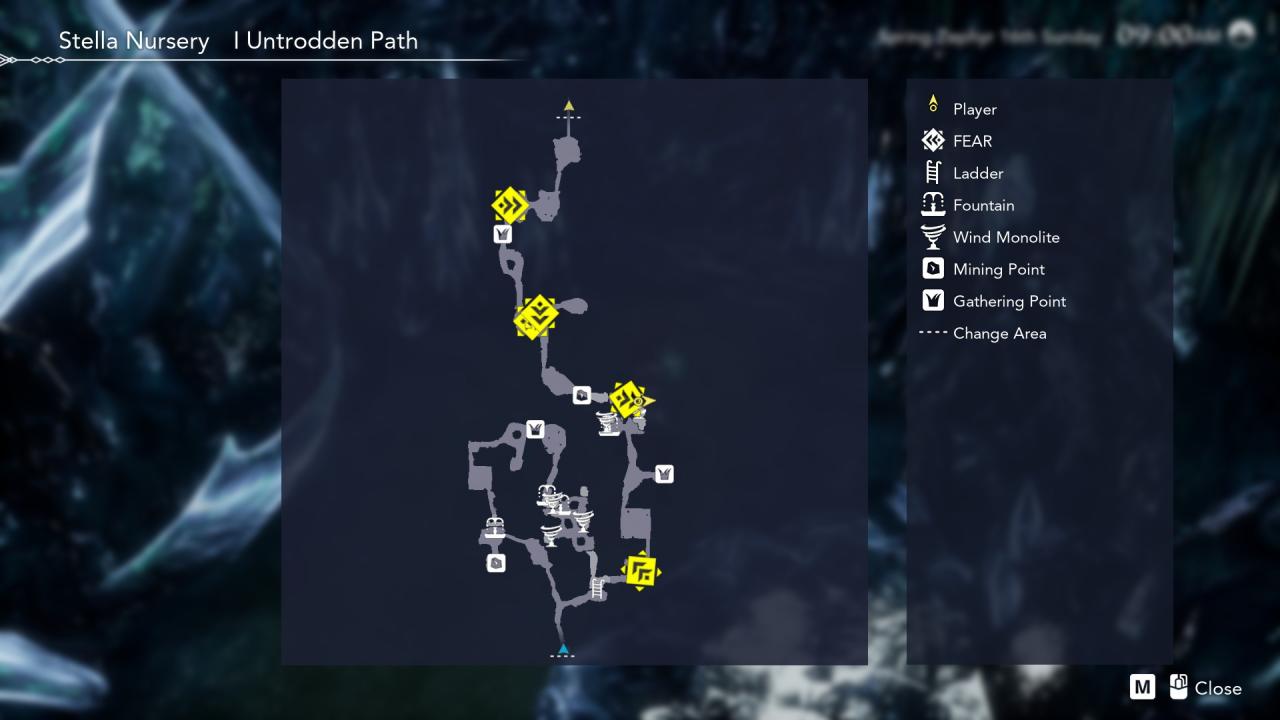
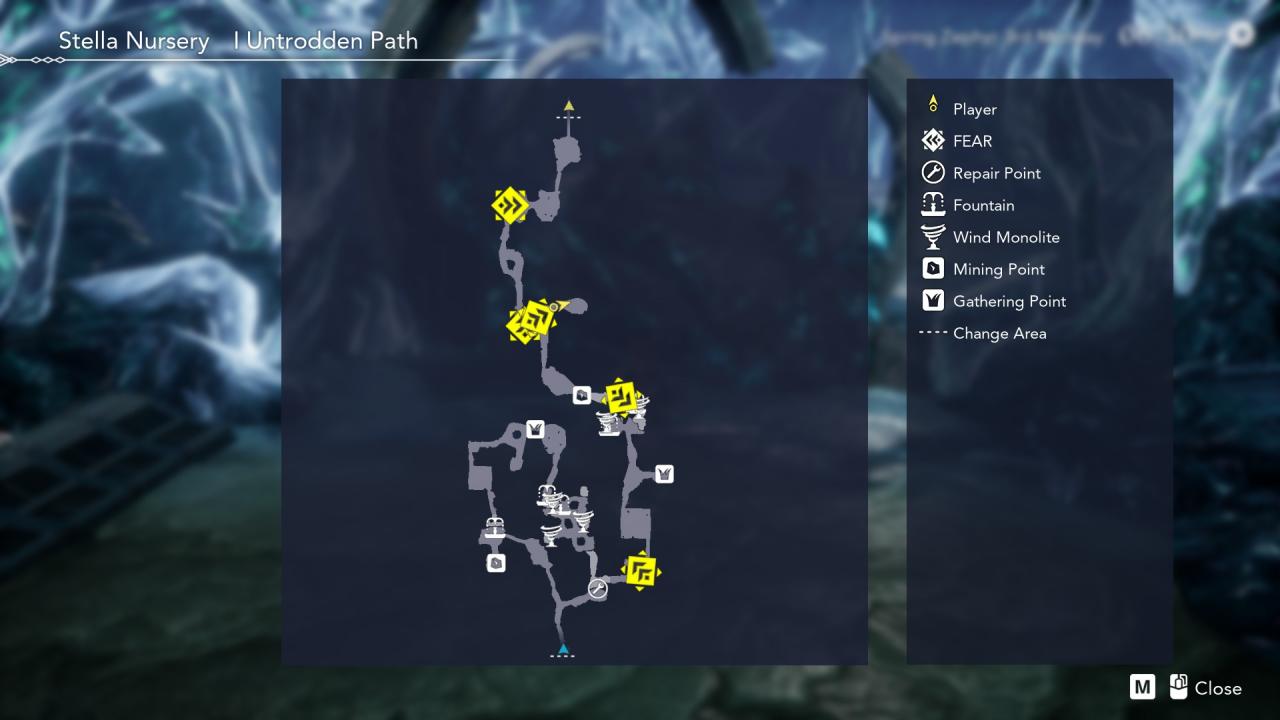
#1 I Untrodden Path
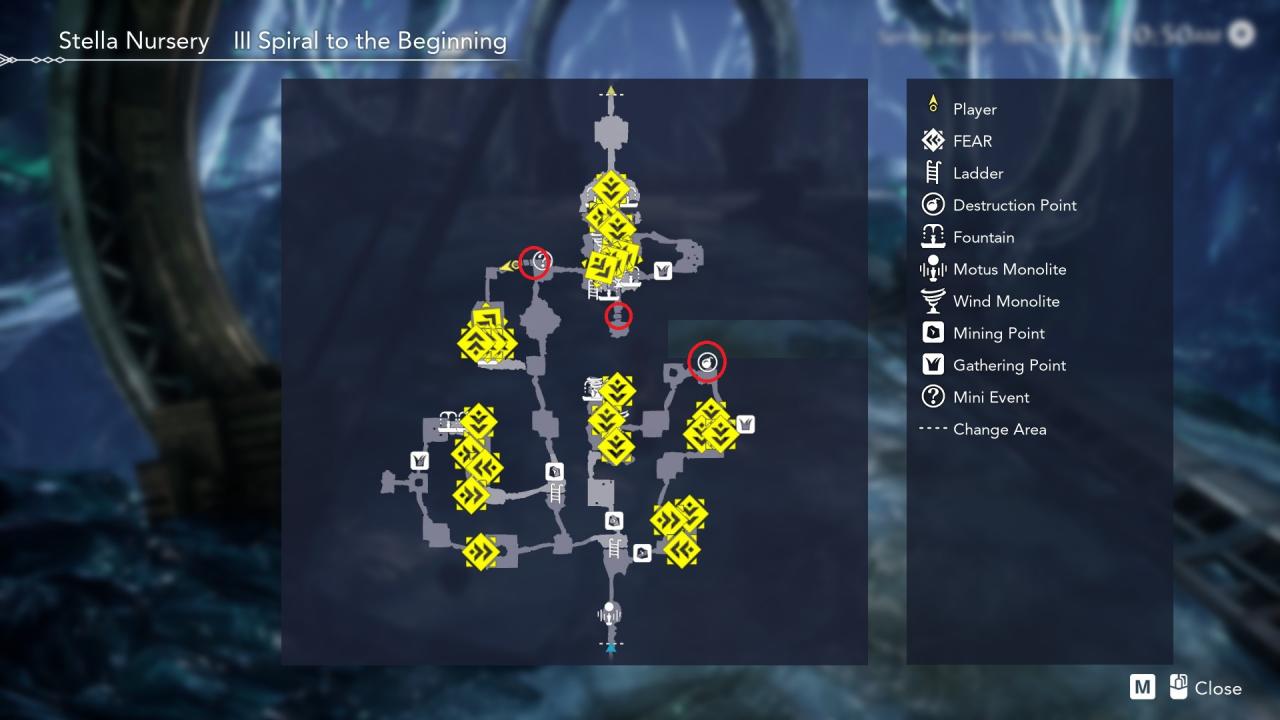
#2 III Spiral to the Beginning
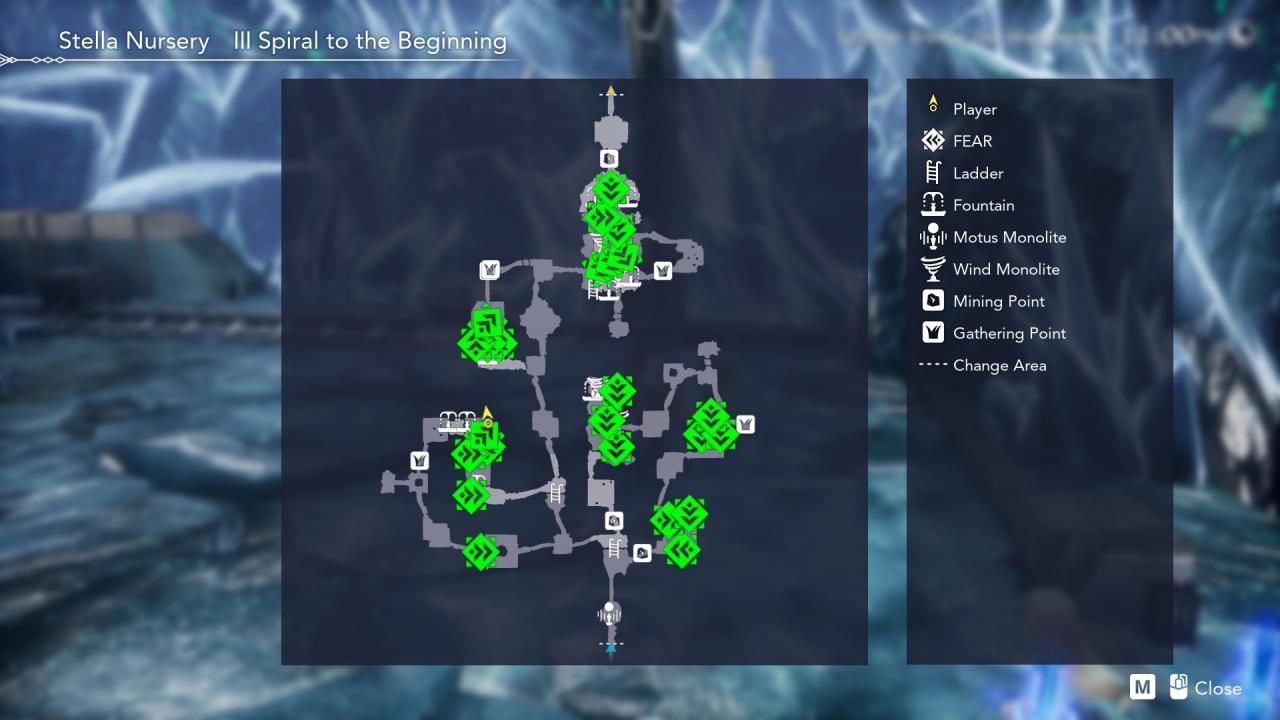
Use Totokaku from Shatolla West Beach

Milestones for reaching Floor 5, 40, and 60. Really hard to miss since it’ll be in front.
Totokaku & Cave Locations
 Eat Up
Feed your pet for the first timeTo feed your pet, buy the Totokaku Feed from the Conellu that set up shop in Lethe Village. You have to interact with your pet at home to trigger the option to feed (upgrade) it.
 Grow Big and Strong
Level up your pet to its maximum levelBefore you do the achievement below, it’s best to upgrade your Totokaku all the way. I’d argue this upgrade is more important than Farm size and Livestock because you can get access to a JP-boosting ring early on in your adventures if your Totokaku can swim (Ctrl+F = “JP Ring”).
 Dig, Totokaku, Dig!
Find all caves by digging


Animal Lover
 A Dairy Story
Rear your first livestock
 Animal Lover
Rear max livestock and max bond with allIt takes roughly a month to max out your bond with each individual animal. I suggest going for the Totokaku first UNLESS your first year is frontloaded with Stellar Wheat and Grass OR you were able to rush 30 Conellu Dolls for the Lvl. 3 Feed Maker. There is a huge difference between Lvl. 1&2 Feed Maker compared to 3 in terms of efficiency and output so rear livestock early on if you plan on keeping them adequately fed without changing your routine too much.Livestock is a great way to earn money daily at 10 Cluffowls and 10 Woolums. The additional miscellaneous items they generate daily can earn you up to an additional 5,500 Grilla/day at max bond. Additionally, when you are not actively processing Milk/Eggs, you can use them as cheap Stamina food when foraging.
Star Fisher
 Nice Catch
Catch your first fish
 Veteran Angler
Catch 10 kinds of fish
 A Good Day for a Big Catch
Catch 20 fish in a dayCatching 20 fish should take no longer than half the day depending on how fast they bite.
 Not Your Everyday Quotidicrab
Catch a size 10 QuotidicrabThis is pure RNG but I don’t think it’s too rare.
I caught 2 size-10 Quotidicrabs on the same day at both Lethe Village and the Farm.
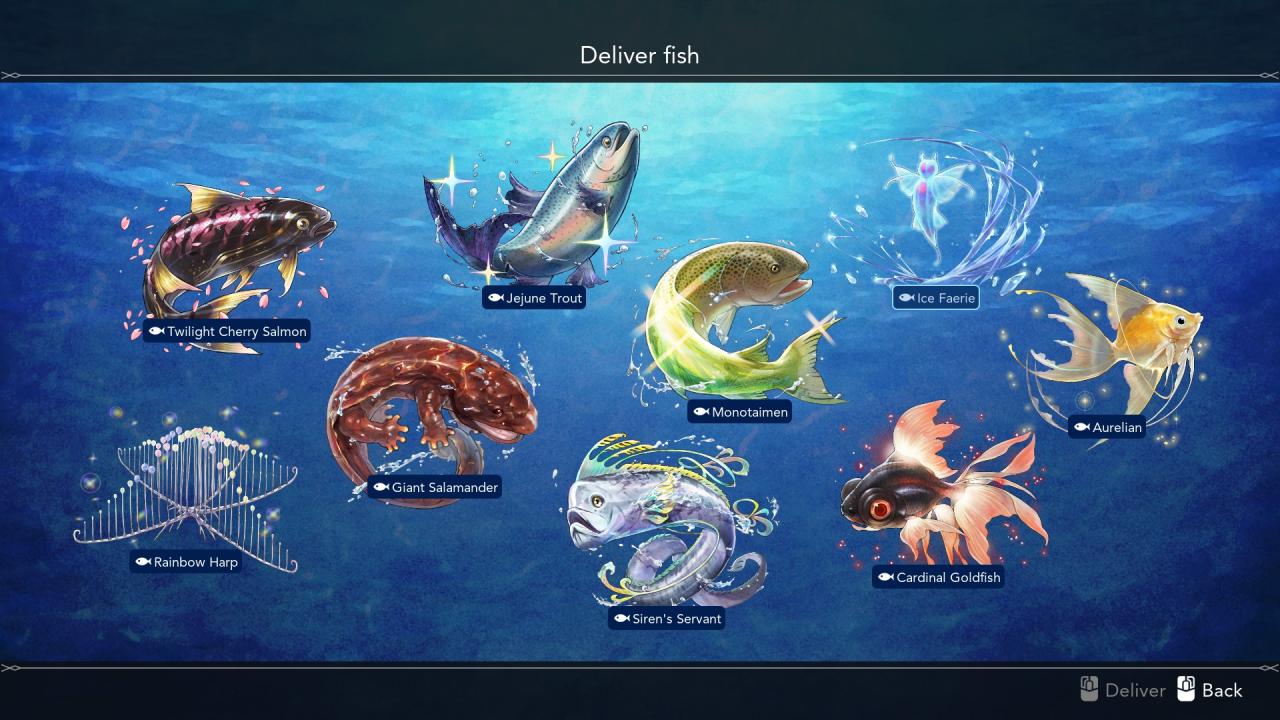
 Star Fisher
Catch every kind of fish
You DO NOT need both normal and gold quality fish to get the achievement.
Eversweet Fish/Gazing Carp/Quotidicrab can be caught in most early-game areas.
Farm:
- Azure Sprat
- Argentian
- Aurelian (RARE)
- Monotaimen
- Springbringer Carp (WINTER ONLY)
Lethe Village:
- Argentian
- Azure Sprat
- Aurelian (RARE)
- Salamander
Higan Canyon:
- Golden Egg Salmon
- Jejune Trout (RARE)
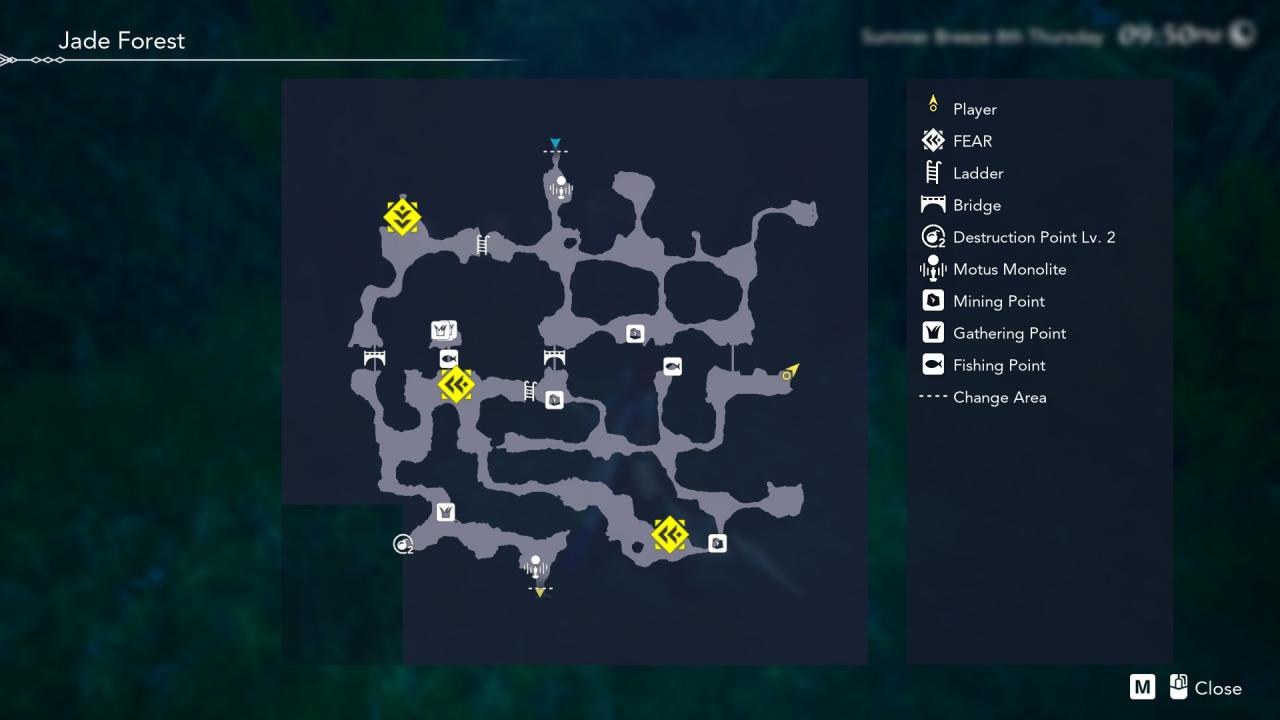
Jade Forest:
- Argentian
- Aurelian (RARE)
Shatolla:
- Octopus Traveler
- Memoriam
- Roly Poly Prawn
- Rosy Seabream
- Golden Egg Salmon
- Super Grouper
- Great King Tuna
- Siren’s Servant (RARE)
Nemea:
- Cherry Salmon
- Marigoldfish
- Twilight Cherry Salmon (RARE)
Argene:
- Chilly Pollock
- Frosty Herring
- Ice Faerie (RARE)
(Quietus) Karenoid:
- Venin Clam
- Cardinal Goldfish (RARE)
Panthalassa Junction:
- Firefly Squid
- Peculiar Barracuda
- Rainbow Harp (RARE)
I heard rare fish live in village nearby. When season become fall, rare fish come out.
Salamander can be caught in Lethe village during Autumn Chill.
Apparently, rare fish live on dis hill, too. It’s not me, though. Don’t try and fish me.
Monotaimen can be caught on the Farm year-round.
I heard rumor about rare fish dat come out when you catch lots of certain Fish.
Aurelian becomes available to catch after you catch around 6 Argentian. You can catch one in the same spots as the Argentians. This is easiest to catch in Jade Forest since there’s a smaller pool of possible fish to catch.
In town in south, dey say something appears when it rains.
Siren’s Servant can only be caught in Shatolla when it is raining.
Glub. Someone told me best day for mountain stream fishing is day after rain.
Jejune Trout can be caught in Higan valley only on the days that follow rainfall.
Some rare fish live underneath thick ice. Glub…I don’t wanna go to ice place.
Ice Faerie can be caught at Snow Hut Square in Argene year-round.
Glub. I hear there’s rare fish dat likes to view flowers at nighttime.
Twilight Cherry Salmon can be caught in Nemea after 7pm.
I heard dat you can find bizarre-looking fish in bizzare-looking cave.
Cardinal Goldfish can be fished in Karenoid which is only accessible during Quietus through the well on your farm. If you are unable to access it, keep progressing your story until you have Aria before Quietus. That’s one of the reasons that can block entry to the well.
Some rare fish live in far away sea. I wonder what dey look like.
Rainbow Harp can be caught in Panthalassa Junction.
Big Landowner
 A Farm to Be Proud Of
Expand the farm to level 3Your farm starts off at Level 1 with a 10×7 plot of land.
Upgrades are purchased from the Renovator:
- Level 2 – 3,000G → + 8×7 plot
- Level 3 – 8,000G → + 3×7 plot
 Big Landowner
Expand the farm to its max size
There are 8 upgrades in total costing 491,000G.
- Level 4 – 15,000G → + 10×7 plot
- Level 5 – 25,000G → + 8×7 plot
- Level 6 – 40,000G → + 3×7 plot
- Level 7 – 80,000G → + 10×7 plot
- Level 8 – 120,000G → + 8×7 plot
- Level 9 – 200,000G → + 3×7 plot
As you can see, upgrade levels 4 & 7 provide the largest expansion relative to the cost. I suggest farming end-game at Level 7/8 to balance your funds for seeds and weapon upgrades while maintaining a respectable plot size for the Harvest Master achievement.
Head Chef
 Novice Cuisinier
Cook 5 kinds of meal
 Head Chef
Cook every kind of mealMost recipes are purchased from General Stores. Some are locked behind deliveries.
The rest are from Karenoid, Conellu Doll rewards, and world map exploration.You can inspect where ingredients can be found on the cooking menu. This list is accurate for the most part, but some locations that are unmentioned may be better.You DO NOT need both normal and high-quality versions cooked to get the achievement.
- Mountain Stir Fry
- Picnic Sandwich
- Ketchup Omelet
- Lethe Hamburger and Egg
- Lethe Vegetable Salad
- Lethe Breakfast
- BBQ Churrasco
- Lethe Ratatouille
- Cucumble & Mince Sandwiches
- Lantern Pumpkin Gratin
- Tacos
- Oyster & Veggie Udon
- Warm Pumpkin Soup
- Chilled Corn Soup
- Rainbow Bean Curry Soup
- Eversweetfish Meunière
- Fall Salmon & Veggie Hotpot
- King Cake
- Mont Blanc
- Vegetable Muffin
- Lethe Special Dinner
- Cheese & Tomato Caprese
- Eggs Benedict
- Tomato & Eggplant Cheese Bake
- Meaty Antipasto
- Nemea Meat Pizza
- Nemea Bolognese
- Chilled Tomato Paste
- Cherry Salmon Marinade
- Cup of Tea
- Strawberry Shortcake
- Peach Rose Mousse
- Nemean Splending Spring
- Sebream & Octopus Carpaccio
- Shrimp & Mushroom Ajillo
- Shatollan Seafood Salad
- Fisherman’s Sandwich
- Vongole Bianco
- Tom Yum Soup
- Shatolla Acqua Pazza
- Coconut Meat Stir Fry
- Coconut Milk Toast
- Super Sweet Shatollan Smoothie
- The Seasons
- Red Moon
- Bitter Cafe Mocha
- Great King Tuna Tartare
- Argene Cabbage Stew
- Pepper Cream Penne
- Jansson’s Temptation
- Herring in a Fur Coat
- Meat with Herbs & Spices
- Summer & Winter Spicy Fish
- Chilly Pollock & Roe Blini
- Mapo Tofu
- Super Spicy Argene Hotpot
- Meat with Spicy Argene Sauce
- Ice Cream
- Season’s Boquet Salad
- Great Plate Stake
- Watermelon Bowl Fruit Punch
- Blessed Charlotte Cake
- Salmon Riceballs
- Nikujaga
- Kamameshi
- Chawanmushi
- Venin Clam Miso Soup
- Big Catch Tempura Bowl
- Premium Tuna Sashimi
- Smoked Seabream Ramen
- Seafood Pho
- Curry Rice
- Superb Eden Curry
- Phantasma Choco Churros
- Forbidden Apple Pie
- Melting Chocolate Fondant
- Green Tea Shaved Ice
- Bunny Buns
- Dangerous Nitro Sautee
- Warm Tea Blend
- Pure Medicinal Porridge
- Crescent Moonfruit Tart
- Conellu Bun
Note: Red Moon is a Karenoid reward.
The One Who Created Everything
 Creative
Craft 5 kinds of item
 The One Who Created Everything
Craft every kind of itemMake sure you actually have the crafting recipes and not just the Encyclopedia entry. That one gets filled when you get the item from something like a treasure chest. To get this achievement, you actually need the recipes to then make each item listed below.
- Return Bell
- Repair Kit Lv 1 & 2
- Bomb Lv 1 & 2
- Flour Mill Lv 1-3
- Fermenting Barrel Lv 1-3
- Feed Maker Lv 1-3
- Cheese Maker Lv 1-3
- Smoker Lv 1-3
- Jam Maker Lv 1-3
- Dessert Maker Lv 1-3
- Spice Maker Lv 1-3
- Battery Charger
- Chaos Cleaner
- Accessory Synthesis Jar
- Sprinkler Lv 1-3
- Fancy Brown/Green/Black Fence
- Simple Brown/White/Orange Fence
- Arched Brown/Blue/Green Fence
- All Elemental Orbs
- All Renewed Elemental Orbs
- Promise Ring
Note: Philosopher’s Orb is locked behind the Four Demons puzzle room.
Arched Brown Fence is found in the world map. (see EXTRA: Recipe Locations category)
Promise Ring recipe is obtained a few days after beating the main story.
Harvest Master
 First Harvest
Harvest your first crops
 Veteran Farmer
Harvest crops a total of 1,000 times
 Harvest Master
Harvest crops a total of 10,000 timesYou’ll get this achievement along the way so don’t worry too much about it. Work on the Wind Faerie Orders to get upgraded planting and harvesting abilities (larger coverage in one shot). You should get this achievement before you even finish upgrading all of your weapons.
Jack of All Trades
 Jack of All Trades
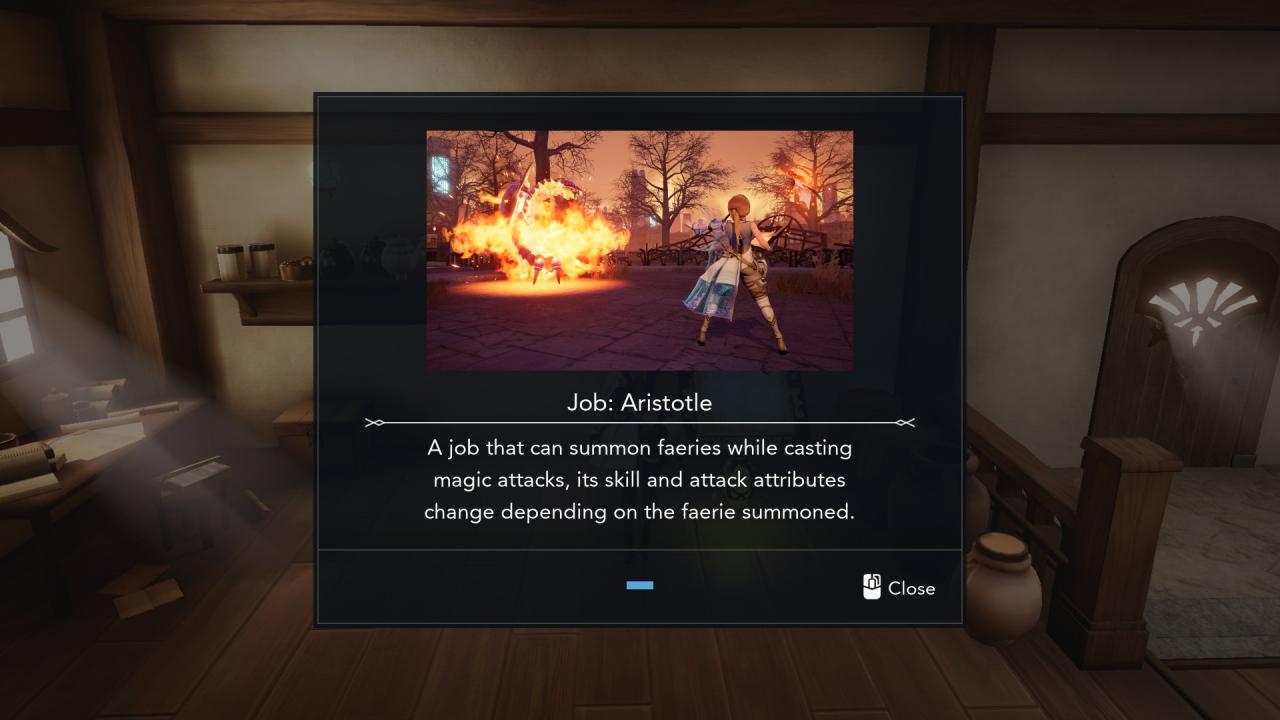
Unlock all jobsPlaying through the Main Story gets you every job except for 2:
- Aristotle
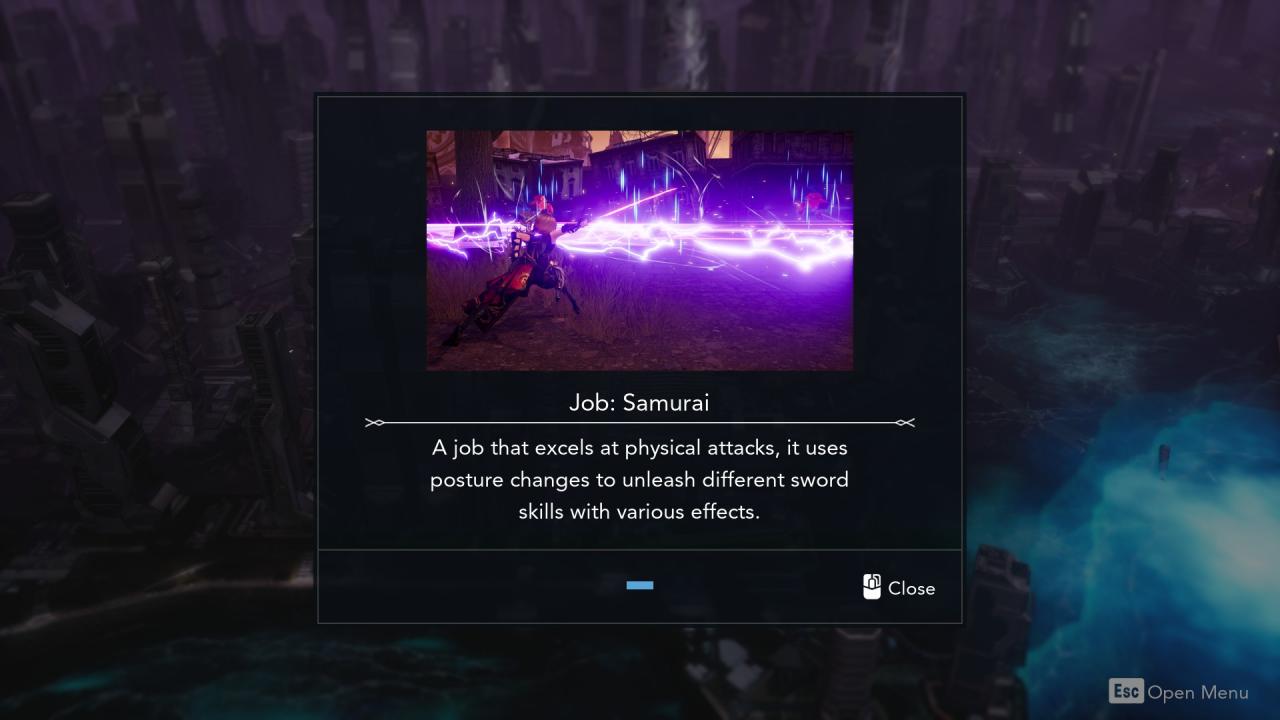
- Samurai
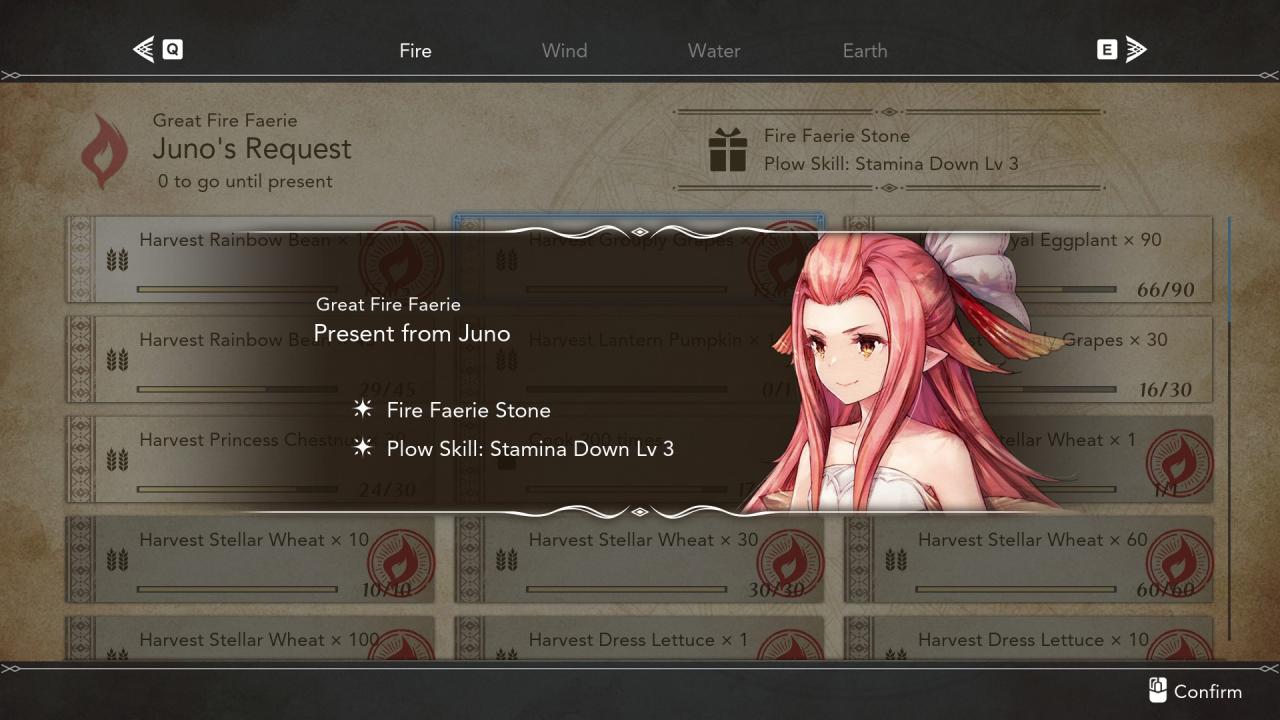
Unlocking Aristotle is simple although it will take some time. You simply need to complete 60 Faerie Orders for each element to get their stone. Once you get all 4, Aristotle will automatically be unlocked. Please refer this spreadsheet[docs.google.com] (linked with permission), put together by the wonderful Aurelia Rose from the r/Harvestella discord, to gain foresight on all Faerie Orders.
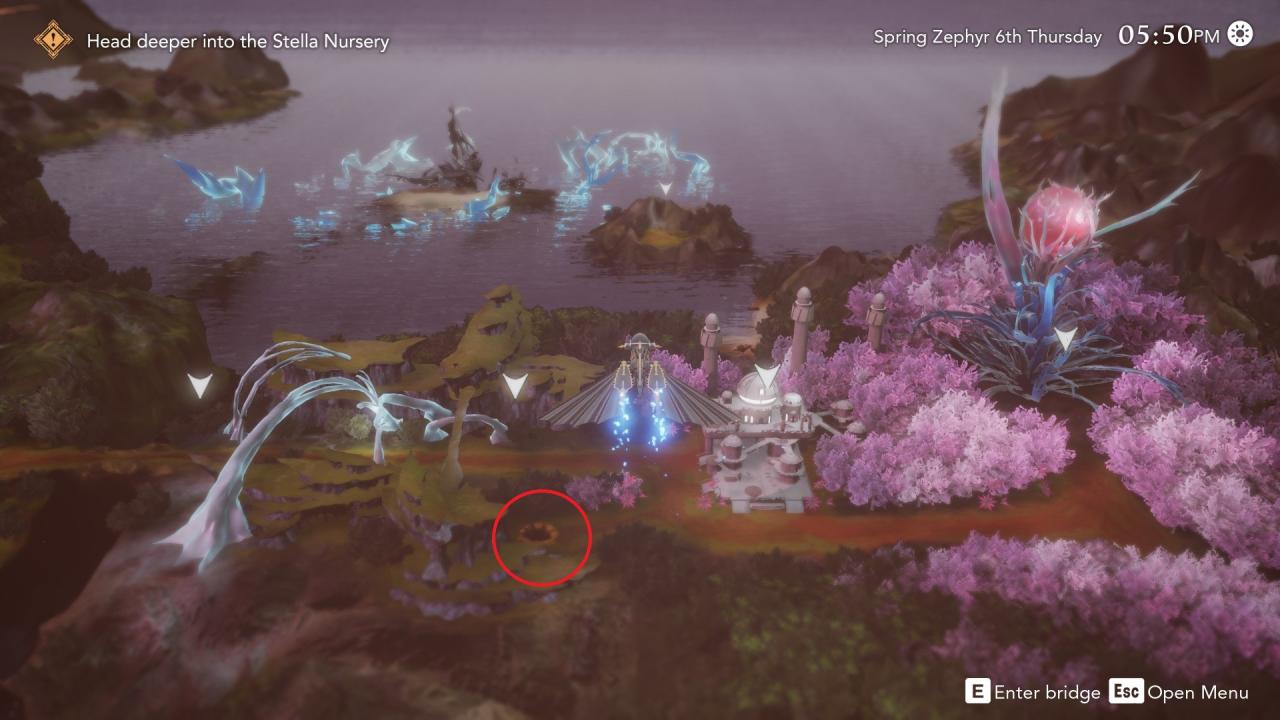
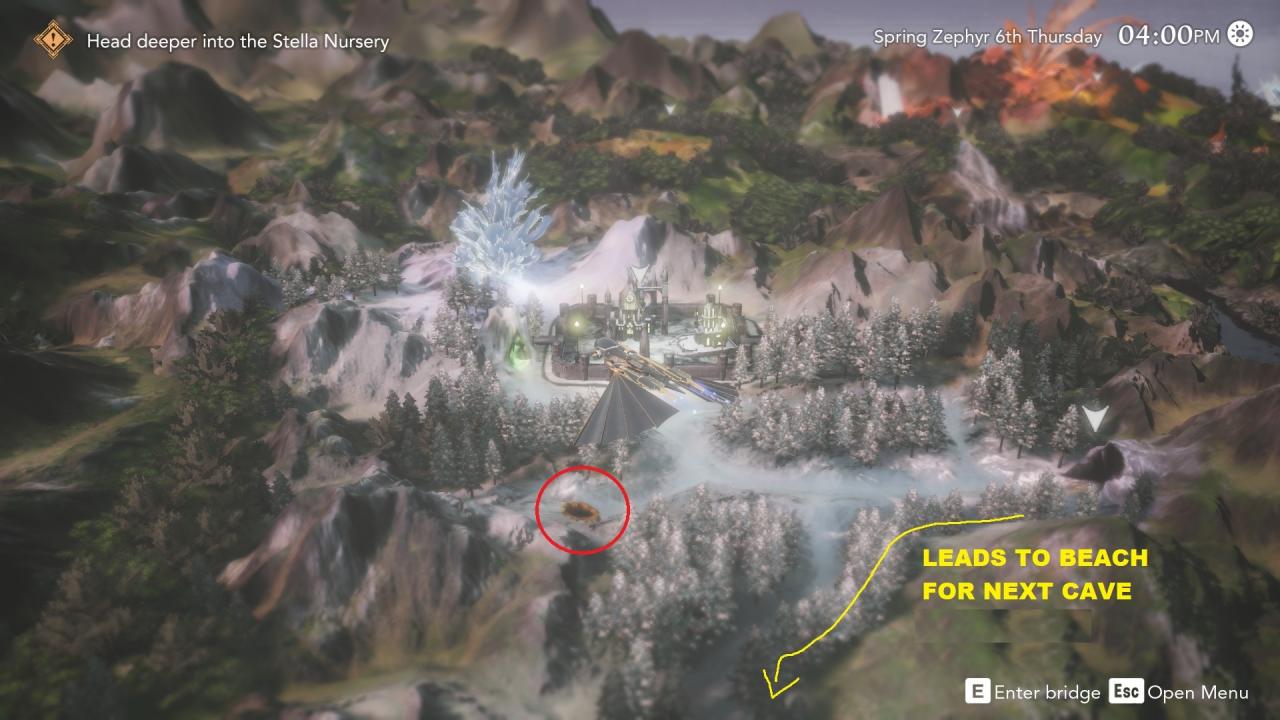
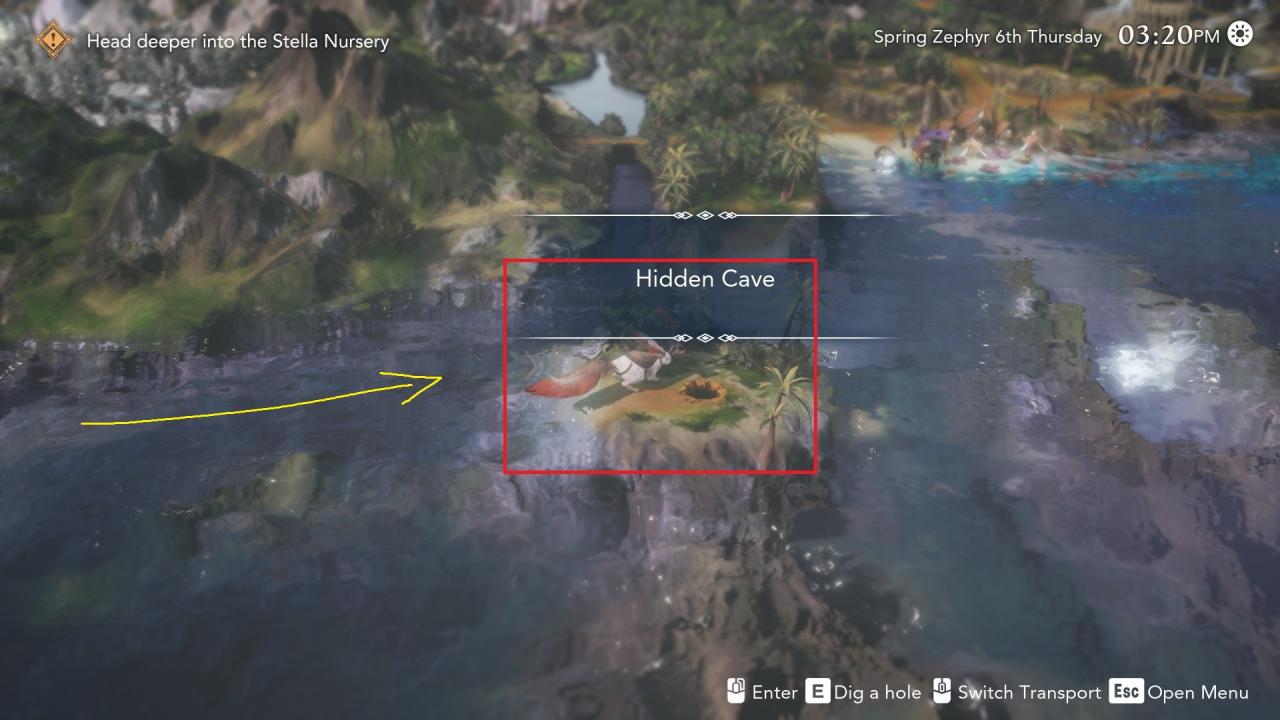
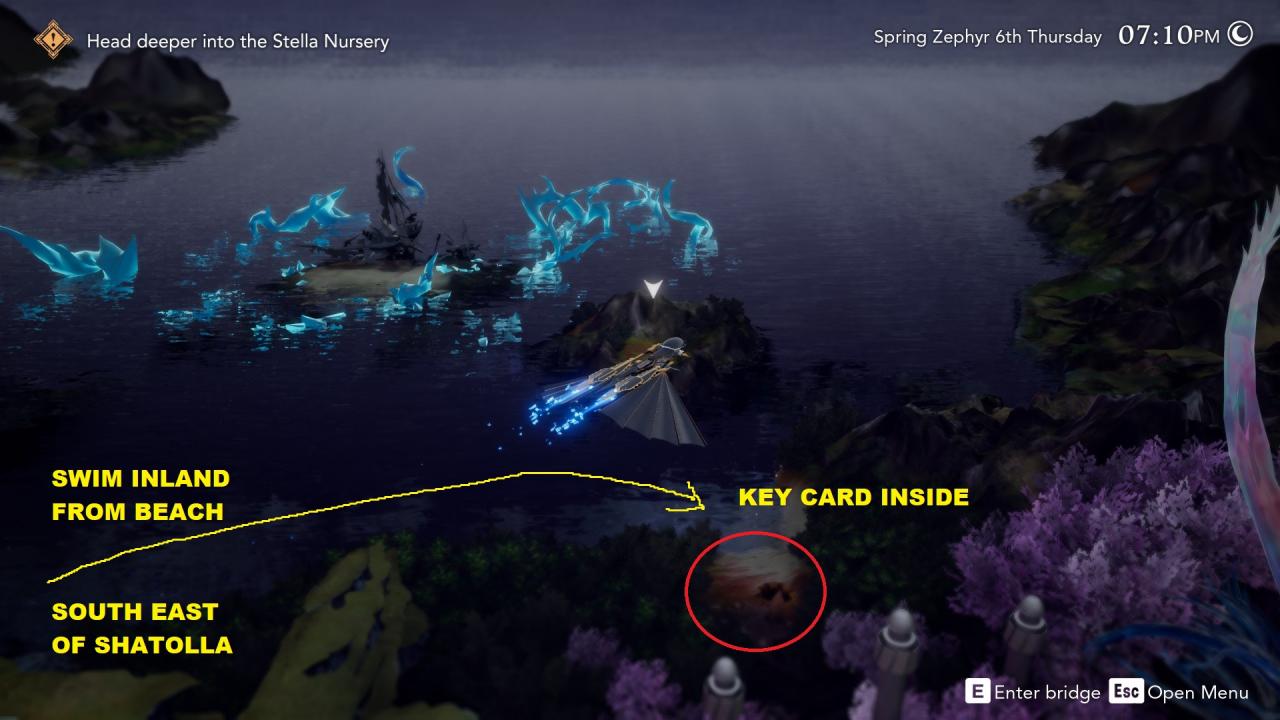
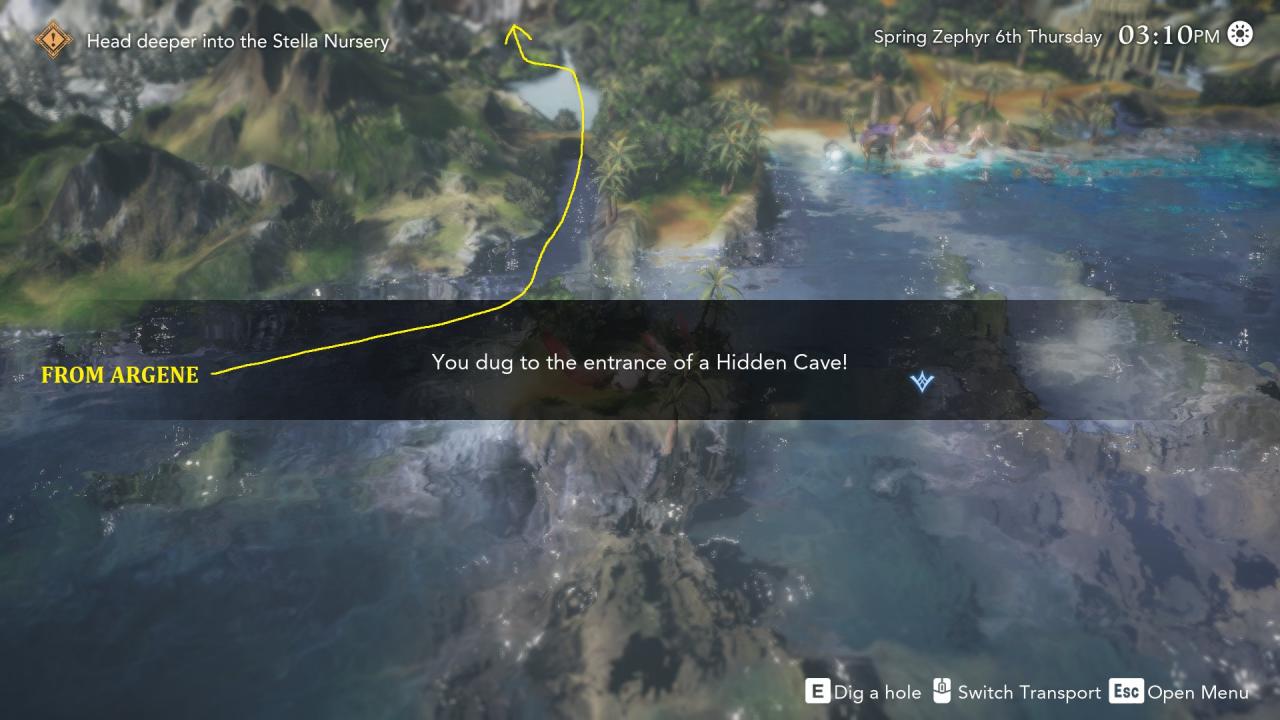
To get the Samurai job, you need to turn in an old scabbard and broken katana to a hidden NPC hiding in the world map of Lost Gaia. You can get the required items before meeting him to make things a lot simpler.
To start off, swim with your max-level Totokaku from the beach east of Shatolla and swim in-land to dig on a beach up North to find a Hidden Cave. The cave has a level 50 FEAR inside and a treasure chest containing a Key Card.
Use this Key Card on the locked door at III Seraph Memorial Garden (Floor 7) of the Research Center to get the Broken Katana inside a chest.
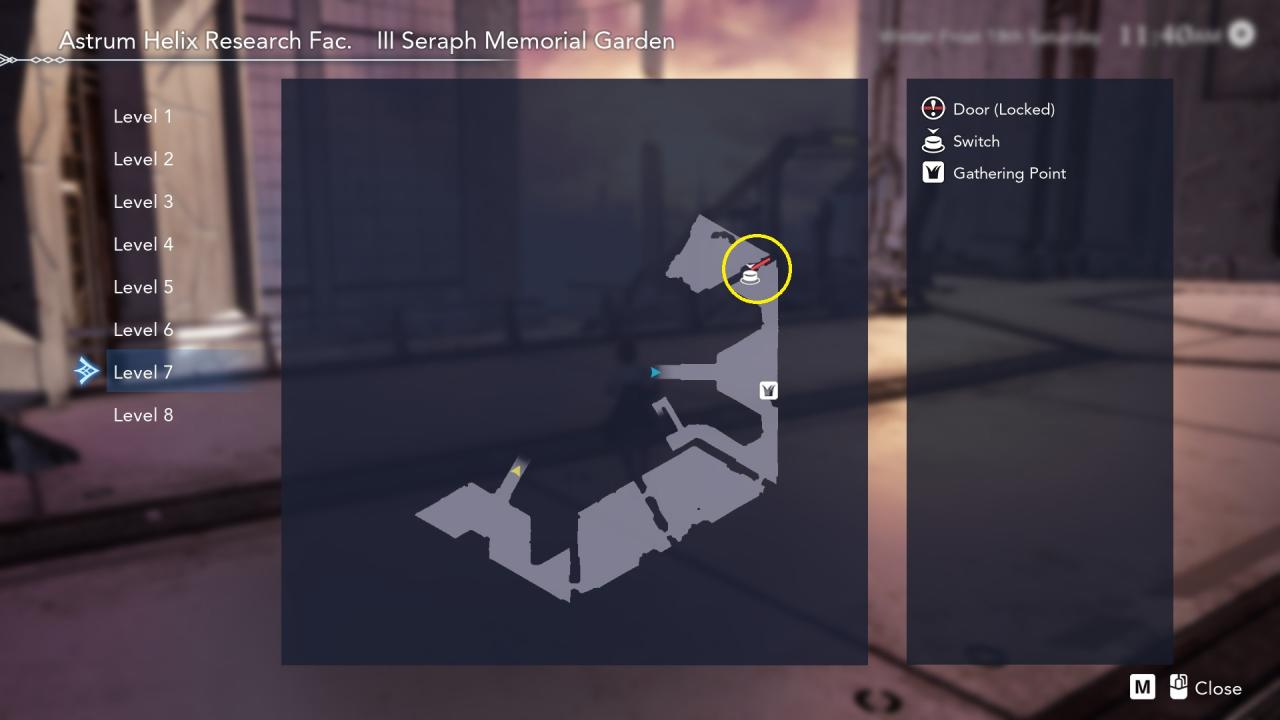
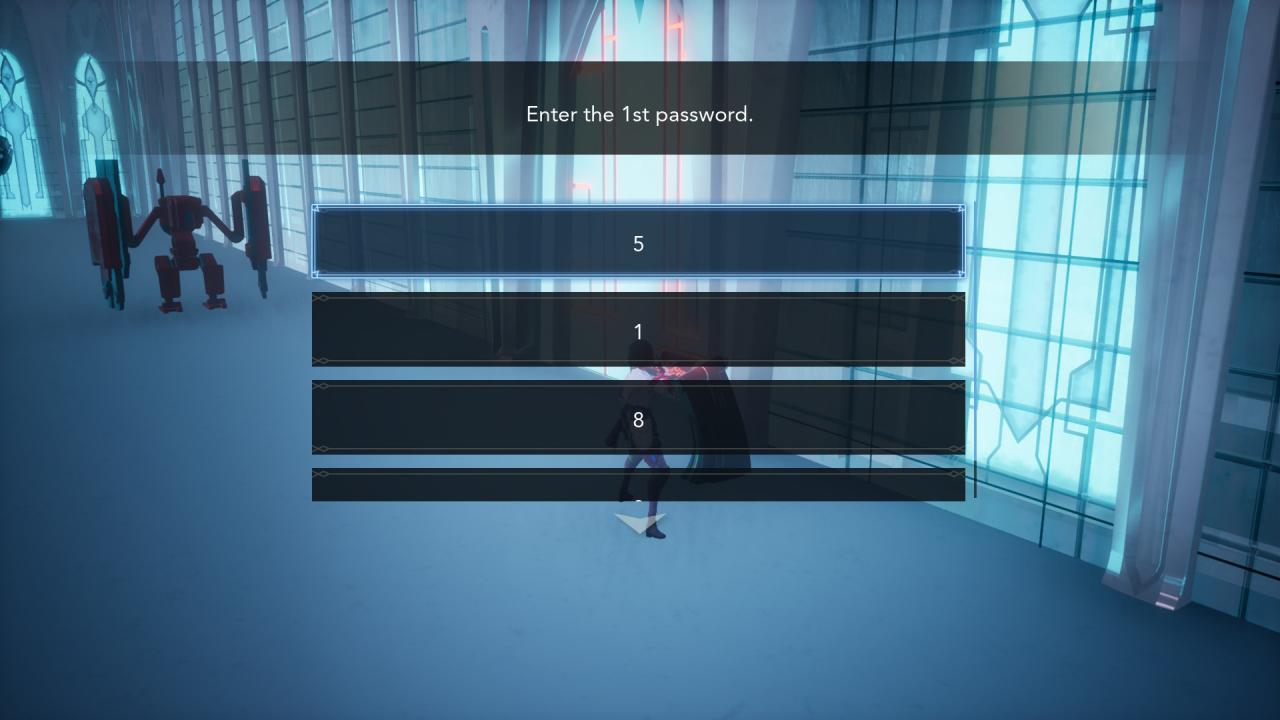
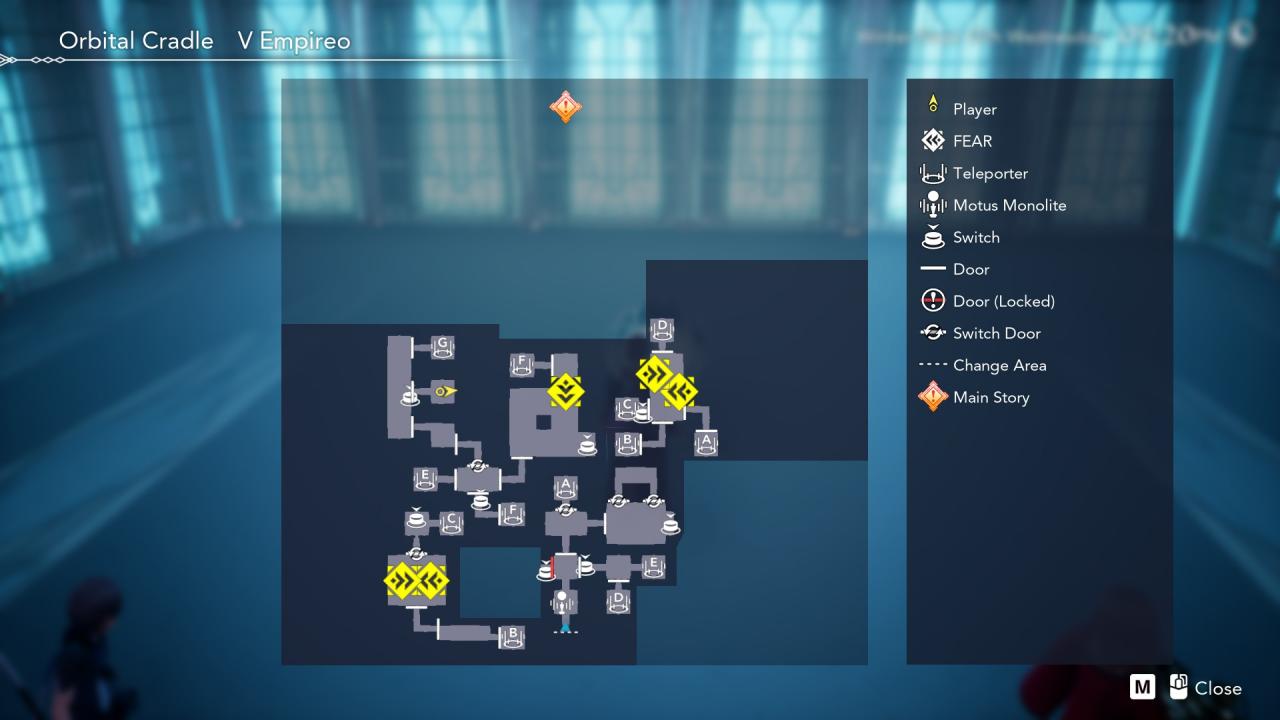
The next piece, the Scabbard is located at Orbital Cradle – V Empireo on the west side behind a locked door with a password. The password hints are in Abandoned Eden. Hints: It starts with 0, 2 is odd, 3 is even. This means that the 1st # is 0, the second number is the ONLY odd number, and the 3rd number is the ONLY even number.
After getting both pieces, exit the Research Center and into the Lost Gaia world map. Head southwest to find an NPC hiding behind a building who will give you the Samurai job upon handing him the items.

EXTRA: JP Farming
If you want to have earlier access to your final skills, it will help you a ton if you equip both JP Rings that are available in the game.
- The JP UP IV Ring can be obtained as a Conellu Doll reward
- The JP UP II Ring requires a max-level Totokaku.
Conquering the Well
 A Cave Full of Wells
Clear 10 floors of the Karenoid
 Conquering the Well
Overcome the last trial of the KarenoidKarenoid is only accessible during Quietus via the Old Well and can only be completed 2/3 of the way (up to 40) before completing the Main Story. Once you clear Chapter 10 and reach the Epilogue, you can access it at any time.To easily defeat the last boss of the Karenoid, bring a row (or two) of juice, all upgraded Elemental Stones (at least 4 of each), and Break UP food. You don’t have to use the same composition or party members I used but here is my list and rationale:
- Job Comp – Assault Savant, Woglinde, Aristotle
- Party Members – Aria & Emo
- Accessories – at least MAG DEF (Karenoid FEARs drop great rings)
I use Assault Savant since it deals great damage without much input by using Tetra Vortex+Photon Ray. The element is also strong against the first phase. I just switch into AS every double break to unleash the wombo combo whenever it’s off cooldown. Since AS requires less input, I can focus on using the elemental stones to keep the Double Break up.
Emo is there for the party skill/full heal. Every Double Break (which you can trigger easily using elemental stones) = free full heal which will negate that periodic nuke from the boss.
- Phase 1 is weak to Fire and Lightning
- Phase 2 is weak to Earth and Poison
- Phase 3 is weak to Ice and Water
- Phase 4 is weak to Sage and Wind
Aristotle is there because her final skill is strong against Phase 4 and is a reliable nuke to rotate during Double Break. The 4-element coverage also helps if you don’t have enough stones or fudge the order. Make sure you pace yourself with the Break UP food to last until the end.
Perfect Break
 Perfect Break
Max out all 4 Break GaugesStep 1: Find out the 4 weaknesses of the FEAR/Boss.
Step 2: Manage the break gauge so all breaks happen before the first break expires.
Recommended: Use Kamameshi or similar food (+150% Break Gauge UP)
Optional: Use a 300% Break Gauge UP food, Aristotle, and Party Bonus from Aria and/or BrakkaNote: This is A LOT easier with elemental stones.
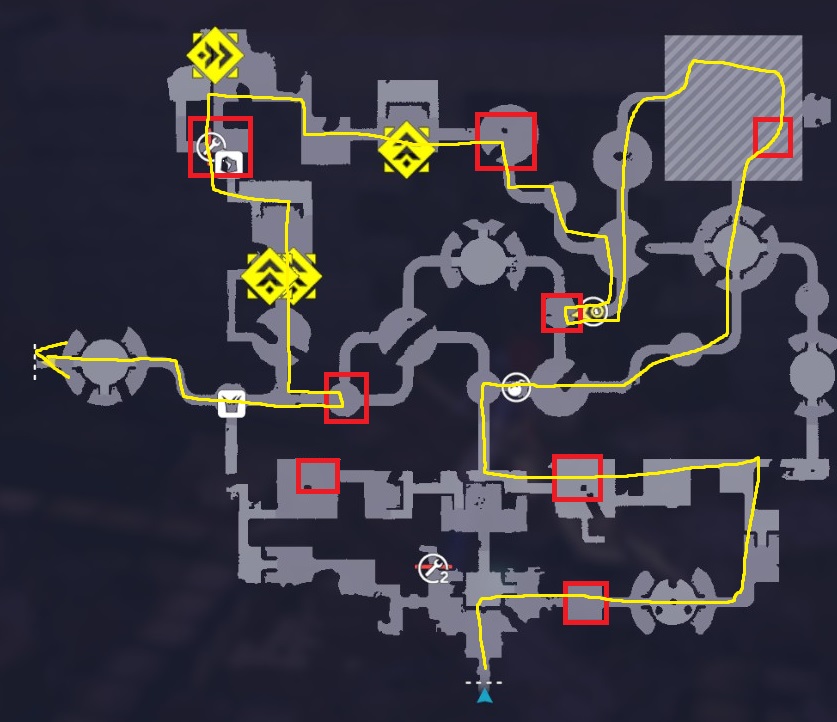
Envoy of Ruin + Repairs (INCOMPLETE)
Note: I am currently missing 2 (at 28/30) screenshots for walls and not sure how many I’m missing for repairs. Any help would be appreciated. For now, I’m waiting for a friend to help me proof this section of the guide. Sorry for the inconvenience!
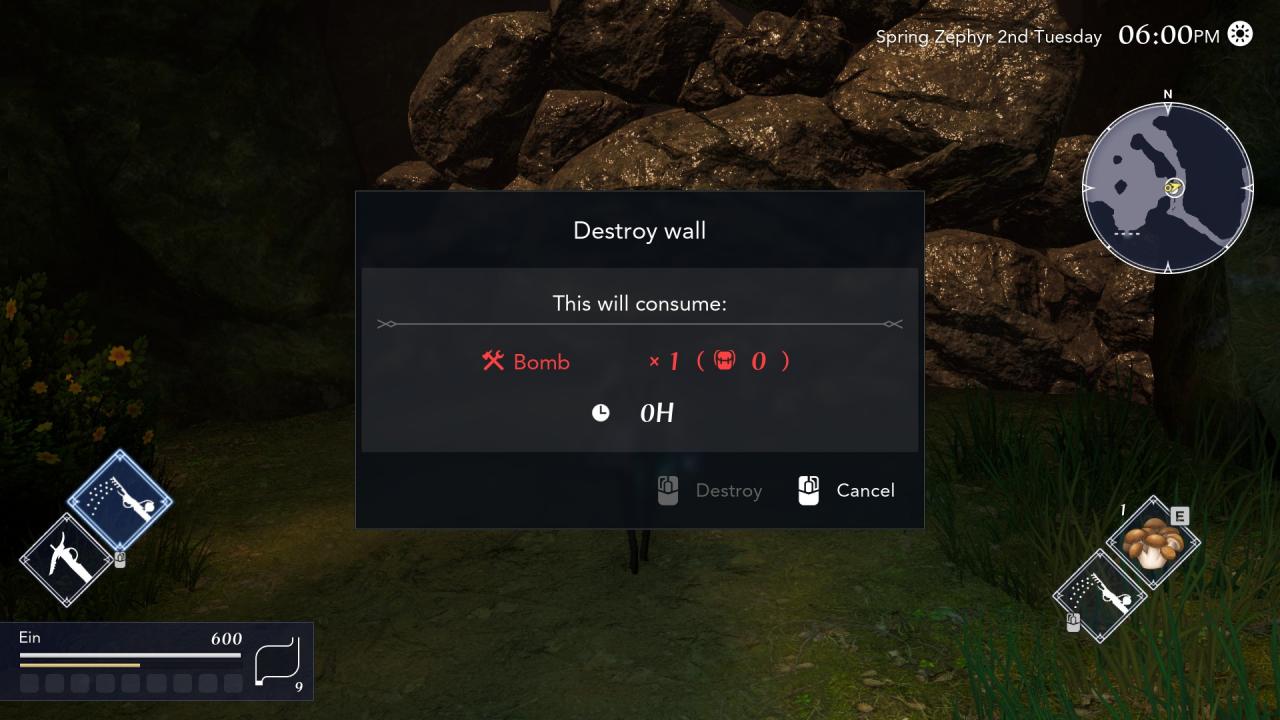
 Envoy of Ruin
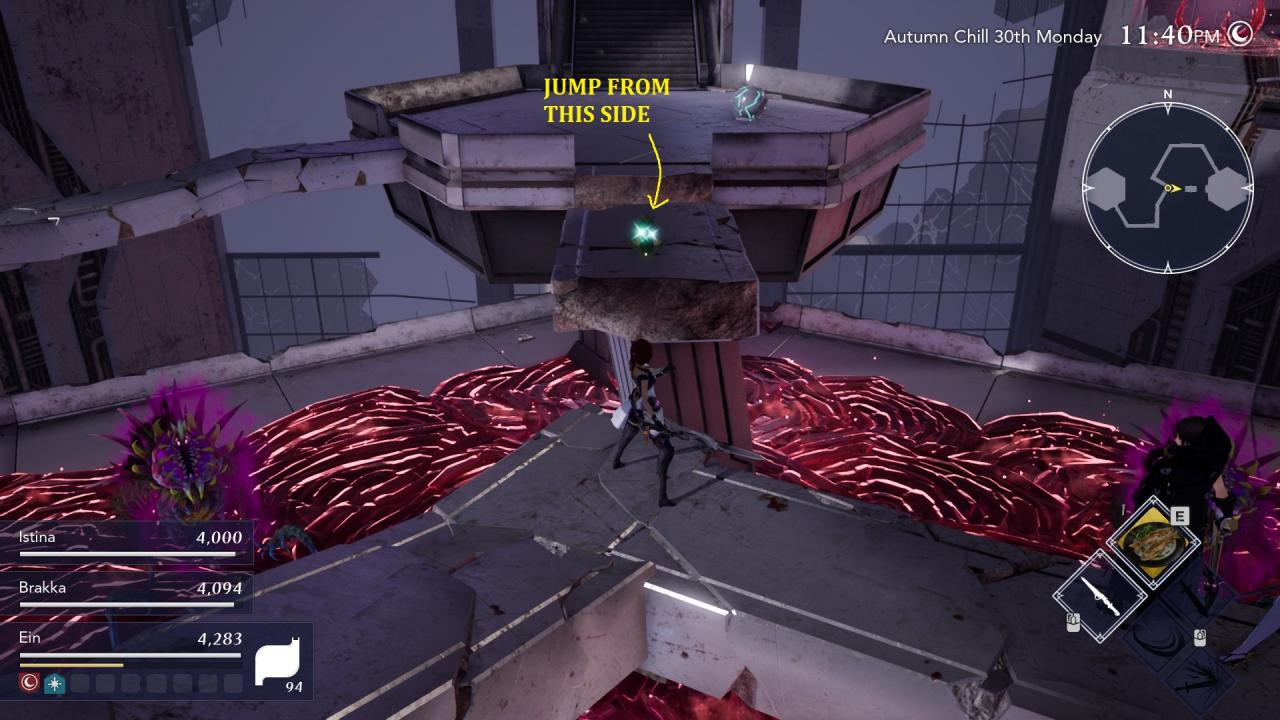
Destroy all walls with bombs
I’m adding Repairs as a bonus and would appreciate any corrections/improvements. There are 30 walls, 39 repair areas (not incl. Ladders), and 20 ladders. For ladders, I’m only posting the screenshots of the map because I’m unable to tell which ones originally needed repairs. The main goal is to get the 30 screenshots for Bombs/Walls.
- 1 L1 Bomb
- 2 L2 Bomb (Farm Area 1 & Cave Biome)
- Door to repair at Cave Biome
- Bridge at Hilltop Monolite
- 1 L2 Bomb
- 1 L1 Bomb accessible after L2 Bomb
- 1 L1 Bomb
- 1 L2 Bomb
- 1(?) L2 Repair

- 1 L1 Bomb
- 1 L2 Bomb
- 4 Bridges
- 1 L1 Bomb
- 1 L2 Bomb
- 2 Bridges
- 2 L1 Bomb
- 1 L2 Bomb
- 3 Bridges
- 2 L1 Bombs
- 1 L2 Bomb
- 2 Bridges (1 is underneath)
- 2 L1 Bomb
- 1 L2 Bomb
- 1 Bridge
NEED EXTRA CONFIRMATION FOR THIS LOCATION


- 3 L2 Repairs
- 2 L2 Repairs
- 4 L1 Bomb
- 5 L2 Repairs
There are 2 planks leading straight north in Area 1. Not sure if they count for Repairs/Ladders.
- 3 L2 Repairs

- 4 L1 Bombs
Battle-Hardened
 KO!
KO!Defeat your first FEAR
 Battle-Hardened
Defeat every kind of FEARKindly refer to this spreadsheet[docs.google.com] (linked with permission) compiled by the awesome VertVentus from the r/Harvestella discord! It should help you take advantage of FEAR weaknesses to achieve double/perfect breaks and expedite this achievement. Note that it also covers Bosses should you need help figuring out their weaknesses.
Miscellaneous
 Health Above Riches
Cook HQ Pure Medicinal Porridge

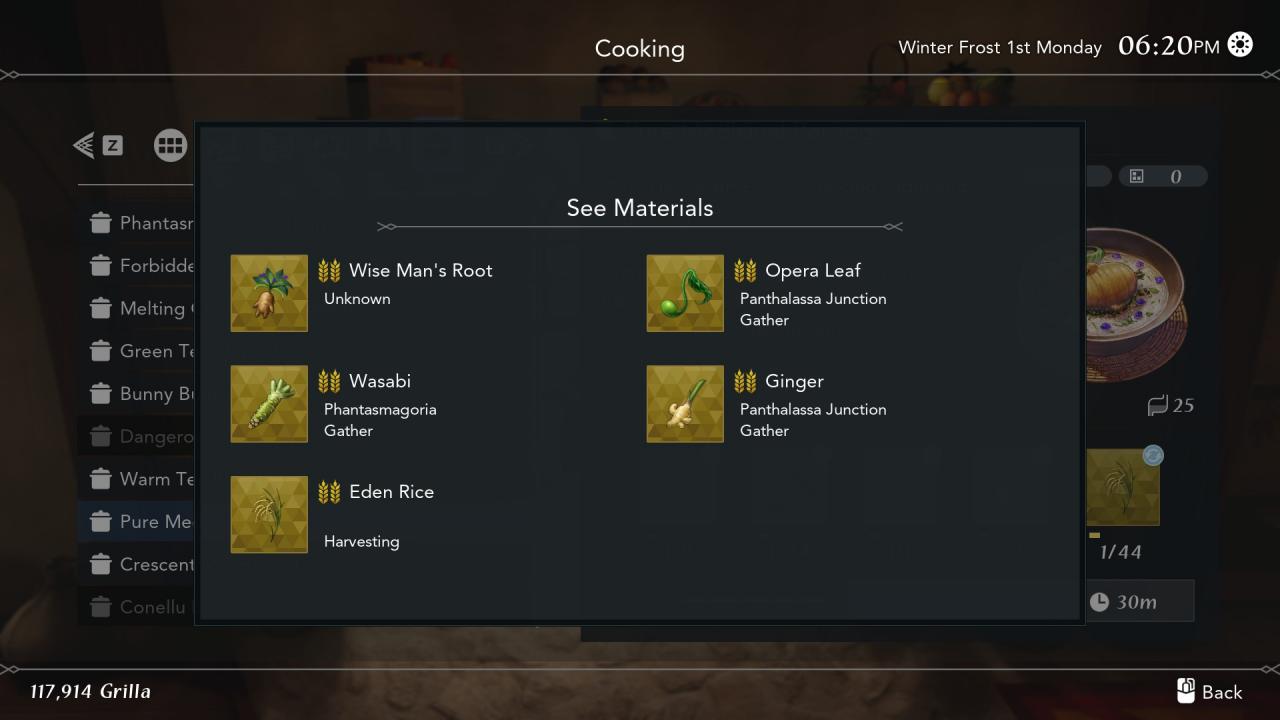 Wise Man’s Root can be obtained from hard-to-get Treasure Chests and the Karenoid. I’m not sure where else you can get some, but there will be a ton of opportunity throughout the game to get ample amounts of Wise Man’s Root.
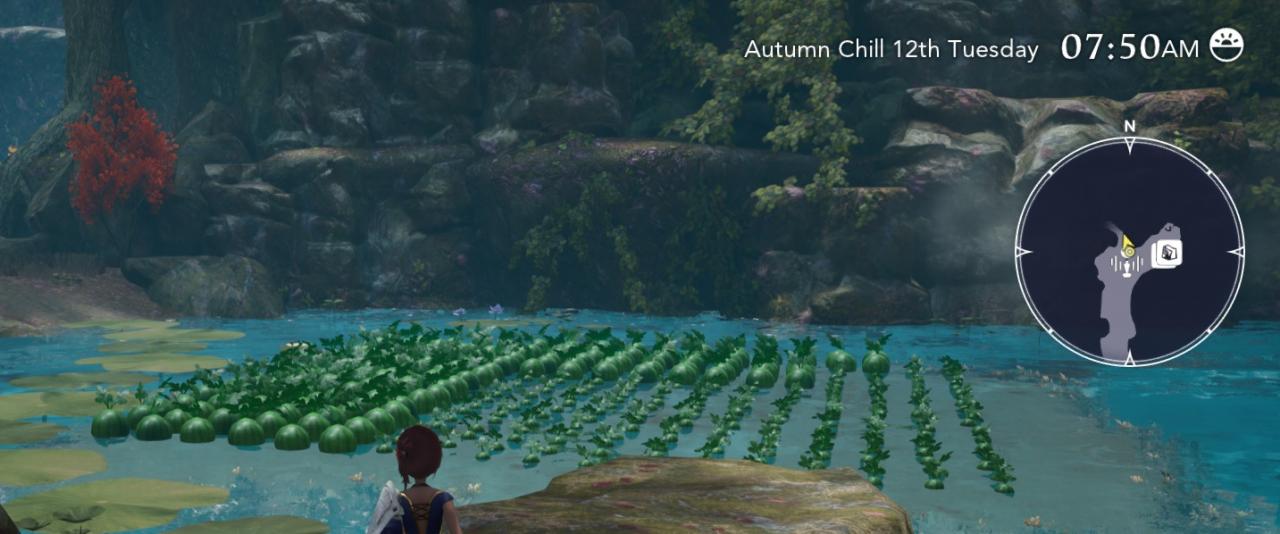
 Prized Watermelon
Harvest a high-quality Islet Watermelon
Upgrading Farm levels by completing Faerie Orders will increase your chance to get gold crops. Islet Watermelon is a Summer Waterside crop. Depending on your story progress and current funds, this may be better off as a year 2 crop.

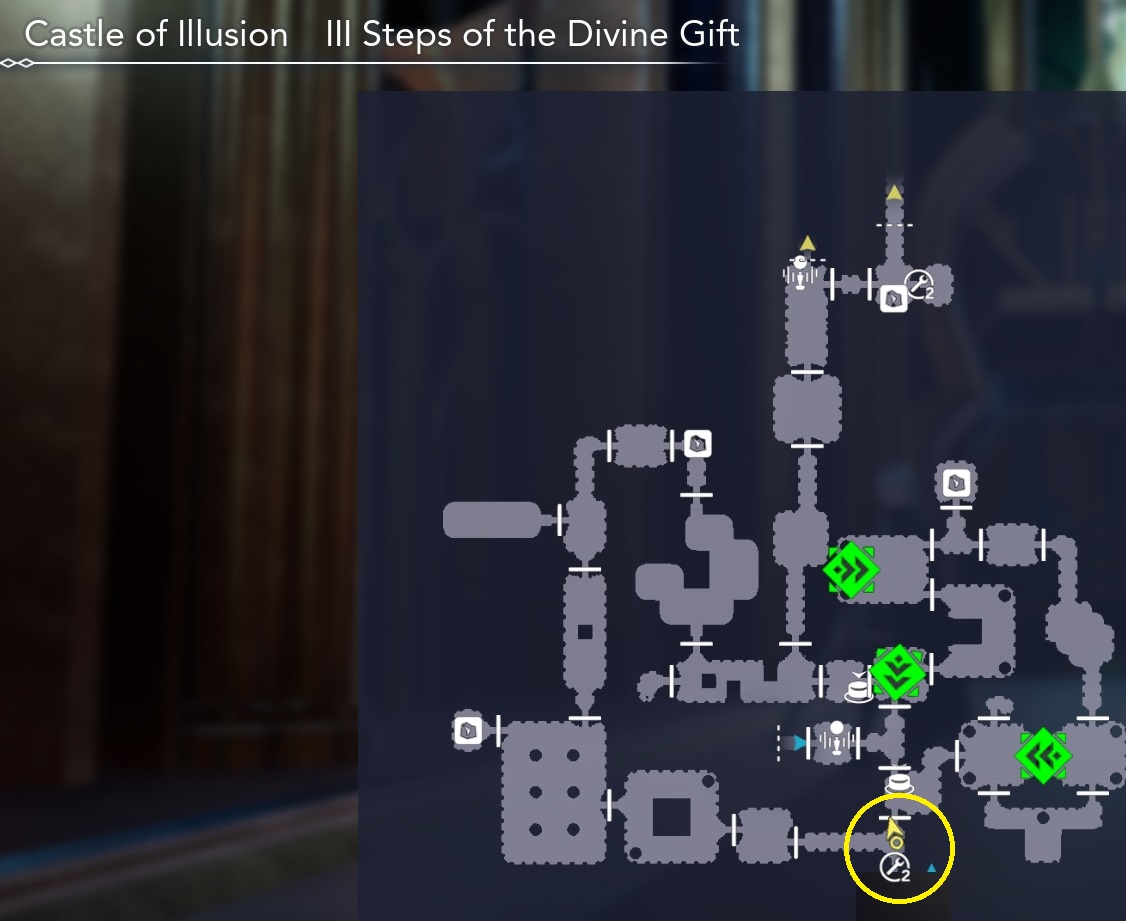
 A Dangerous Dinner Party
Eat Dangerous Nitro Sautee at break time
Simply eat this dish using the take-a-break feature at a Monolite.
The recipe for it is locked behind a L2 Repair in Castle of Illusion (the Southern one in Area III)
Wealthy Farmer
 Wealthy Farmer
Earn over 1,000,000 Grilla from shippingNot really the definitive method to earn money, but here are some very loose tips to get you to the 3,000,000G+ you’ll need for Farm and Weapon upgrades:
- Fishing level 2 is a HUGE upgrade. Great King Tuna sells for a TON.
- Surplus Rare Fish also sell for a lot.
- Spring: Cucumble is good. Tingle Radish is also good (the gold version is a huge price bump)
- Summer: Focus your funds on Islet Watermelons. Disperse the rest on Seatide Garlic/Morrocorn. Bellhops become profitable with Fermenting Barrel Level 3. 25 Bellhop → 36 Hop Juice (3.5x Profit after processing)
- Autumn: Focus funds on Lantern Pumpkins. Rainbow Beans function the same way as Bellhop. The gold quality version is actually a 7.2x profit multiplier with the Level 3 Fermenting Barrel.
- Spring → Autumn: Outside of Summer, Process Honey Flowers/Nectarcanes/Revol Peppers/Curry Herbs for selling (after using what you need for cooking).
- Winter: Chilly Plant and Fishing. I didn’t really earn much in Winter, but you have a lot more free time for quests at least.
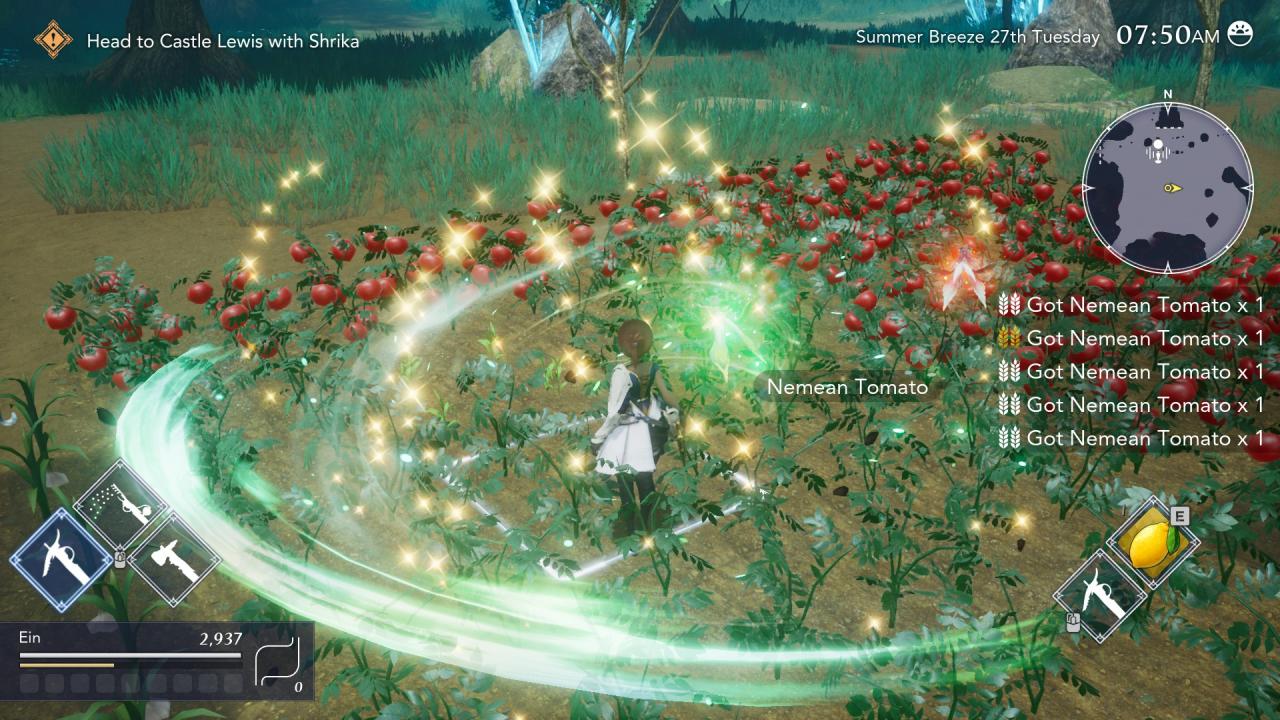
- After beating Main Story, Quietus will no longer be a thing. This will allow you to plant seasonal crops during the final days/week of a season to allow for an additional harvest cycle.Examples: Planting Islet Watermelon during the last week of Summer & Lantern Pumpkin on the last week of Autumn. Both are huge money-making crops and adding a 3rd possible harvest cycle for both will hugely increase your profits (see screenshot below).
Use with Caution
 Maintenance
Fortify your weapons a total of 5 times
 Use with Caution
Fortify all weapons to max strengthPLACEHOLDER
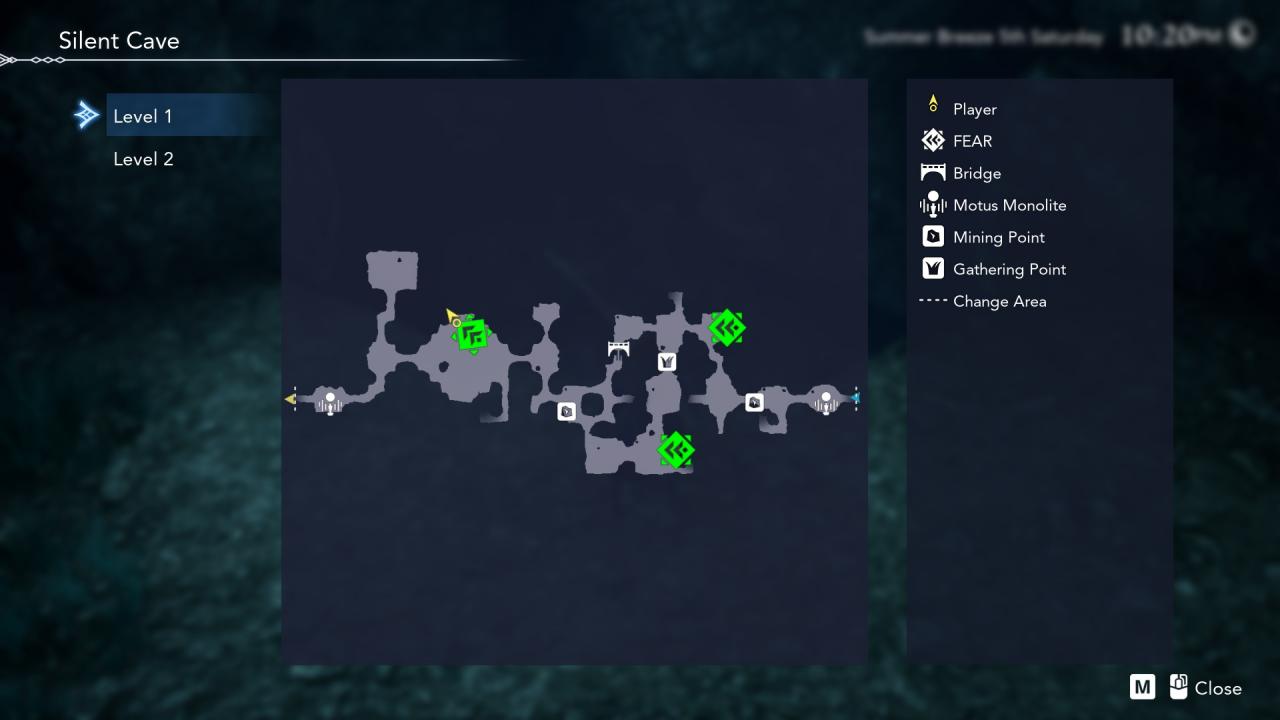
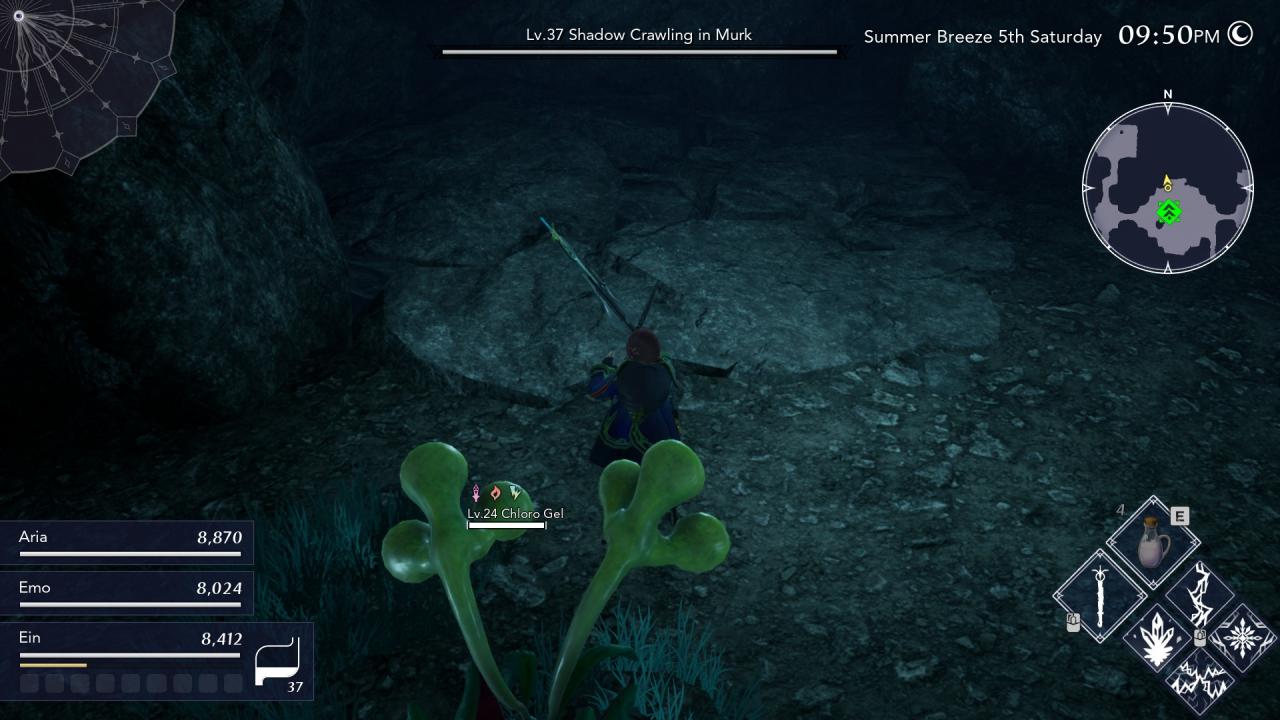
EXTRA: Recipe Locations
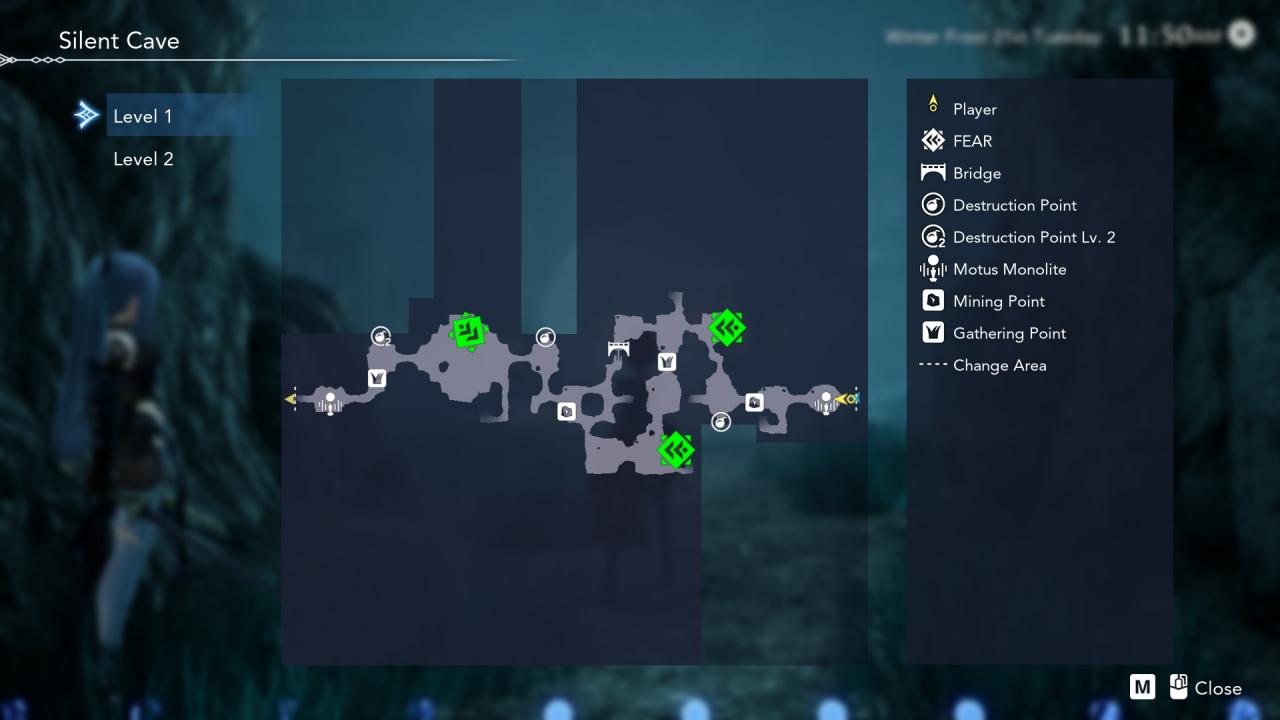
Drop down in a crack on the ground against the wall in Silent Cave. It drops you beside the chest containing the recipe on an elevated platform.


More Guides:
- HARVESTELLA: All Rare Fish Locations
- HARVESTELLA: How to Unlock Secret Job
- HARVESTELLA: All Ladders, Repair, and Bomb Spots