This Guide will help you find the hidden Keycards and Lost Safes across 4 maps – which contain voice recordings known as the Lost Tapes!
Introduction

Welcome Heisters 🙂
This guide will help you find all special keycards and Lost Safes on the 4 different maps.
As of right now you can only access the hidden tapes for the shadow raid map.
Possible upcoming maps might be: Hell’s Island, The Diamond Heist, The White House (this info is unconfirmed)
There are several possible spawning locations for each keycard and safe per map and you will find them all in this guide!
Happy hunting and enjoy the recordings <3
What are you looking for?
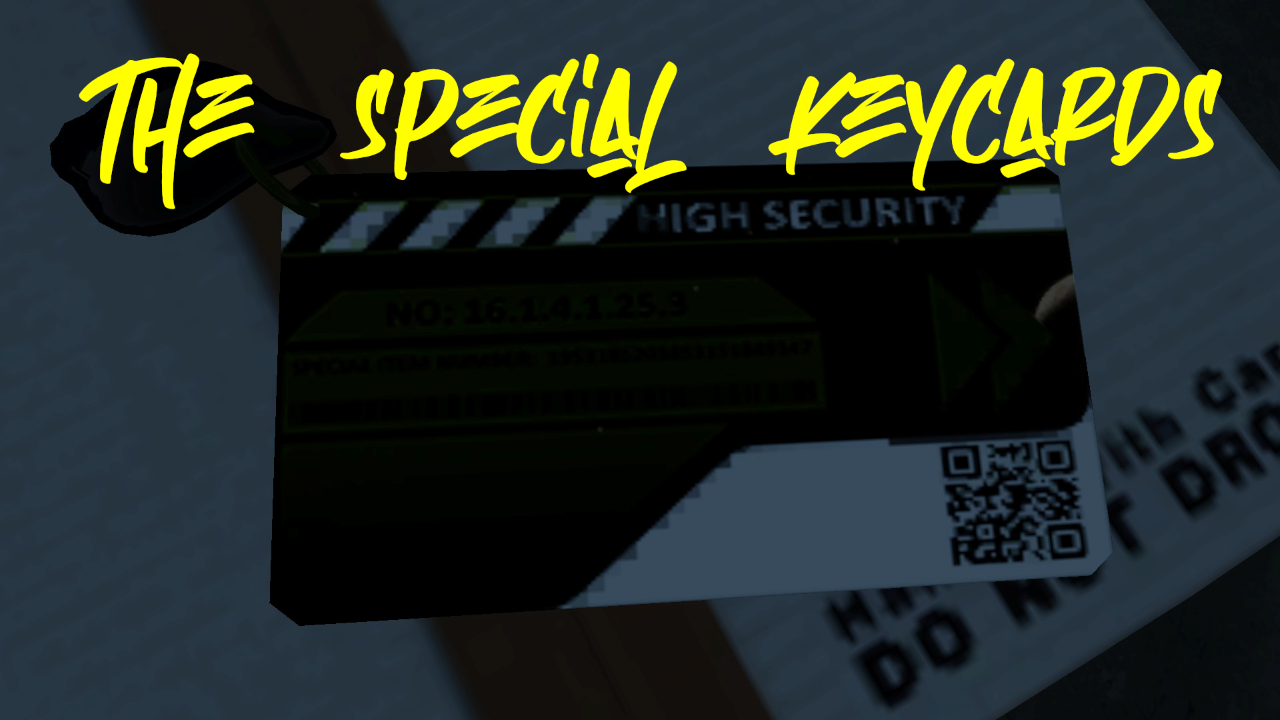 You will need to find 2 hidden keycards looking like this.
Unlike normal keycards these special keycards can be stacked in your inventory – allowing you to carry more than 1 keycard at a time. This makes it easier to complete the heist on your own!
ㅤ
The Lost Safe:
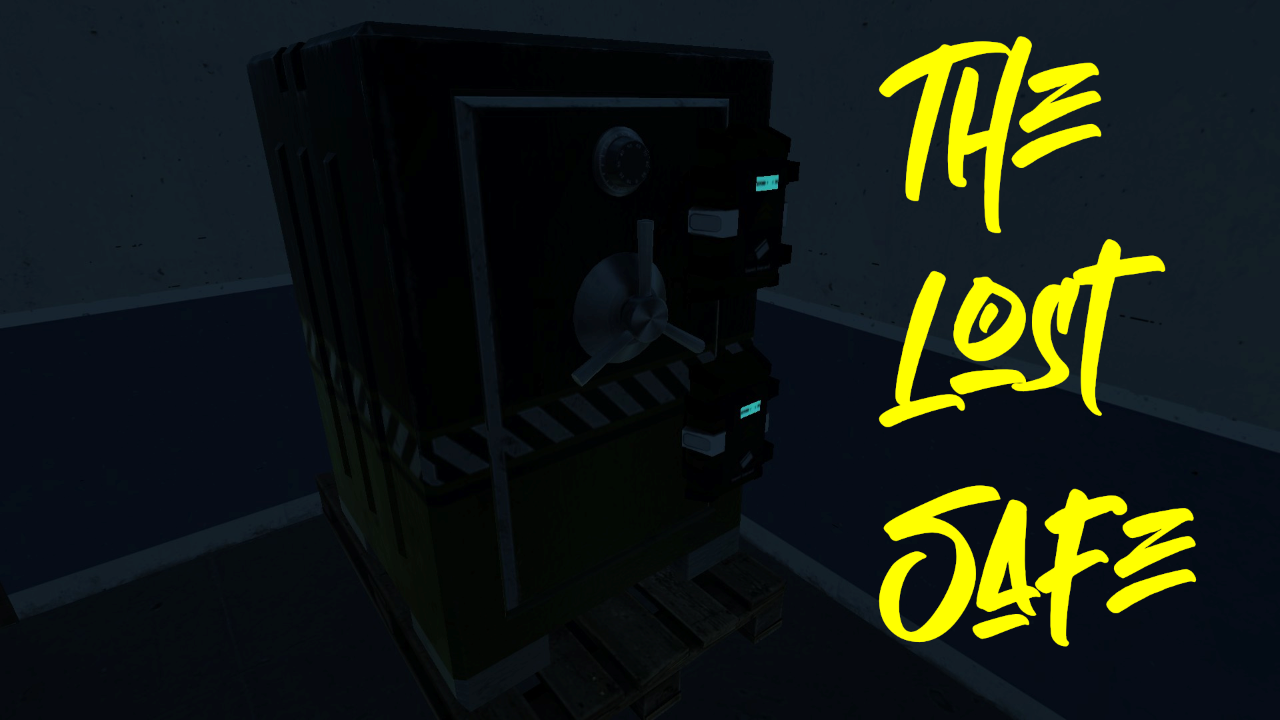 You will need to find 1 hidden safe looking like this and use the keycards on it!
ㅤ
Tape 1 (Bad For Business): Shadow Raid
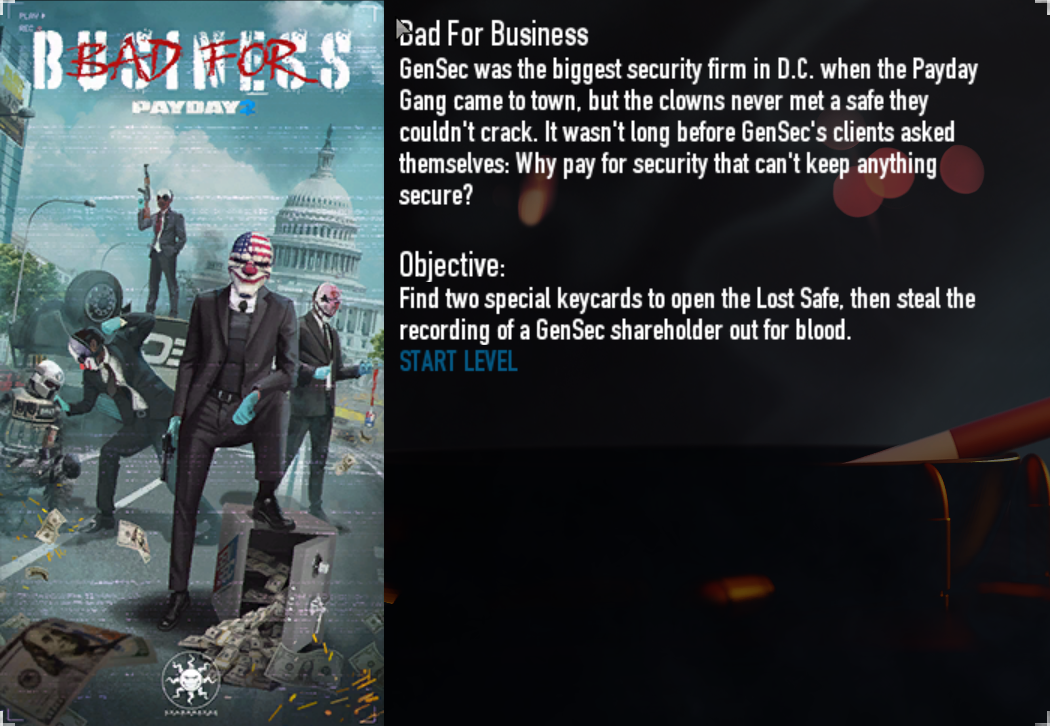
Objective:
Find 2 special keycards to open the Lost Safe, then steal the recording of a GenSec shareholder out for blood.
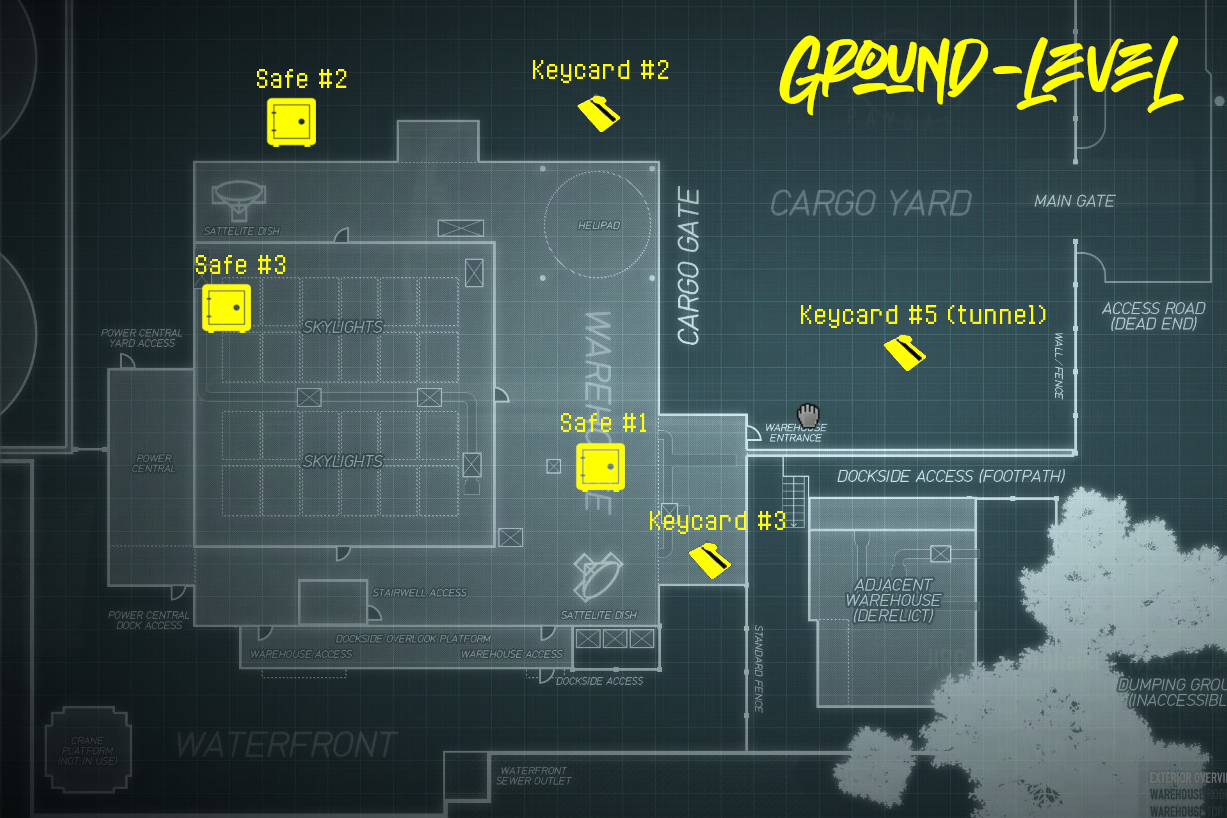
There are a total of 6 different keycard spawns and 3 different safe spawns on the map, there will always be 2 keycards and 1 safe!
ㅤ
Ground-Level Floor:
 ㅤ
ㅤ
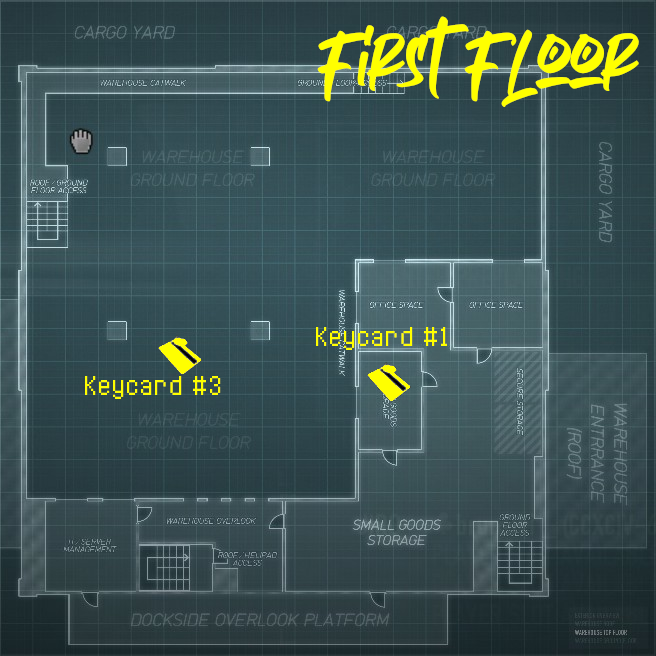
Warehouse 1st Floor:
 ㅤ
ㅤ
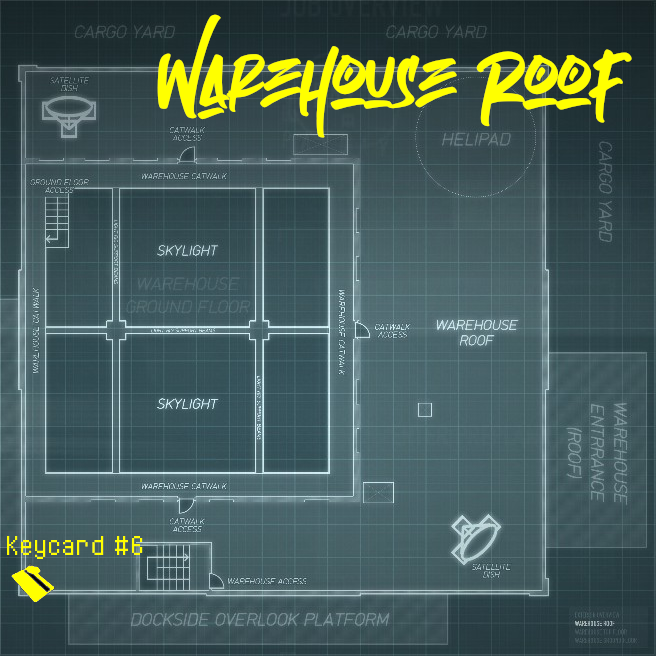
Warehouse-Roof:
 ㅤ
ㅤ
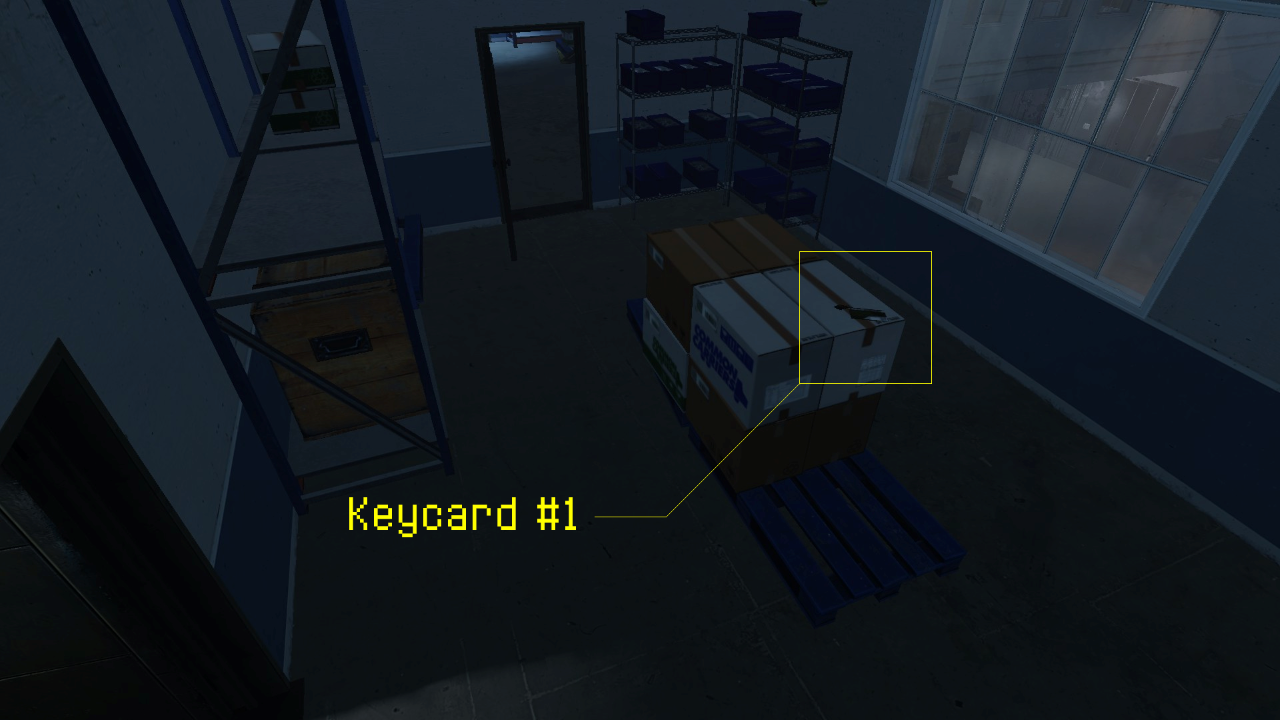
Keycard #1:
ㅤ
Keycard #2:
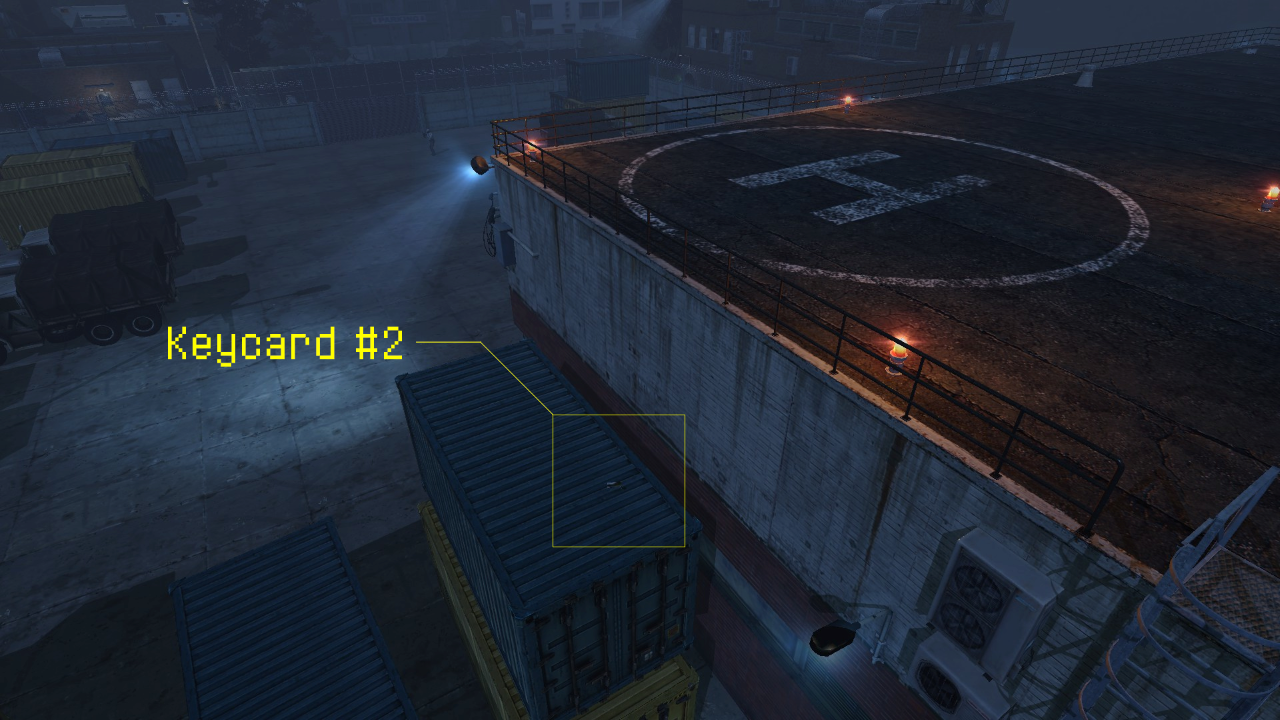 Outside of the warehouse on the yard, on top of the 2 containers (upper container is blue), to the right side of the warehouse entrance, visible from the helipad looking down
ㅤ
Keycard #3:
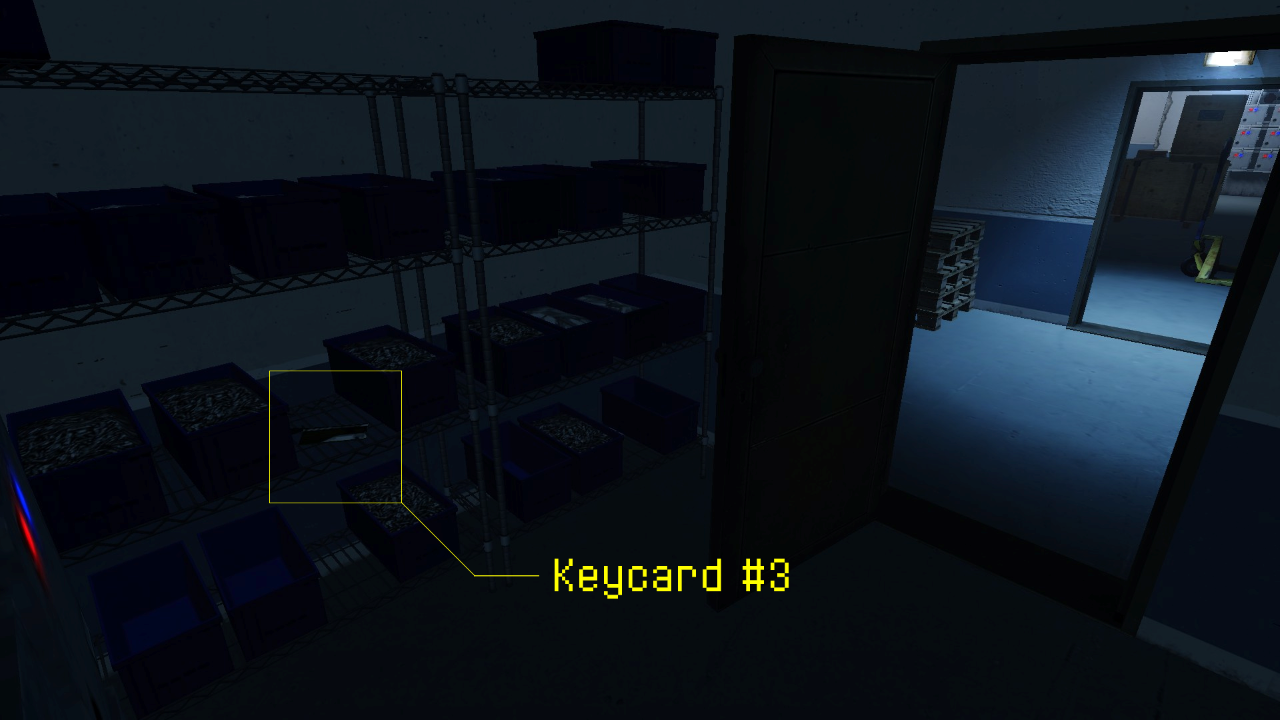 Inside the building on the ground-level floor, on the shelf inside the small maintenance room connecting the building to the outside yard, next to some blue boxes.
ㅤ
Keycard #4:
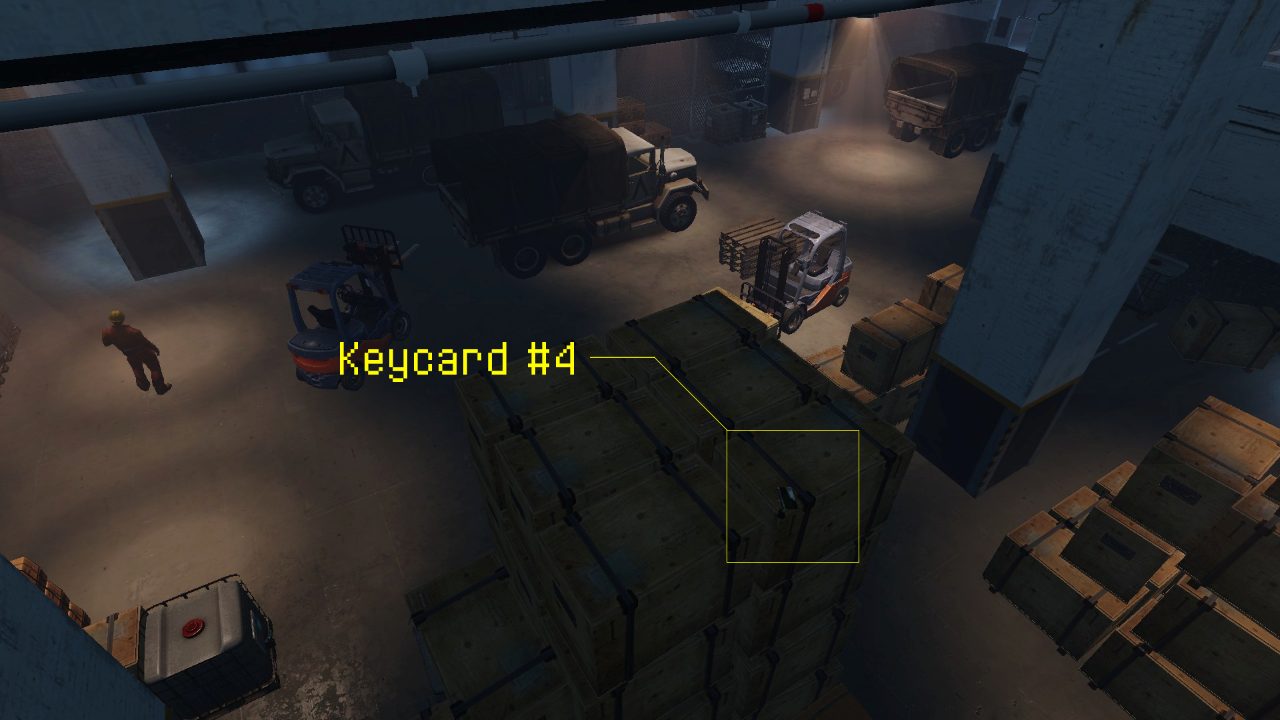 Inside the main warehouse, on top of a big stack of wooden boxes in the center of the warehouse.
ㅤ
Keycard #5:
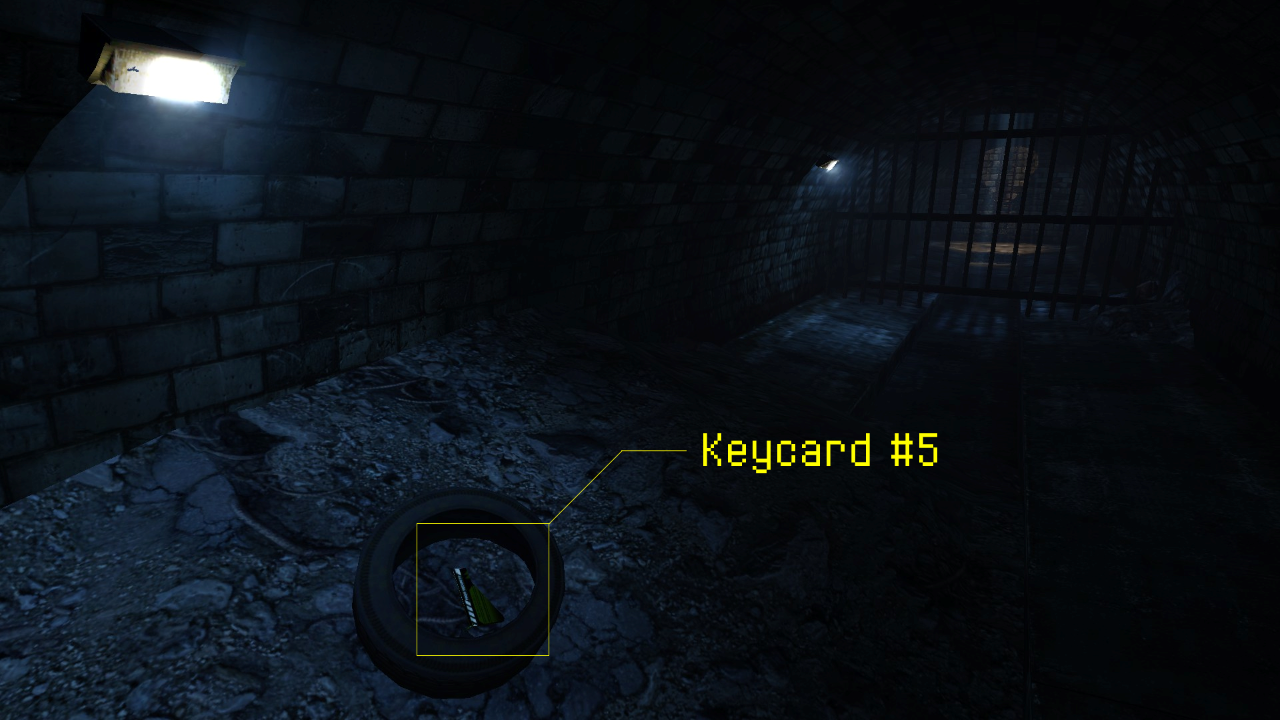 Inside of the sewer tunnels, right behind the first steel bars when coming from the van, inside an old tire lying on some rubble.
ㅤ
Keycard #6:
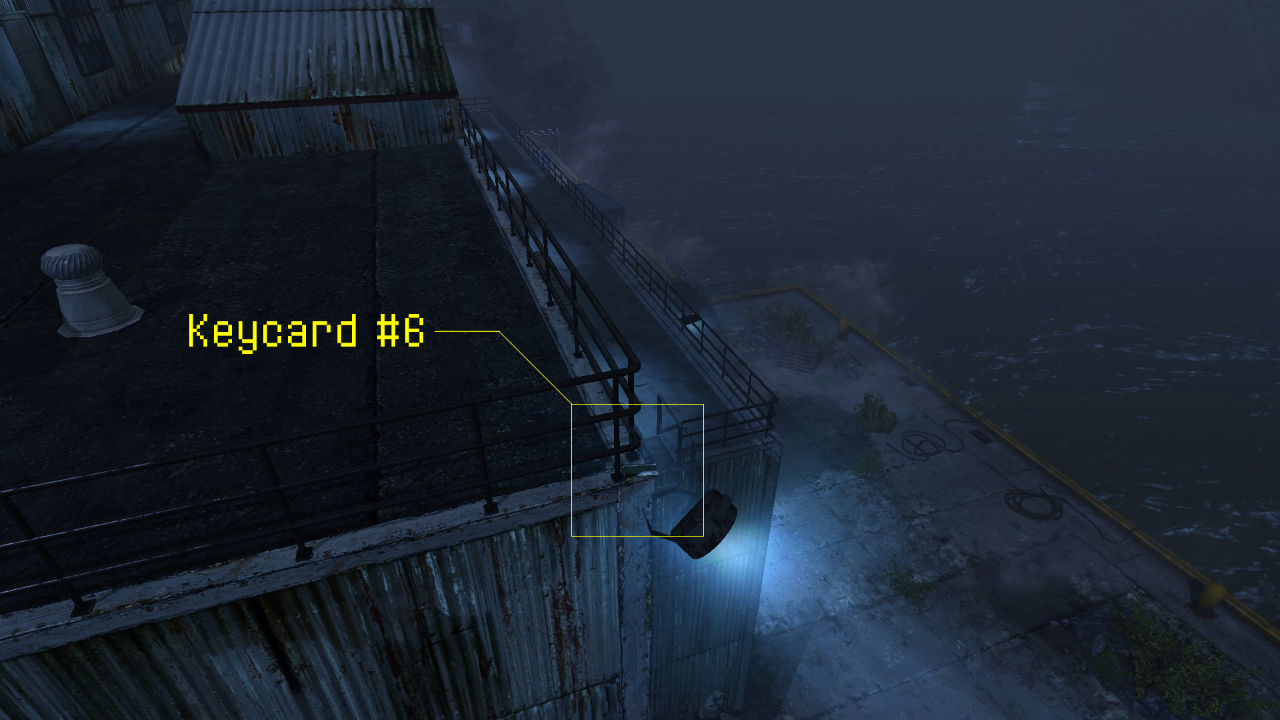 On top of the warehouse building, on the far left side looking towards the big yellow crane next to the water, lying on the ground next to a floodlight, behind the stairs leading into the warehouse.
ㅤ
Safe #1:
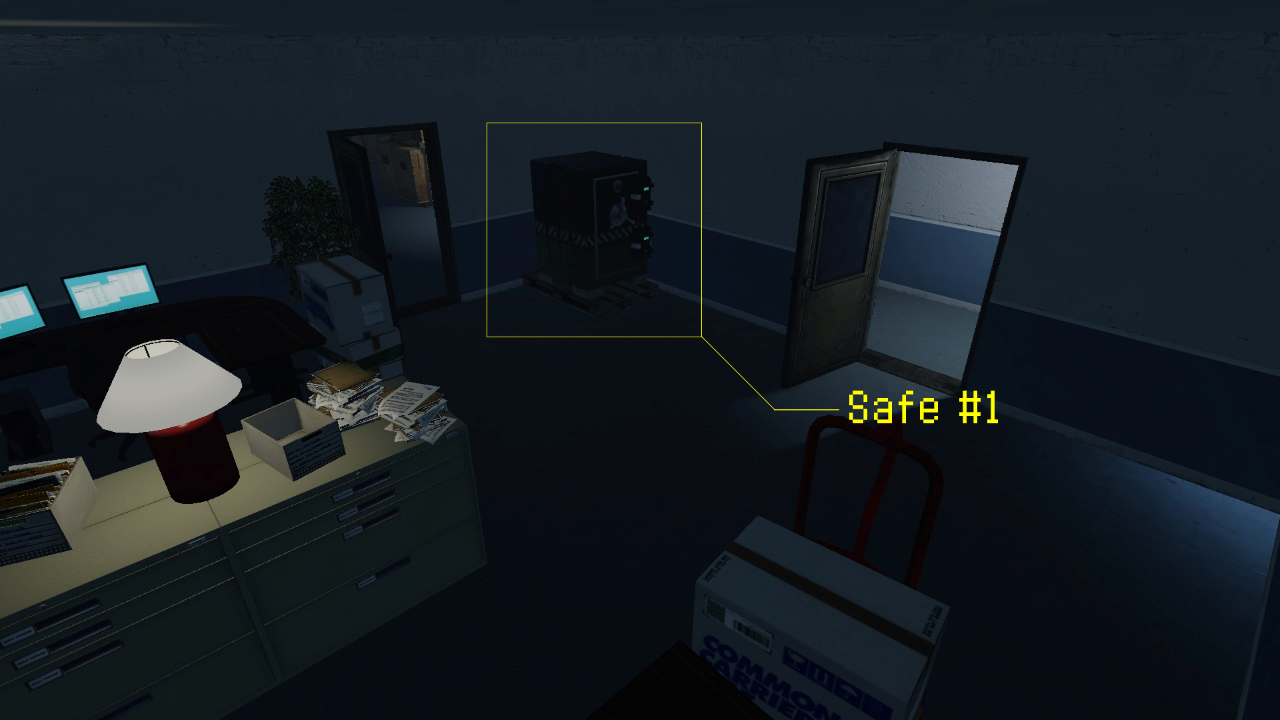 Inside the building on the ground-level floor, inside the small office room next to the kitchen.
ㅤ
Safe #2:
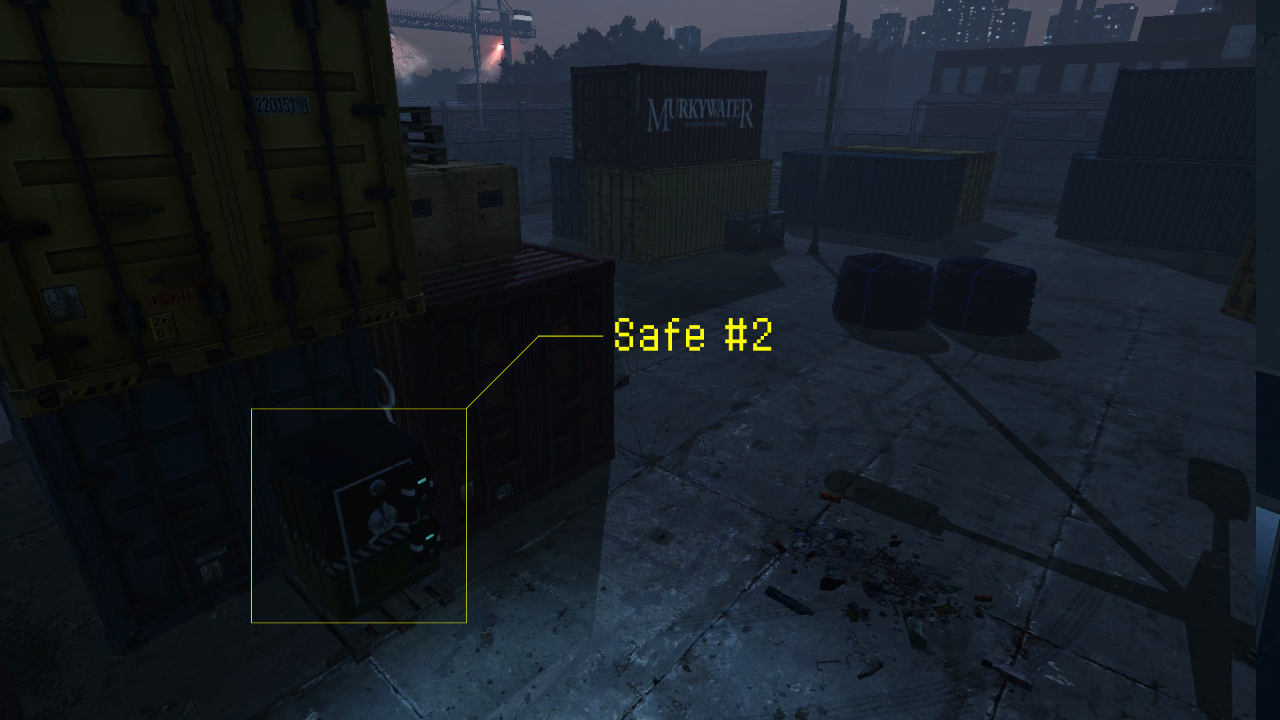 Outside of the warehouse on the yard, pretty far back when coming from the van, next to 3 yellow/blue/red containers, close to the parkour container puzzle.
ㅤ
Safe #3:
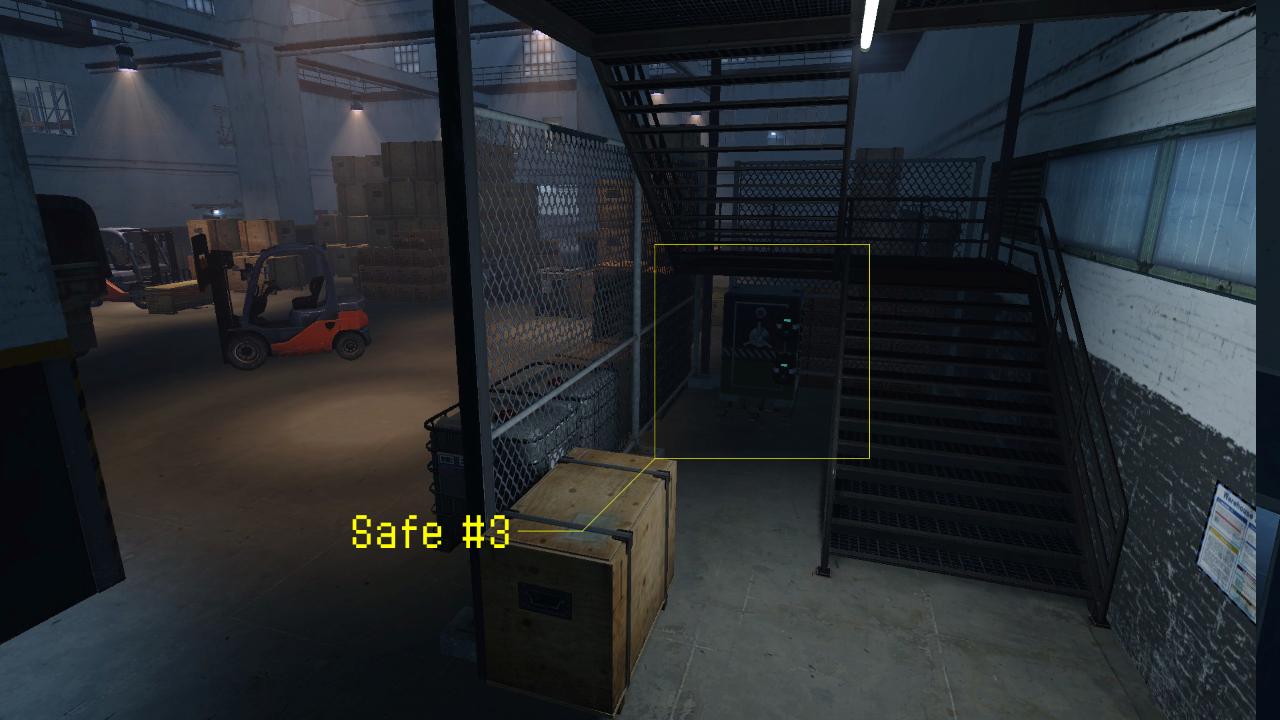 Inside the main warehouse in the far right corner when coming from the van, under the steel stairs leading up to the warehouse roof.
ㅤ
Tape 2: unreleased
Tape 3: unreleased
Tape 4: unreleased
More Guides:
- PAYDAY 2: “For The Mad Hatter” Achievement Guide (City of Gold Teapot Locations)
- PAYDAY 2: Lucky Streak Guide (Midland Ranch)
- PAYDAY 2: Texas Treasures Guide (Midland Ranch)
- PAYDAY 2: Anarchist SMG Build Guide
- PAYDAY 2: No Gnome Left Behind