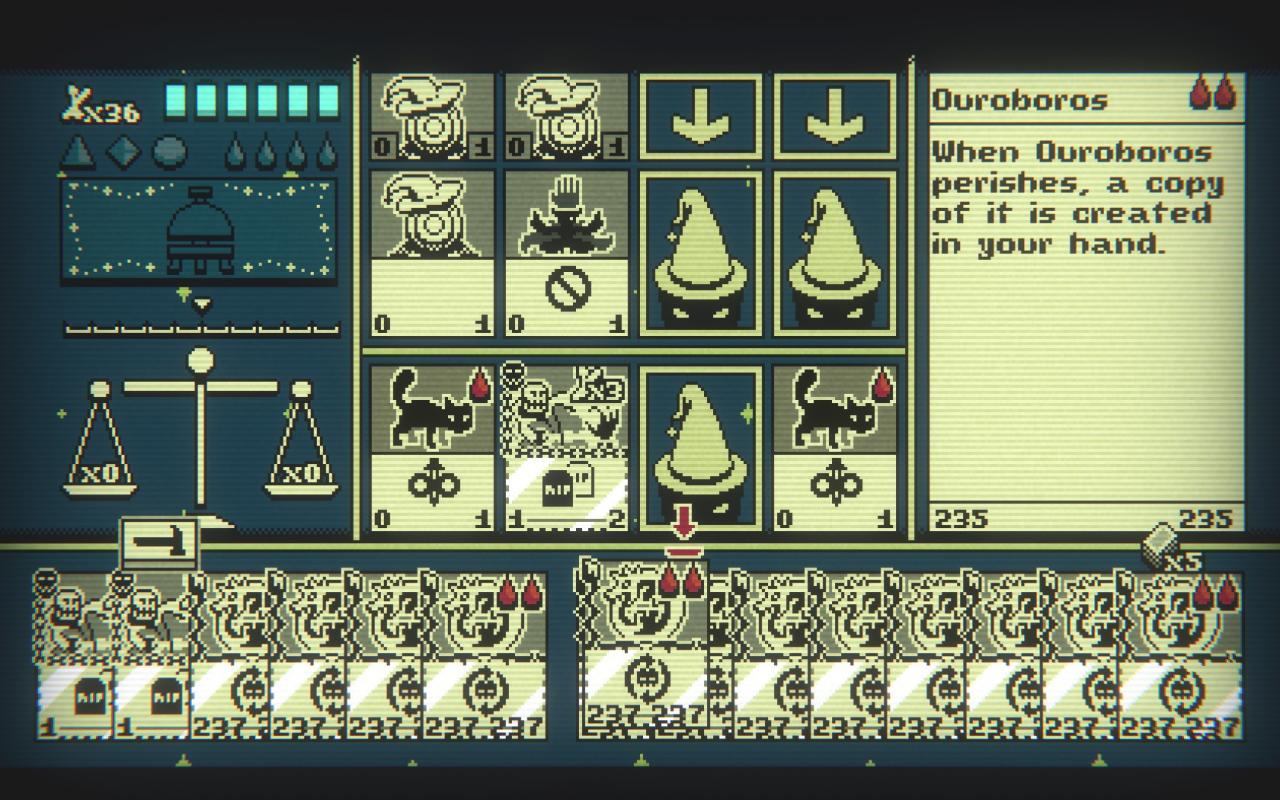
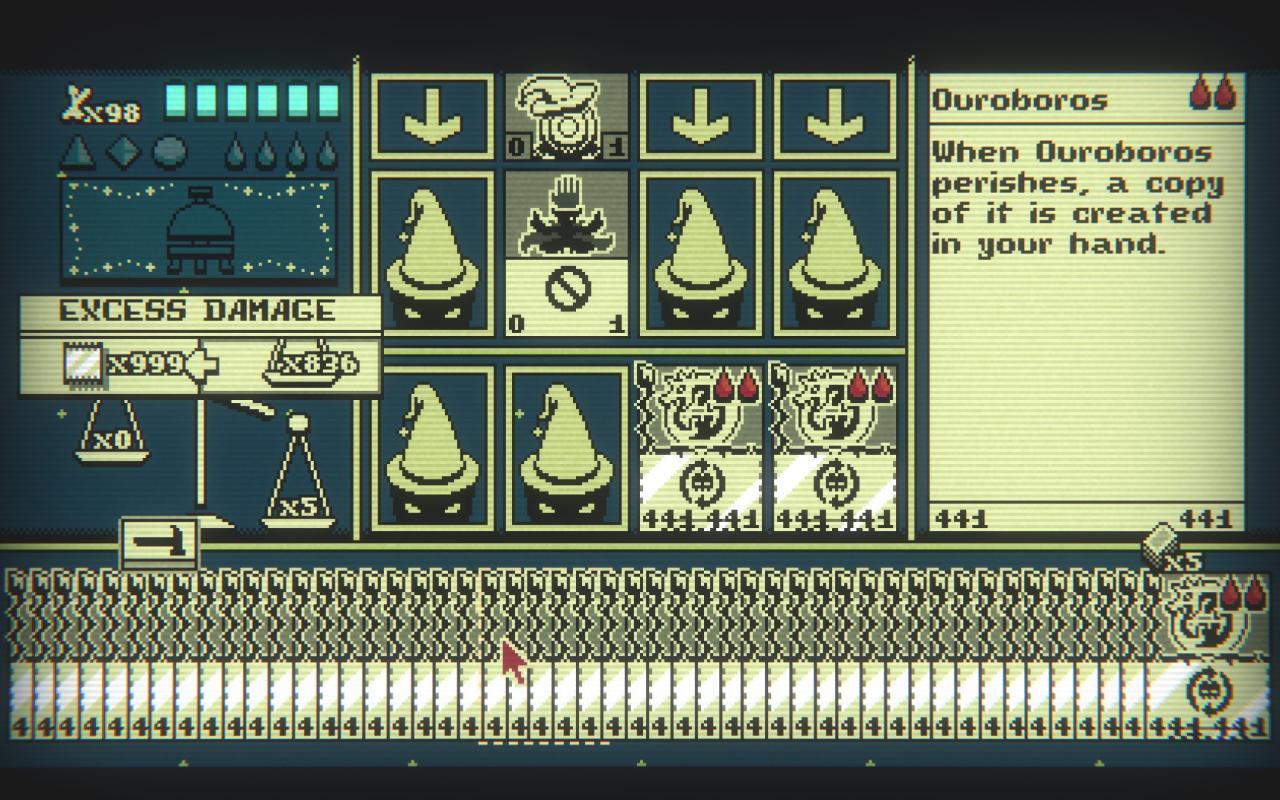
Short, sweet and simple guide to cheesing the ELF out of a fight in Act 2 to farm infinite foils. If you’re a completionist or achievement hunter like me, this will allow you to get every. single. for purchase. card in Act 2.
The set-up/requirements
To get started there are a few things you need ahead of time, keep in mind that these are minimum requirements more is better because that helps ensure you can pull what you need:
- at least 2 cats
- at least 1 necromancer
- at least 8 foils to buy Ouroboros
- access to floor 2 of the mage tower
- patience for opening packs to draw the required cards and for drawing all the cards after you’ve got your foils.
It’s worth it to note that it is beneficial to have 2 necromancers on the board after you have your ouroboros and at least one low cost/no cost trash card to sacrifice. Also, if you have more than 2 cats, the more the merrier as that’s the limit to how long you can do this in one run, thus boosting Ouroboros further faster (which is also why it’s beneficial to have 2 necromancer’s on the board).
The strat
So, there’s the overview, here’s the in depth with pointers I learned to help streamline the process:
1. Use 8 foils to buy Ouroboros from the merchant in Leshy’s cabin ASAP.
2. Go through the story making sure that, if possible, you’re snagging cats and necromancers along the way. Make sure that by the time you finish Grimora’s area you have at minimum 1 but preferably 2 or more Necromancers and as many cats as you can spare, acquire or buy some 1 or 0 blood trash mobs along the way, they will be needed to set things up as you want to limit the use of cat to ouroboros as, it’s not unlimited sacrifices despite the sigil for it having the mobius strip, it’s 9 lives per cat.
3. Once you have gone through to the second floor of the mages tower, look to the north of the puzzle pillar in the middle, there will be a training dummy there. This is why we’re here. It’s the only repeatable battle in the entire Act.
4. Start a battle with it.
Note: There is an element of RNG to this, you’re turn limited to the amount of cards you have, if you draw your last card a new set of cards start appearing that damage you called starvation or something. If you get to this point kill it then or surrender to start a new battle. No biggie though, you don’t have to worry about permadeath if you lose, it’s just annoying when you’re in the midst of this strat since you’ll be seeing this battle repeatedly.
5. After starting the battle keep drawing until you get something to sac to lay down a cat, keep pulling until you get at least 1 necromancer and your ouroboros, go for 2 necro’s if you can because that makes things go by a lot quicker. It is advisable to keep drawing until you have 1 cat on the board and 1 or 2 more waiting in your hand, also maybe a few sacrifice fodder to drop ouroboros.
6. Layout matters here:

Cat to the left, necro in under the force mage which cancels out attacks so it doesn’t damage the dummy and the third or fourth for Ouroboros.
7. Once you’ve dropped the cat and first necro on the board and you have a few trash mobs to sacrifice to the right, sacrifice them so Ouroboros (Ouro) can be put on the board to the right. Put just one more sacrifice fodder down in the remaining square. Reason being is you need to sacrifice just one more creature before you’re set up with a duplicate of Ouro.
8. Once the first Ouro is dropped, use that handy dandy hammer below the bell to destroy your Ouro. This procs Ouro’s undying and death buff, and with necro it procs those abilities twice which in turn makes you have 2 ouro’s in your hand.
9. You are now set up for an almost infinite turn. Now that you have 2 Ouro’s in your hand, sac the cat and the final trash mob to drop 1 Ouro on the board, if you have a second necro drop it to the right most square which makes the Ouro proc its ability 4 times versus 2 hence making this process even quicker.
10. Sac the cat and Ouro to drop the second Ouro. Keep doing this until the cat has red tears, at this point if you have another cat like I suggested, sac the red teared cat for the new one and continue the process until your last cat is red teared. At this point sacrifice the cat and Ouro to drop one Ouro and sac the 2 necro’s to drop a 2nd Ouro in the right most square.

11. End turn to OHK the dummy and rake in all the foils… this will take time once your Ouro’s are up to 100 plus attack.
12. Rinse. Repeat. Profit.
13. After you’ve amassed the insane amount of foils, if you’re doing this for the achievements here’re my tips:
- For the 666 achievement, keep beefing up your Ouro’s until both of them deal over 666 damage total. Or, if you’re dead set in an Ouro with over that amount itself, beef 1 up to or past 666 strength.
- For the card collecting achievement, farming the foils is quicker. You have to get enough foils to buy an inordinate amount of card packs unless you 1. know a way to manipulate RNG for this game or 2. Get realllly lucky on the first draw in each pack. You don’t need to go to the card book every time, just open up the alter deck option in the pause menu, the cards are listed in groups per area and the pages have no blank spots when you have all cards, so, if you have a missing spot in the beast category, go to the skinner in Leshy’s area, for undead Grimora’s area etc.
- There are a few hidden cards you can’t pull.
- The mycologist merged cards are one example, second is one that you can pull up from a well in Grimora’s area, another in Grimora’s area can only be had by giving the correct sacrifice to the ghoul.
- Since this part is in spoiler, here’s how you get that. Place the left and right broken obals next to each other in a battle left to left right to right which gives you Ancient Obal which the ghoul wants, there’s a secret creature to talk to past that ghoul and among other things you get a card from them. There are a few more I’m not listing, like how to get the kraken, but I forgot so I’ll either create a guide or I suggest you google it.)
As an aside, the in game visual cap for foils is 999. I think this is more a cosmetic to fit the old low item caps that were common in video games due to tech limitations as I can confirm that even when it goes to 999, you’ll still be getting foils past 999. Keep in mind that you can redo this battle as much as you want even if you proceed with the story and beat the boss at the top of the tower.
Well, that’s it! Have fun getting your Ouro OP as hell so that it can OHK a 3 star bounty hunter in act 3! Mine is at 489/489 currently with poison, bifurication (sp?) and the sniper skill for 2 attacks to whatever I want. You might be thinkin the poison is useless on something with that much attack… nah… it’s overkill and that’s what I’m about.
Speaking of Act 3, you can absolutely farm tons of robobucks, keep in mind, though, that the more cards you buy there, the harder it is to pull Ouro in 6 turns as you don’t get to build a deck out of what you have like in Act 2.
More Guides:
- Inscryption: Act1 Map Icons for New Players
- Inscryption: Cards with unique hidden abilities
- Inscryption: How to Easily Buff the Ouroborus in Act 1 and Kaycee’s Mod
- Inscryption: General Tips to Start
- Inscryption: All Bosses Guide
