An overall guide for how to scavenge wrecks both safely and efficiently.
The Very Basics
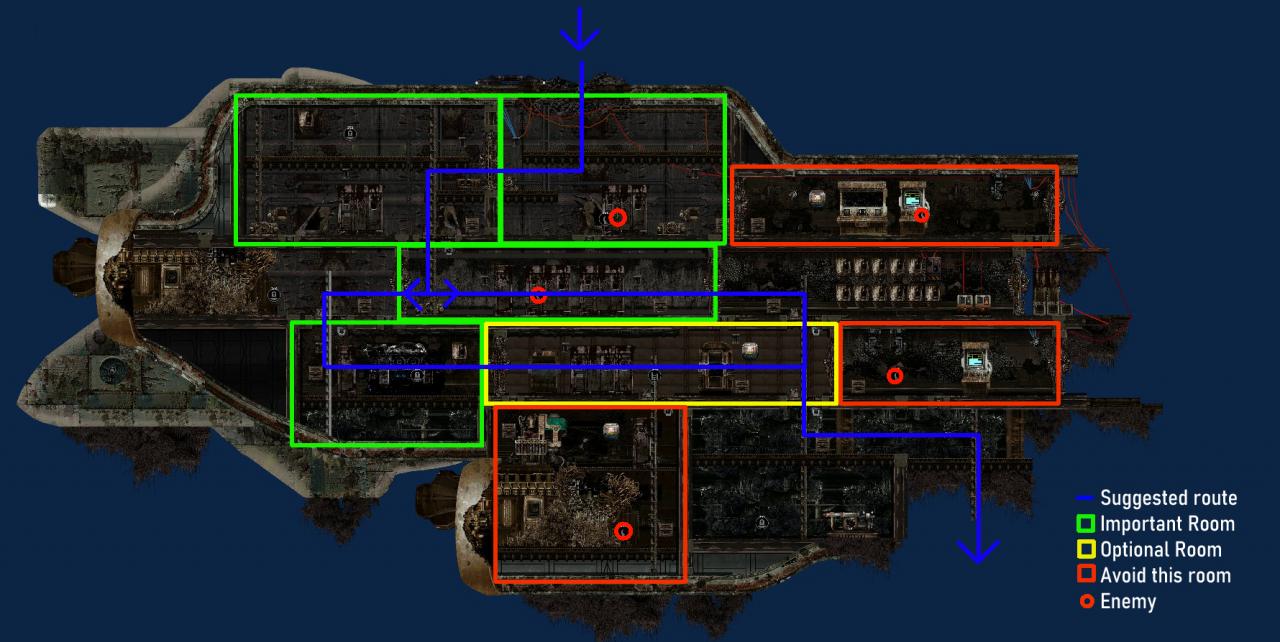
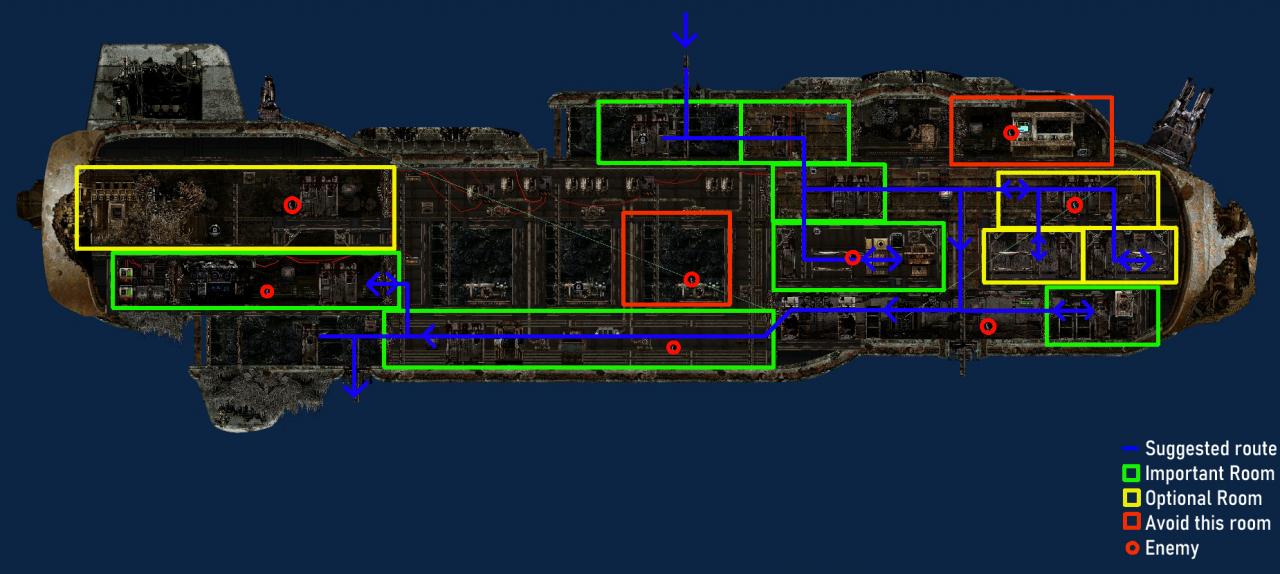
Wrecks have three main dangers, all of which can be (mostly) avoided if you know what you are doing.
– Running out of oxygen: A simple, but oddly frequent one. You’ll likely spend more time in a wreck than you expect. Remember that taking multiple trips into a wreck is always better than having to restart the mission.
– Sea Creatures: Namely, Husks, Crawlers, and Mudraptors. These are best dealt with by luring them out into view of your sub’s ventral (bottom) guns, but if that is not an option SMGs and Harpoon guns are your best option. Remember if damaged by a husk, get to a medic ASAP, regardless if you think you’re infected. Husks appear as the vast majority of creatures spawned, and mudraptors appear the least.
– Thalami: Occasionally, a wreck will be a thalamus, which basically means you shouldn’t bother looting it, as it’s not worth the medical cost. To avoid being forced to deal with one, approach a wreck from the SIDE instead of the top.
What Loot to Look For
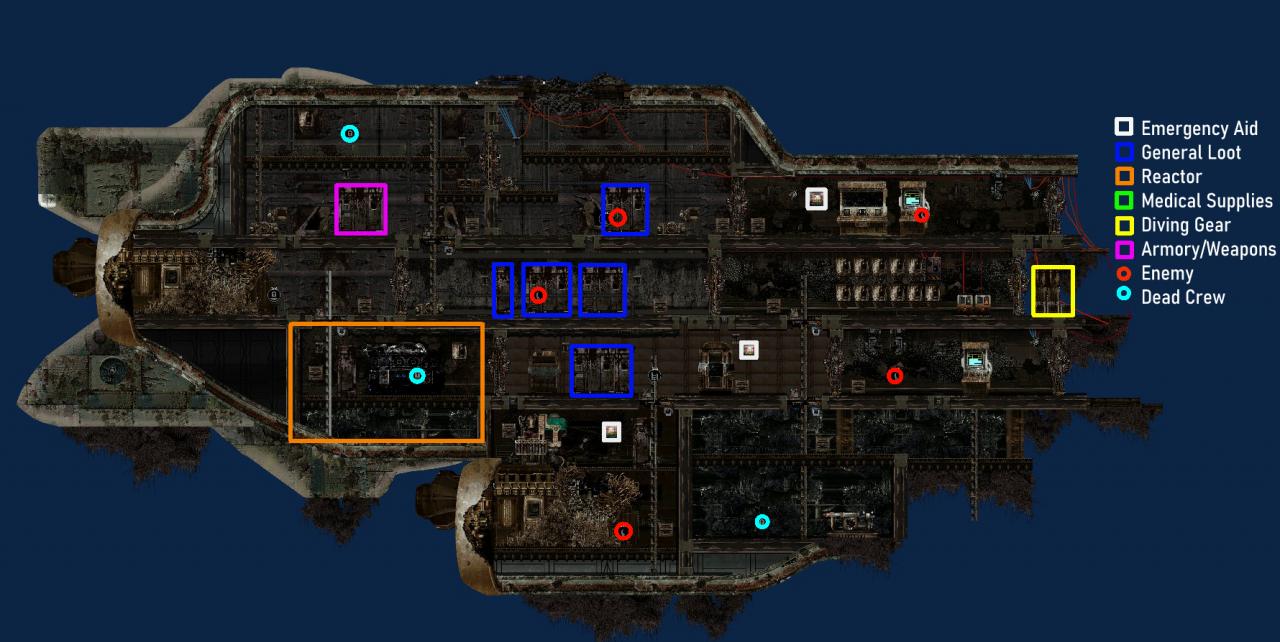
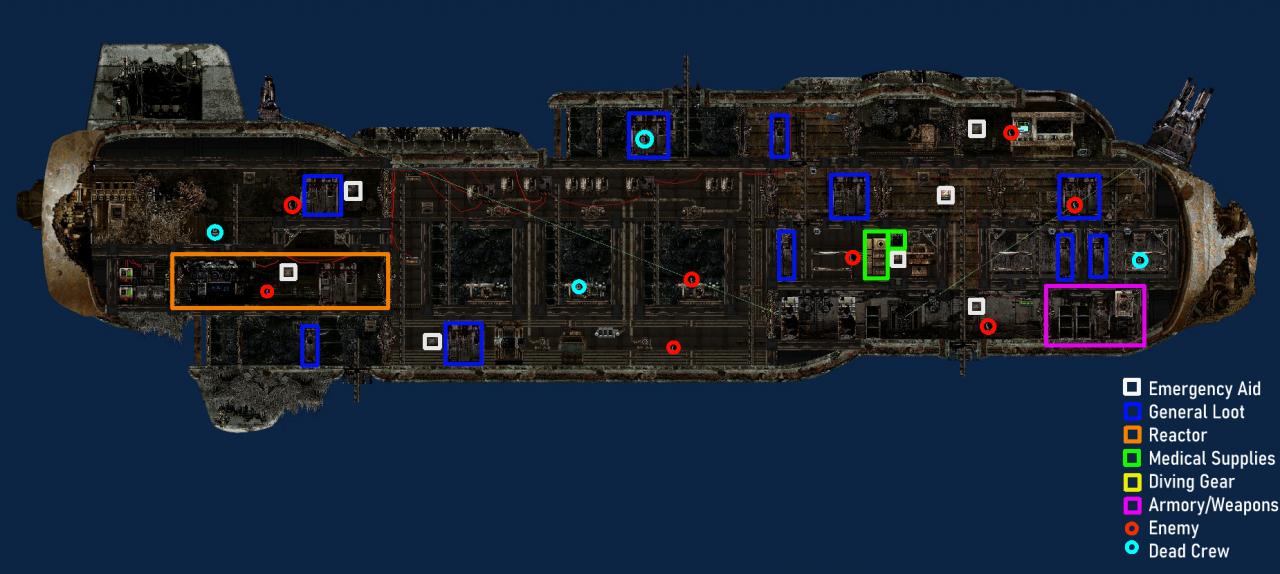
The different kinds of loot in subs:
Emergency Supplies (White):
The same things you find in your sub’s emergency supplies crates, like welding tools, o2 tanks, and basic meds like blood packs and morphine. Don’t count on them having o2 when you’re running low.
General loot (Blue):
Mostly crafting supplies like copper, steel, and the like, but you also get things like wiring, various tools, and, most importantly, alien metals like incidendium and physicorium. No oxygenite shards though.
Reactor
Various kinds of reactor rods. Electrical engineer has a skill to get bonus stuff from here.
Medical Supplies
Better-quality meds like Plastiseal, Antibiotic glue, and even Deusizine. The Kastrull also has an intact toxin cabinet with poisons.
Diving Gear
Full O2 tanks and Diving gear. Useful in a pinch.
Armory and Weapons
The most valuable room in the sub. Contains ammo for guns, grenades, and most importantly, legendary gun variants, including the deadeye carbine, the best gun in the game that can be put on a belt.
Needed per person:
- Diving suit (combat suit preferred) + at least 2 or 3 o2 tanks
- Plasma cutter with an extra o2 tank
- Some kind of handheld gun that can be stowed in a belt – Deadeye carbines are best, but smgs, and harpoon guns are also useful if you dont have one yet. The AR and Autoshottie, while powerful, cannot be stowed on a belt, making exploration much slower. if using something with an SMG mag, take an extra.
- Underwater scooter, best with fulgurium battery.
- A Toolbelt
- A few basic meds, e.g: 1 morphine, 1 plastiseal, 1 blood pack
Choosing who goes on the expedition
It really depends on what perks each person has. Security officer can be good for fighting hostiles, but mechanic and electrician can both get extra loot. There’s no real reason to take an assistant or a captain (unless your captian has high medical/combat skill)
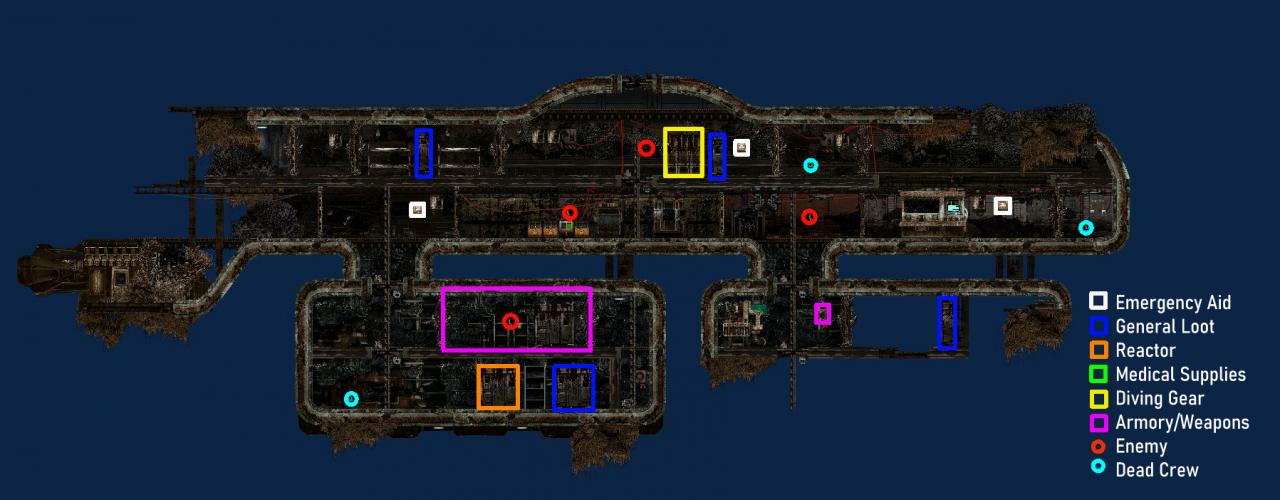
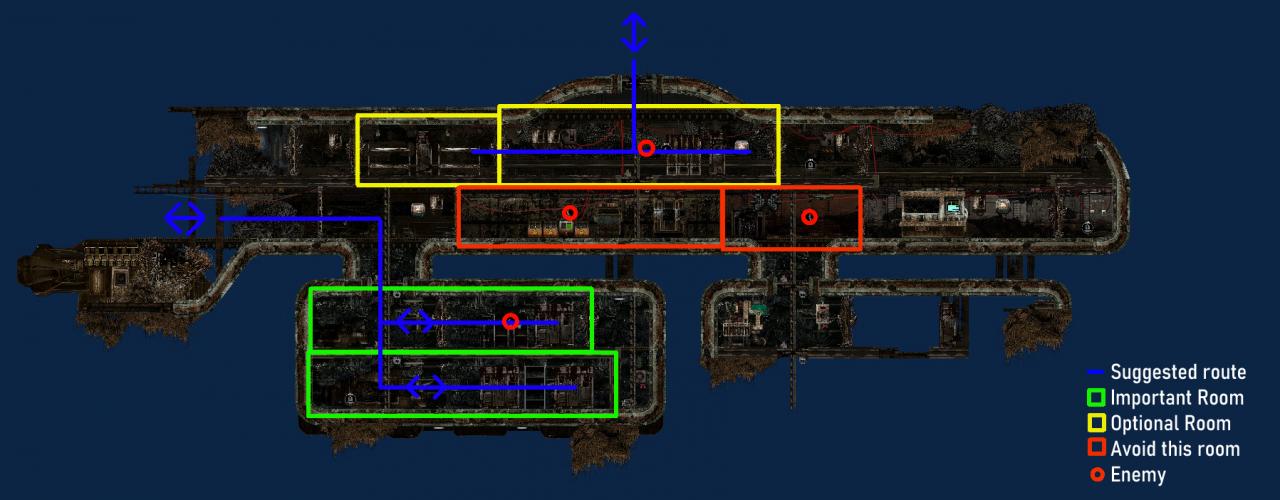
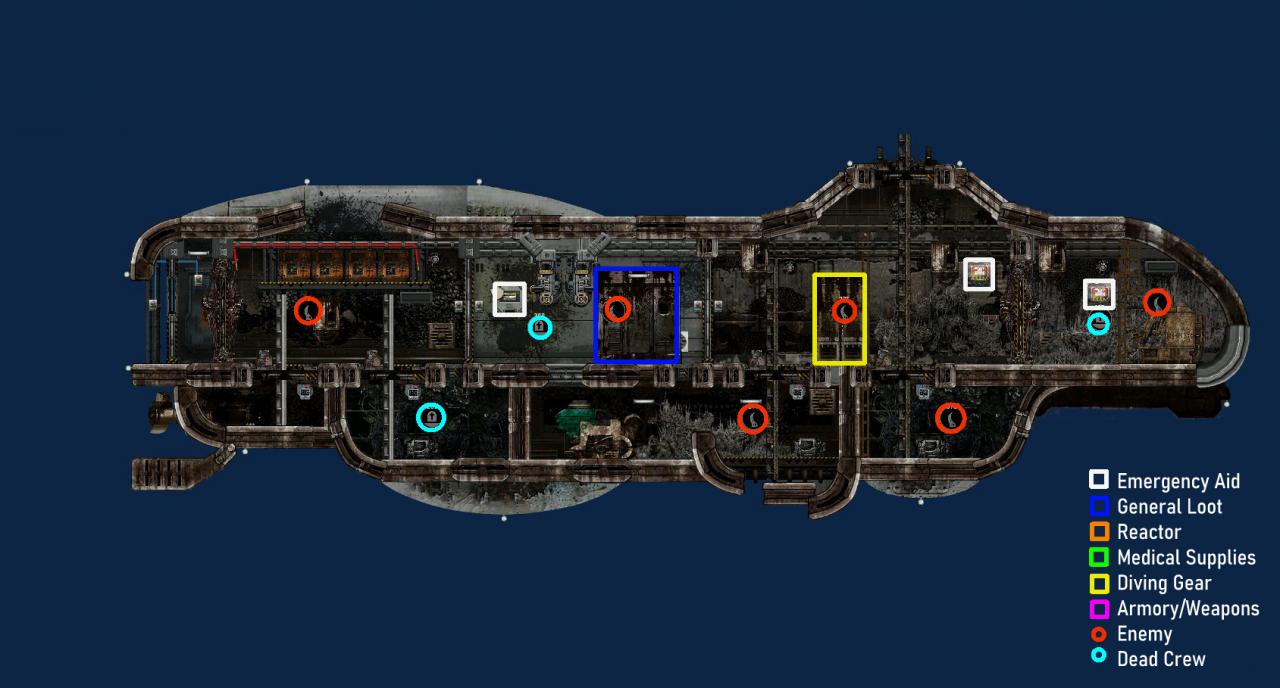
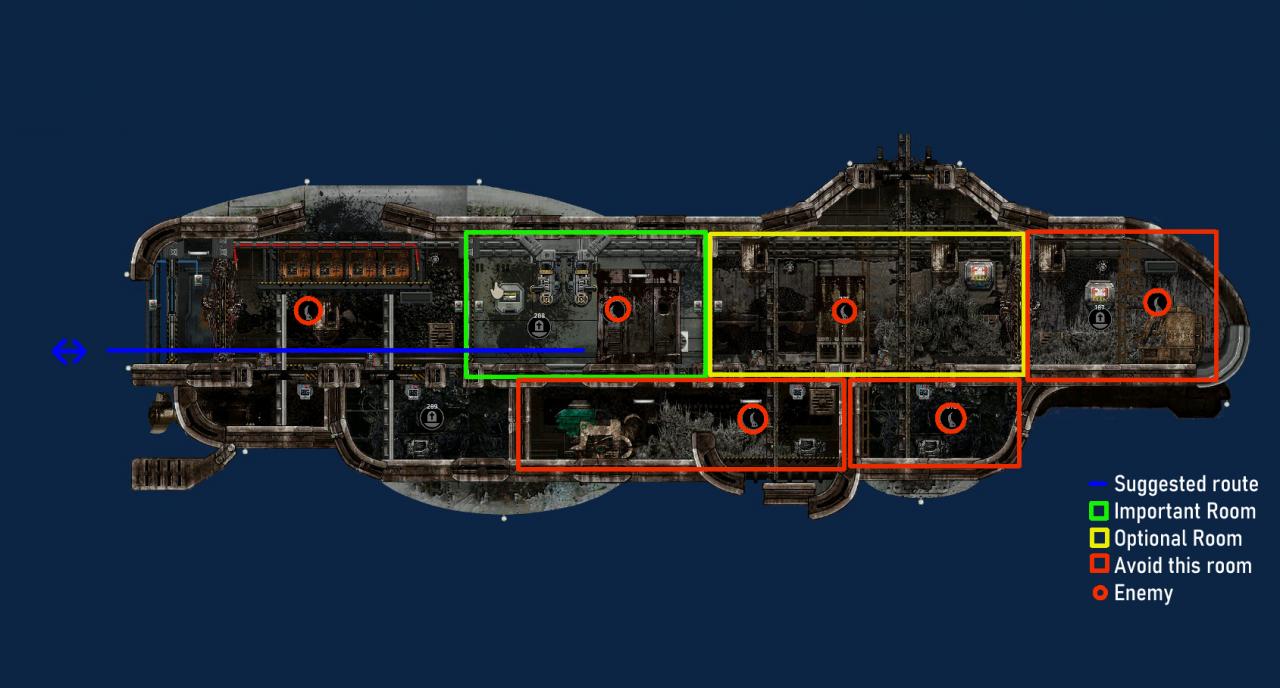
Handy Maps
Wreck 1 Maps
Dugong Wreck Maps
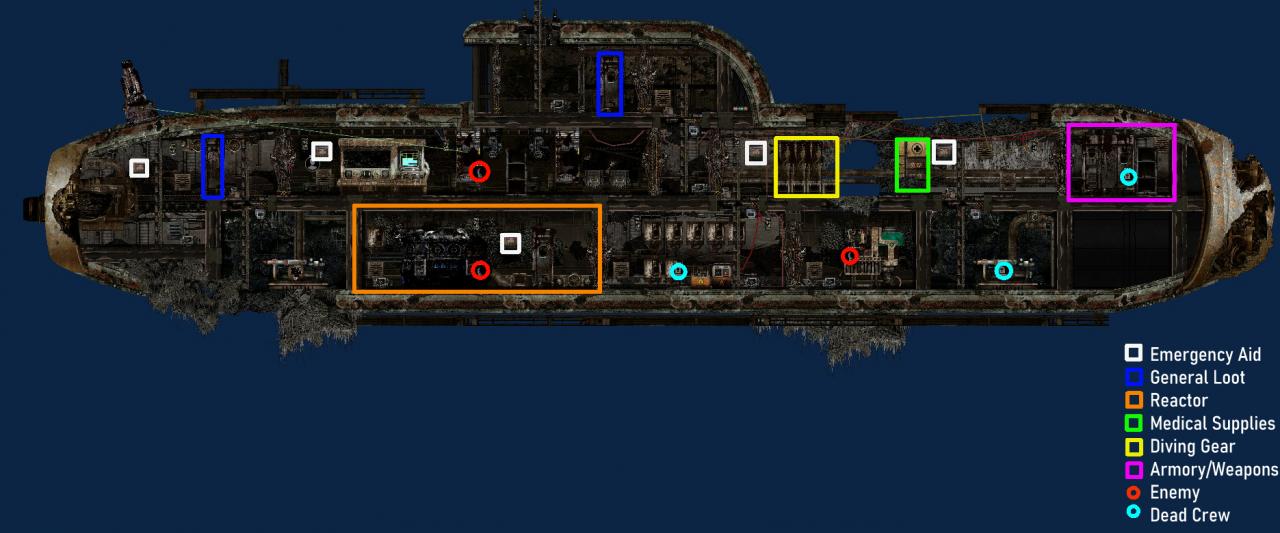
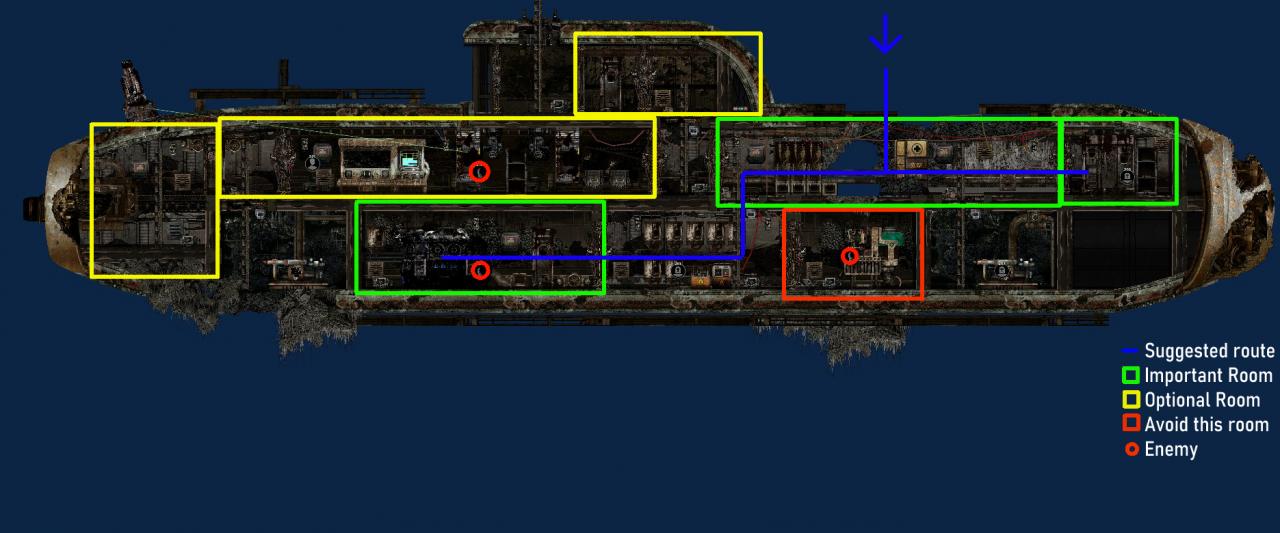
Berila Wreck Maps
Kastrull Wreck Maps
Hemulen Wreck “Maps”
More Guides:
- Barotrauma: Job Guidelines for Beginners and Veterans
- Barotrauma: Mechanic Guide (Average to Artisan)
- Barotrauma: How to Blow Up the Reactor
- Barotrauma: All Job Talent Trees 2021
- Barotrauma: Locked Door Mechanism Guide